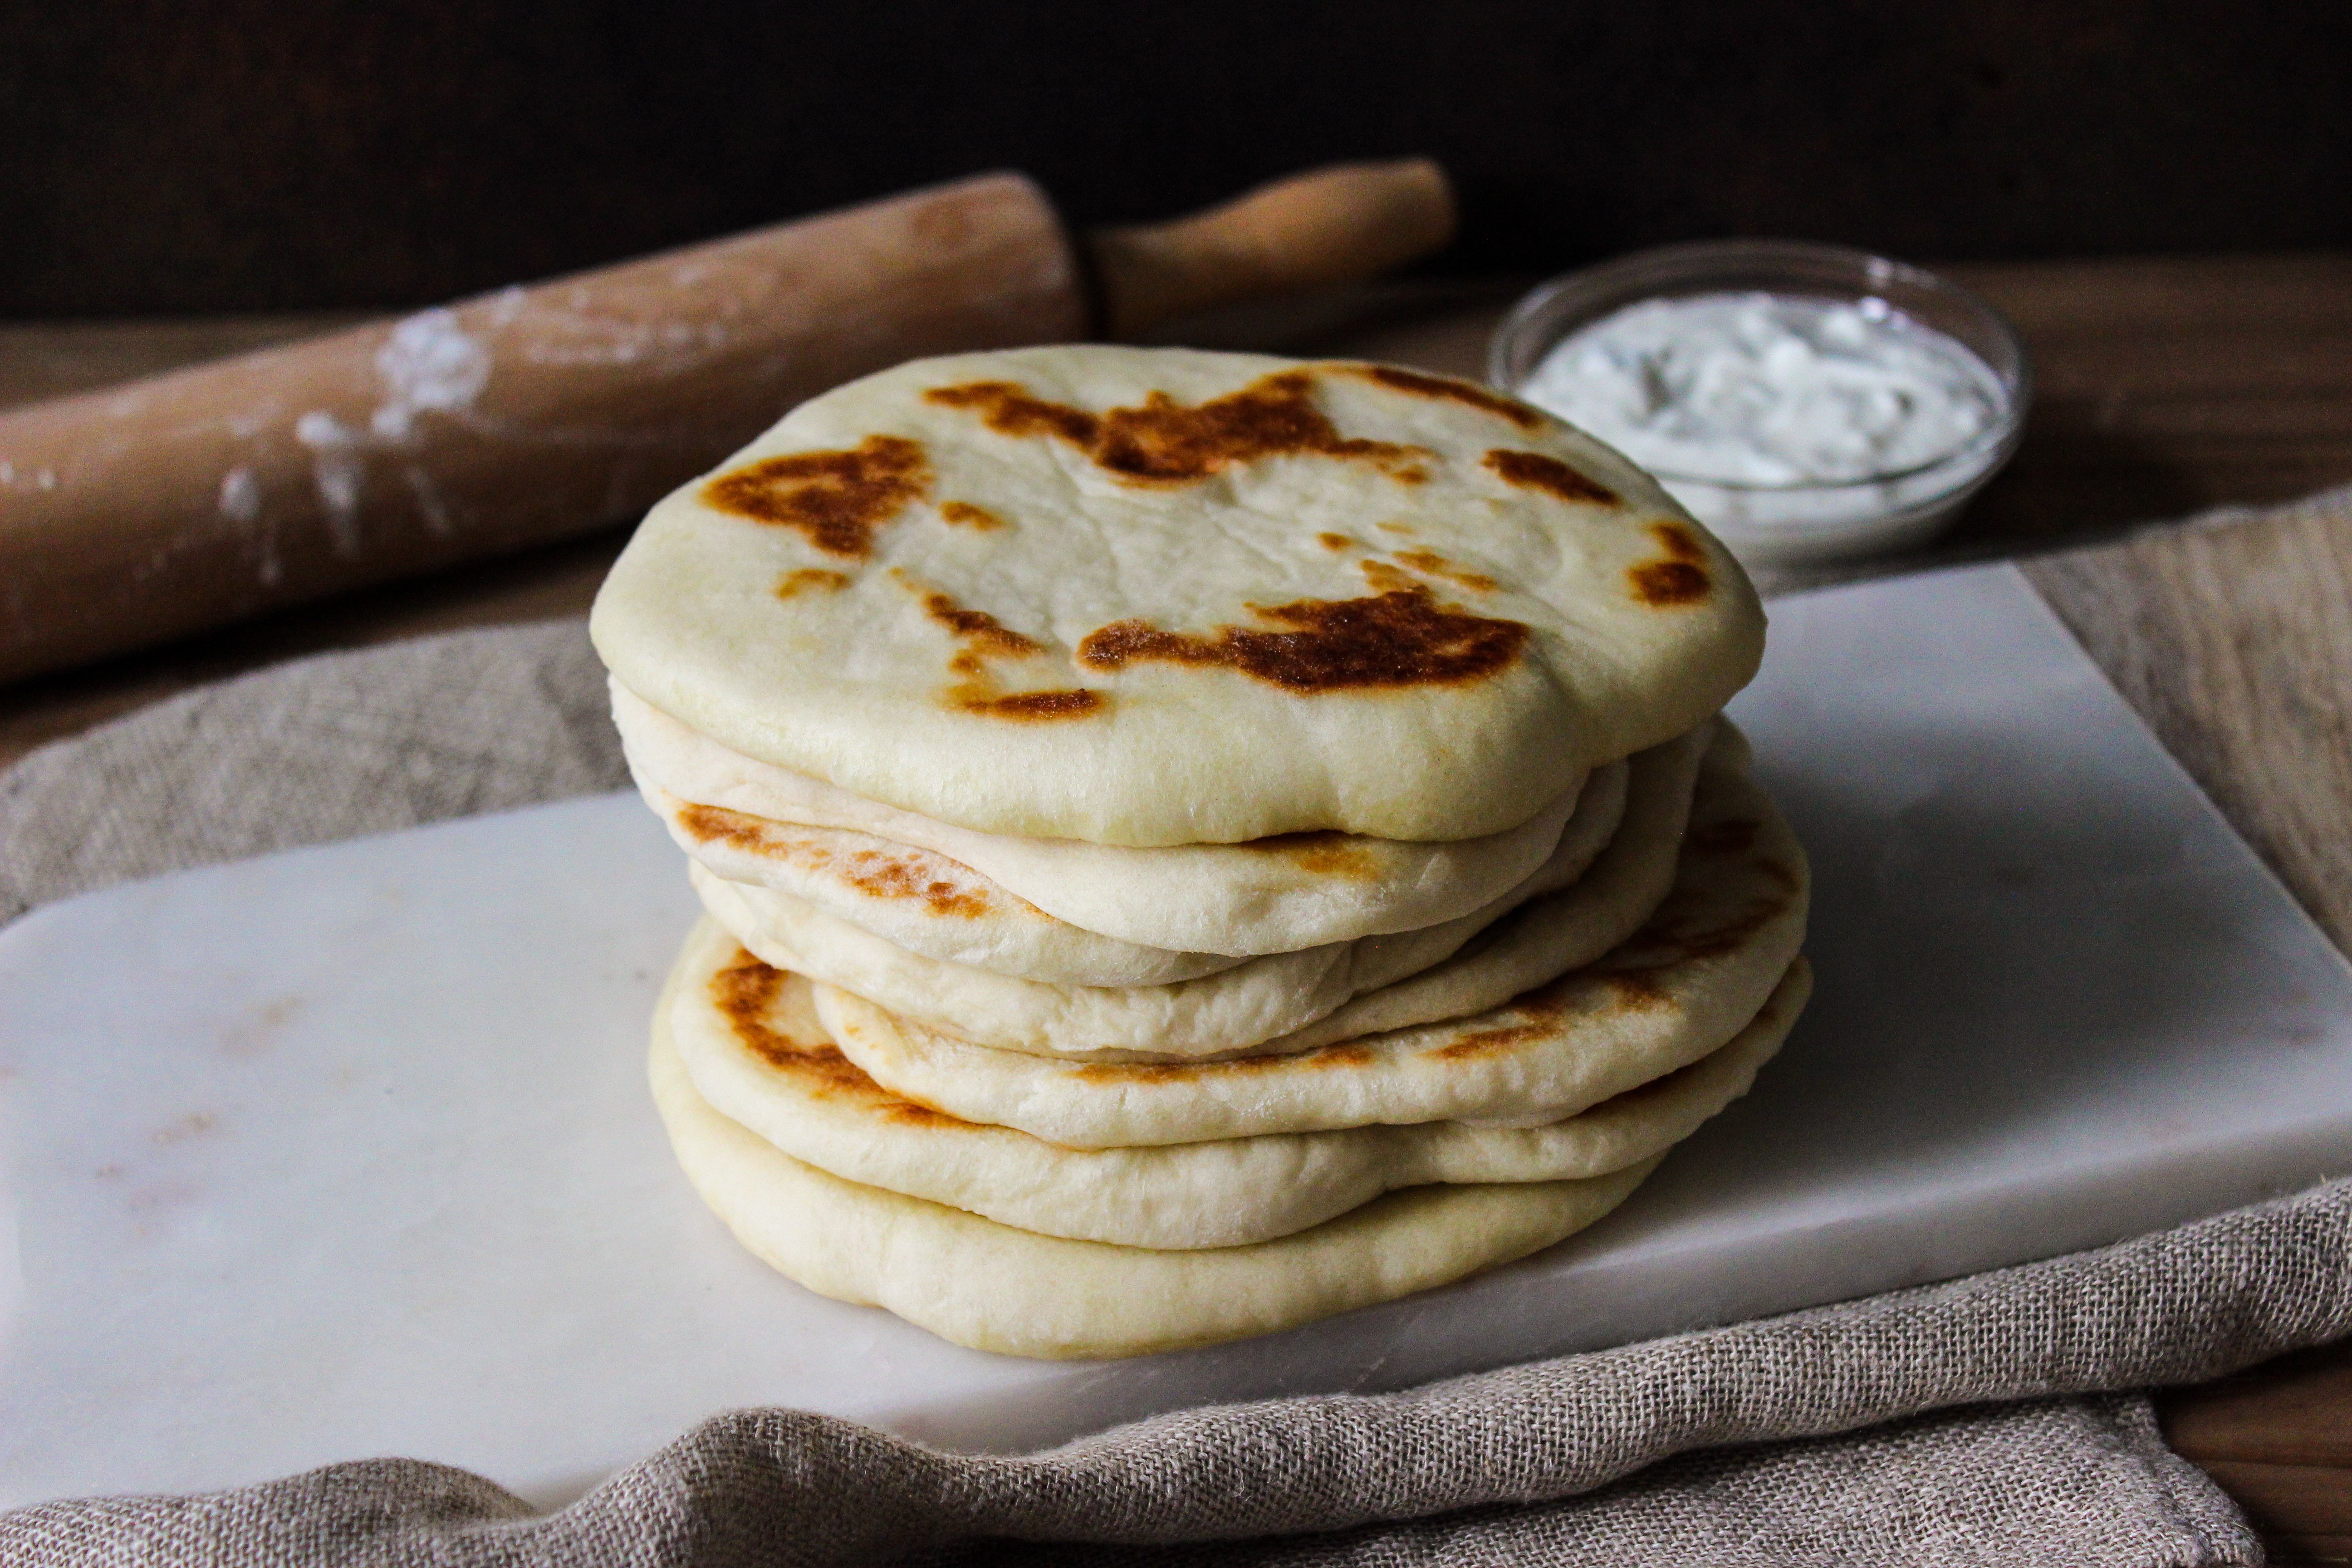
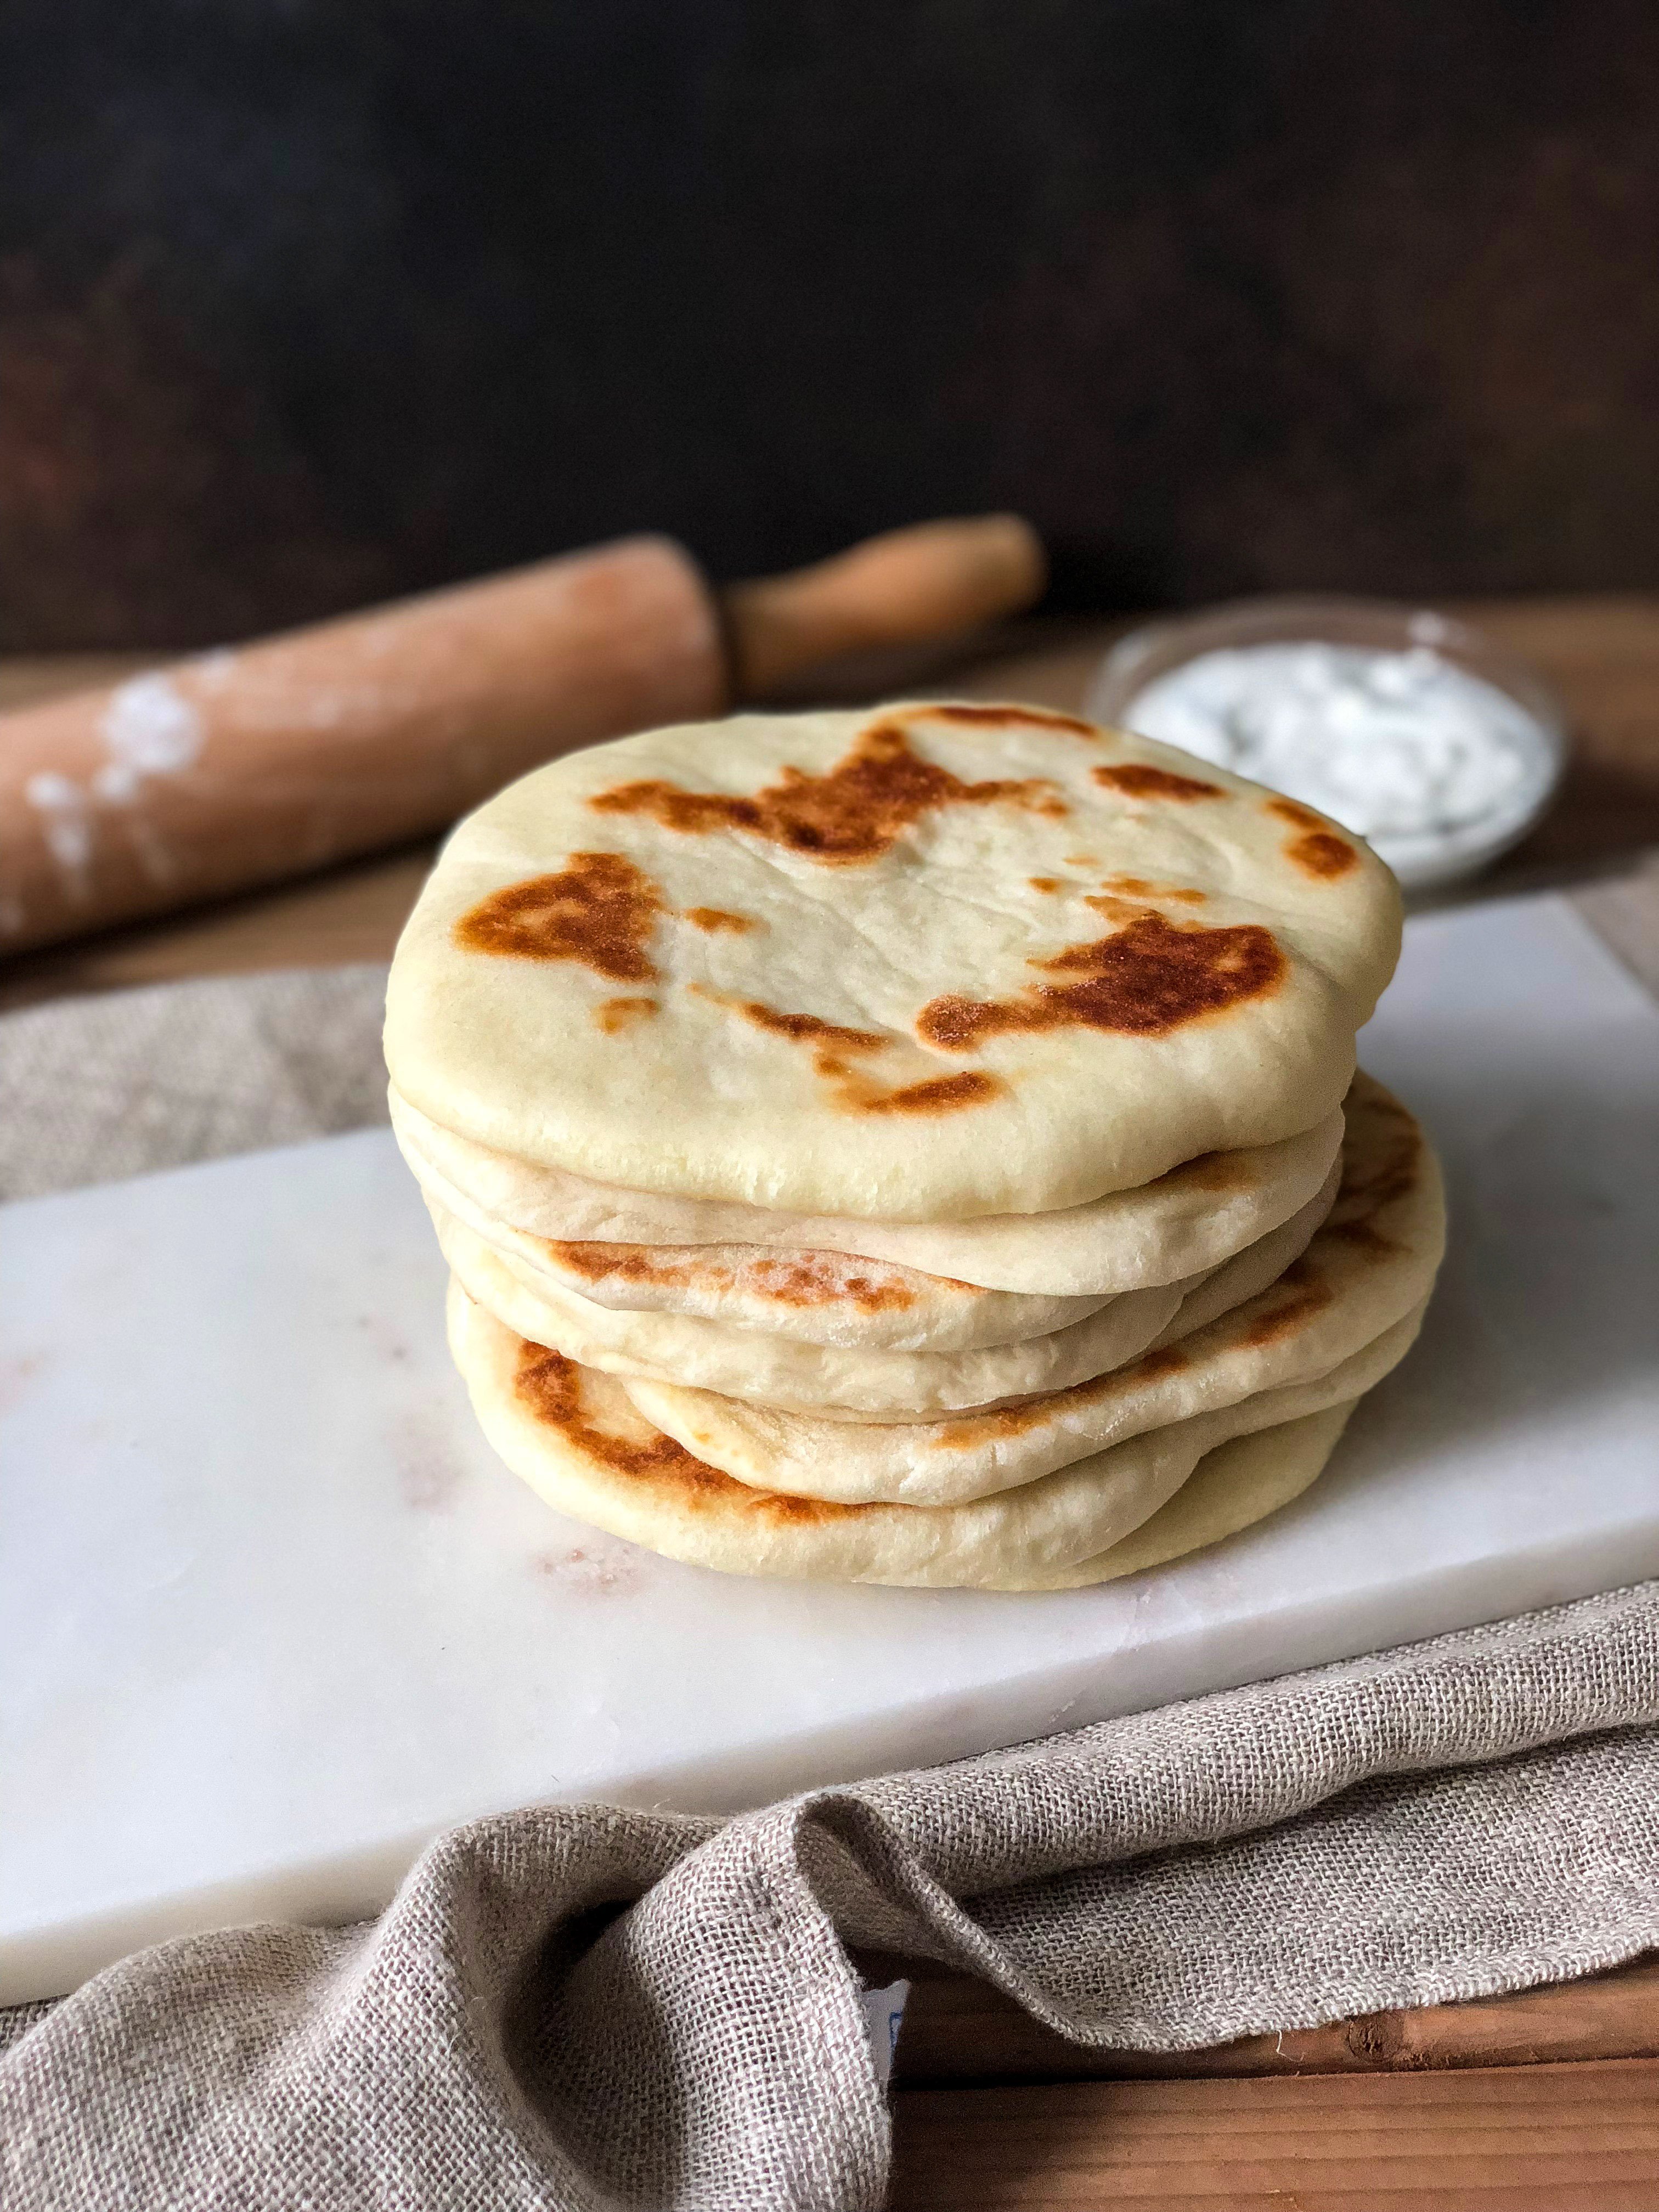
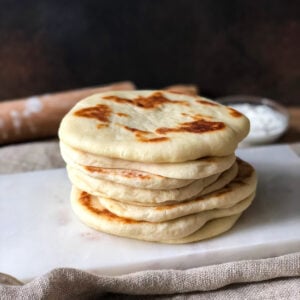
Homemade Greek pita bread
Soft and fluffy authentic Greek pita bread that you can easily make at home. All you need is all purpose flour, yeast, water, salt, sugar and some olive oil. This pita bread is quick and simple to make and can be enjoyed in all kinds of ways.
The French have the baguette, Mexican cuisine has the tortilla, Indian aloo gobi gets sopped up with soft, pillowy naan bread, and if you’ve every treated your palate to Ethiopian food, you’ll likely remember using the pancake-like bread called injera to scoop up every bite you took. Every culture, every cuisine, seems to have a variation of some cereal or grain based bread that is quintessentially their own. For Greeks, that is the pita.
Oh sure, Greek kitchens and bakeries and farmhouses and village stone ovens produce many other types of baked breads, like kouloures and lagana, but in my humble opinion, nothing beats pita bread. Pita is what you use to wrap around a souvlaki, to dip into tzatziki and to scoop up eggplant dip (melitzanosalata).
Why I love this recipe
I love pita bread! It is quick and easy to make your own using my recipe and it is so versatile. You can use pita to scoop, dip or wrap anything your heart desires!
The texture is perfect: My pita bread recipe will give you pita that is soft and fluffy!
Easy to make: You won’t need anything complicated to make this recipe. If you look around, you probaby already have what you need in your pantry. Also, as always, my recipe is clear, detailed and so easy to follow. Even if you have never made bread before, I know you will be able to make this recipe with success! I believe in you!
Versatile: There are so many ways to enjoy pita bread, and I am going to share many of them with you!
It is vegan: That’s right, this recipe contains no dairy, and no eggs! You don’t need them! This is the traditional way to make Greek pita bread and therefore it is perfect for periods of lent (Greek fasting periods where we eat nistisima foods), or to feed the vegans that you love.
Key ingredients
Making homemade Greek pita bread is really simple, and you probably already have the ingredients you need in your pantry.
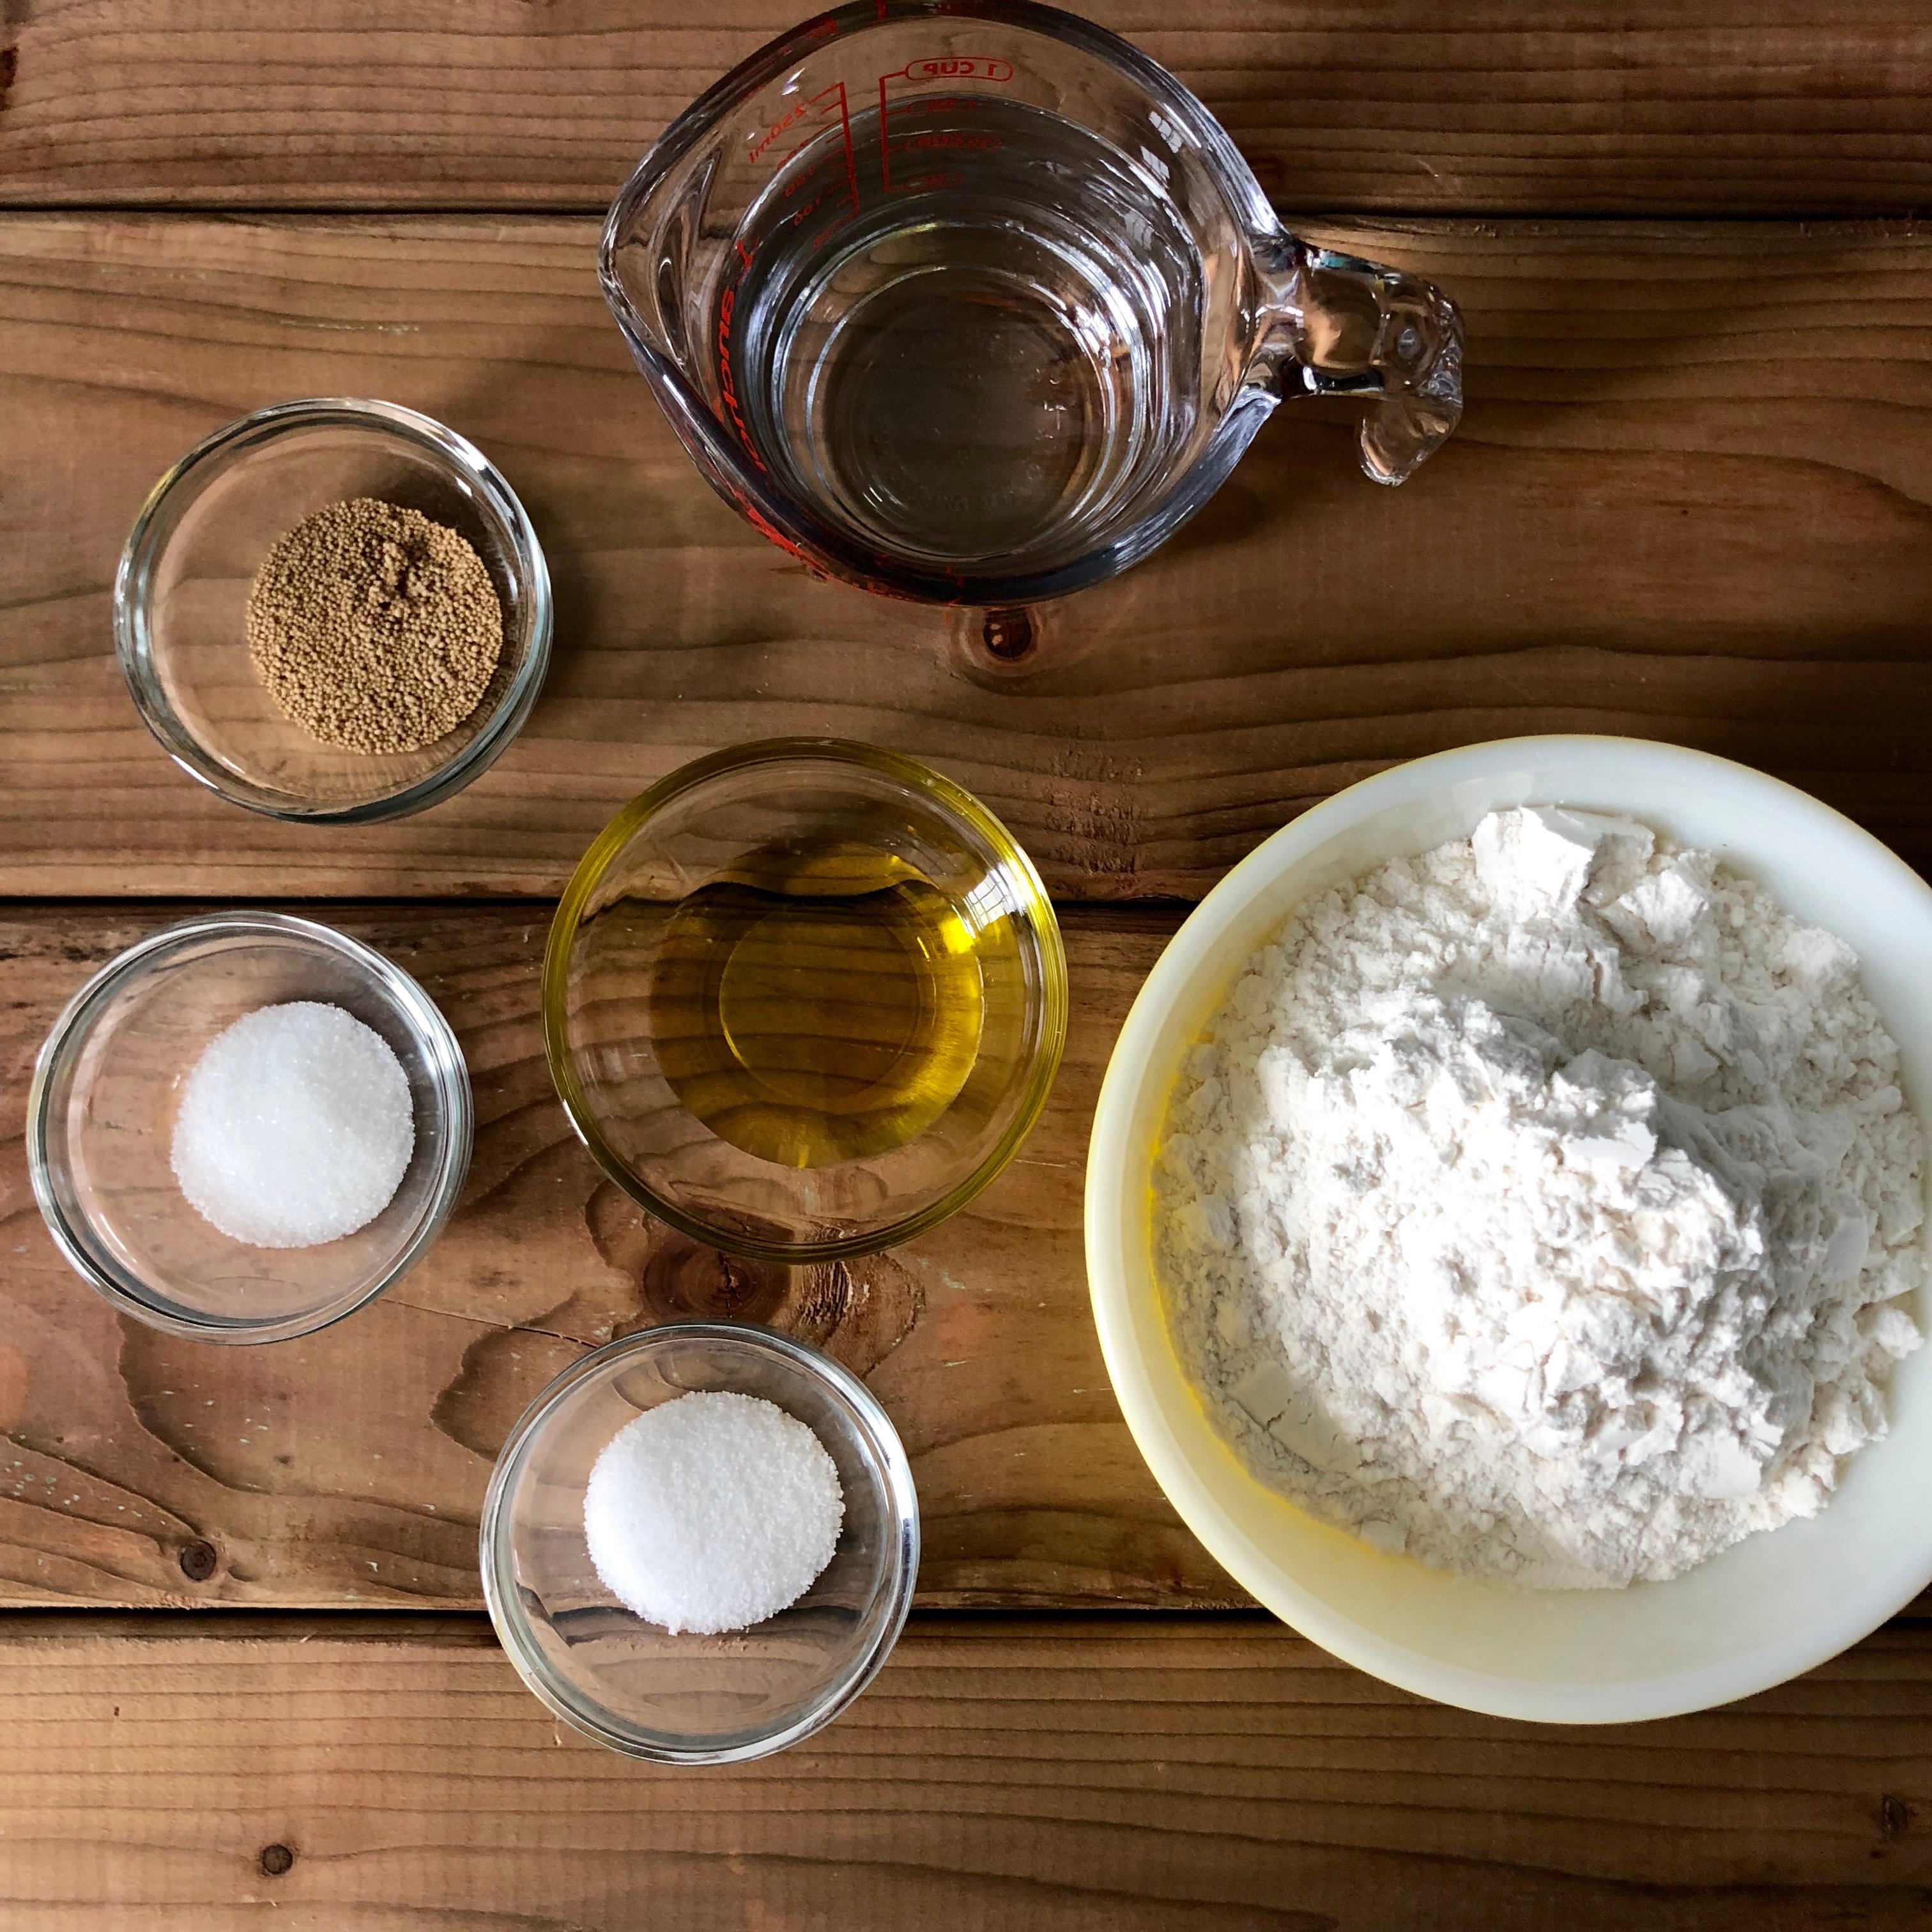
Flour: I use all purpose (also called regular or plain) white flour to make pita bread. This flour is easy to find and is so versatile.
Yeast: I use active dry yeast to make my pita bread, Make sure that your yeast has not expired, otherwise your pita bread will not become light and fluffy.
Water: Lukewarm water straight from the tap is needed, anything too hot will kill your yeast!
Sugar: Yeast needs a bit of food to get activated and that is where the sugar comes in! I use granulated white sugar to help get my yeast going.
Salt: I almost always add salt to my baked goods, including breads. It helps to enhance the flavour of everything!
How to make it
Sometimes the idea of making bread can be intimidating, but really, it is quite easy, especially with the right recipe! Once you make my homemade authentic Greek pita bread you will stop buying it ready made from the store, because this recipe is just that good! Here is a summary of how to do it; for the complete detailed recipe, keep scrolling to the bottom.
Step 1
Combine your yeast and water in a bowl and stir. Let sit for about 5 minutes until you see bubbling on the surface of the water.
Step 2
Put all the ingredients, including the yeast mixture, into the bowl of your stand mixer and use the dough hook attachment to knead together for about 5 minutes.
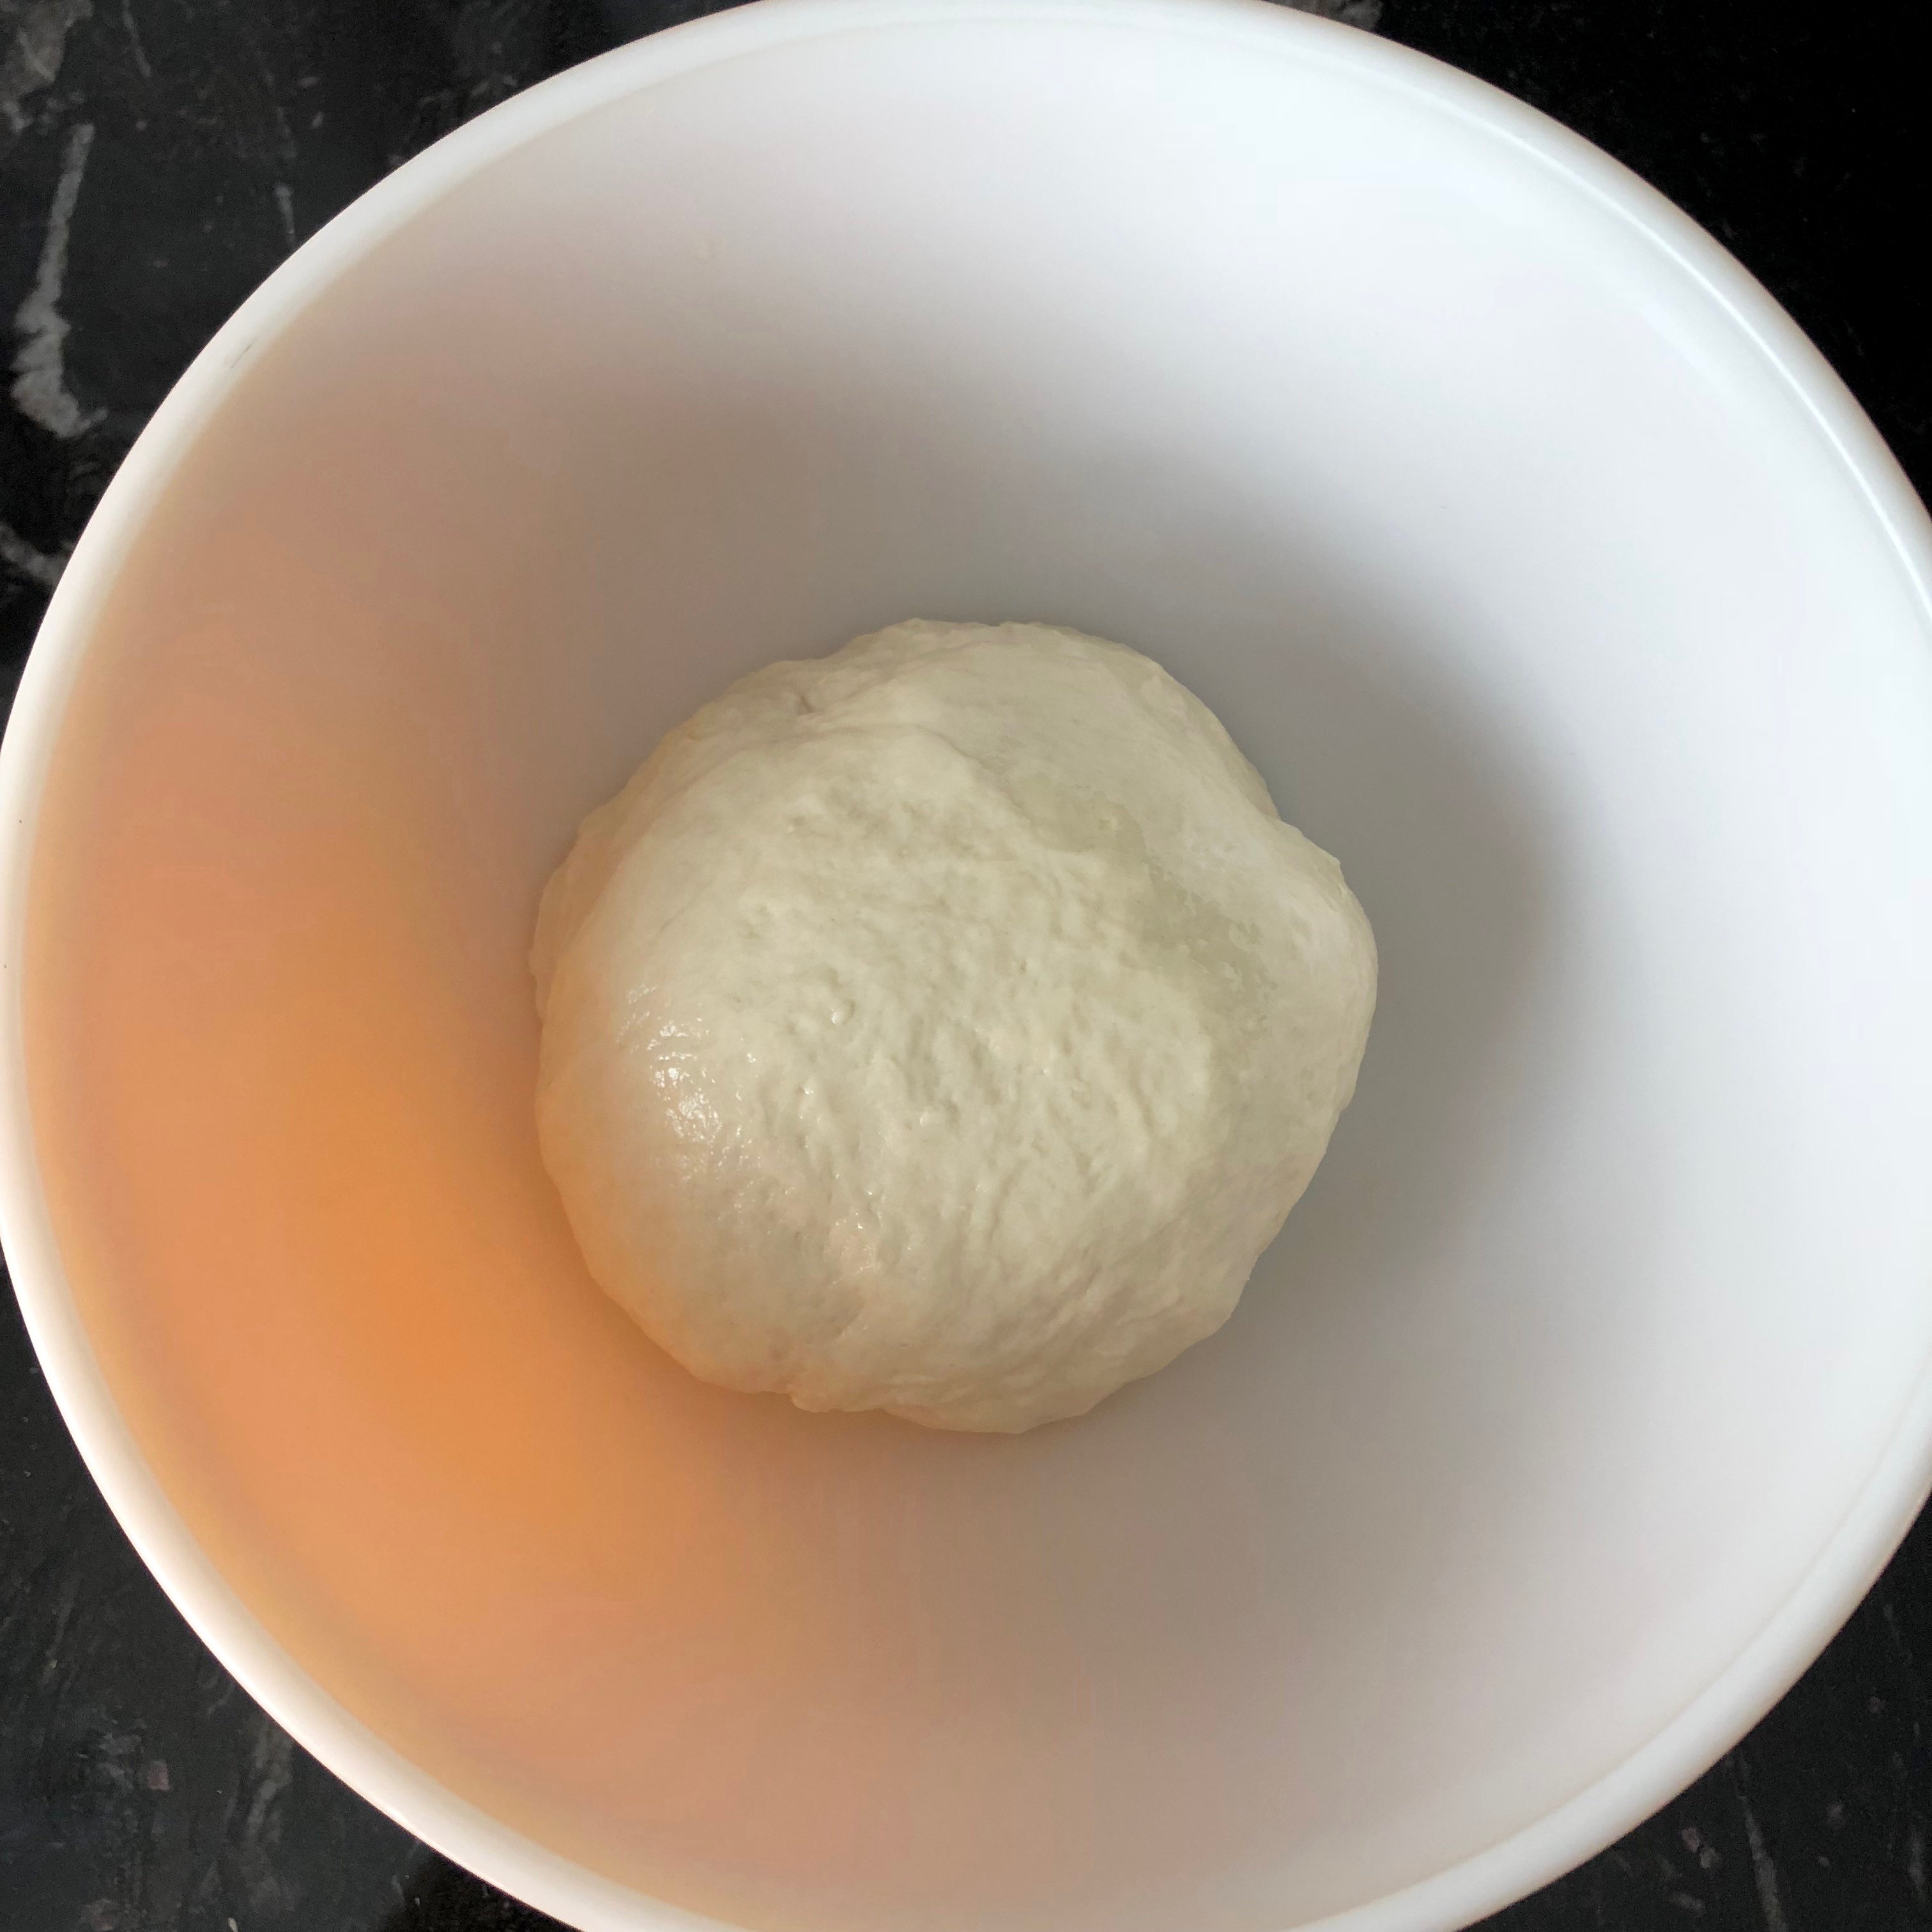
Step 3
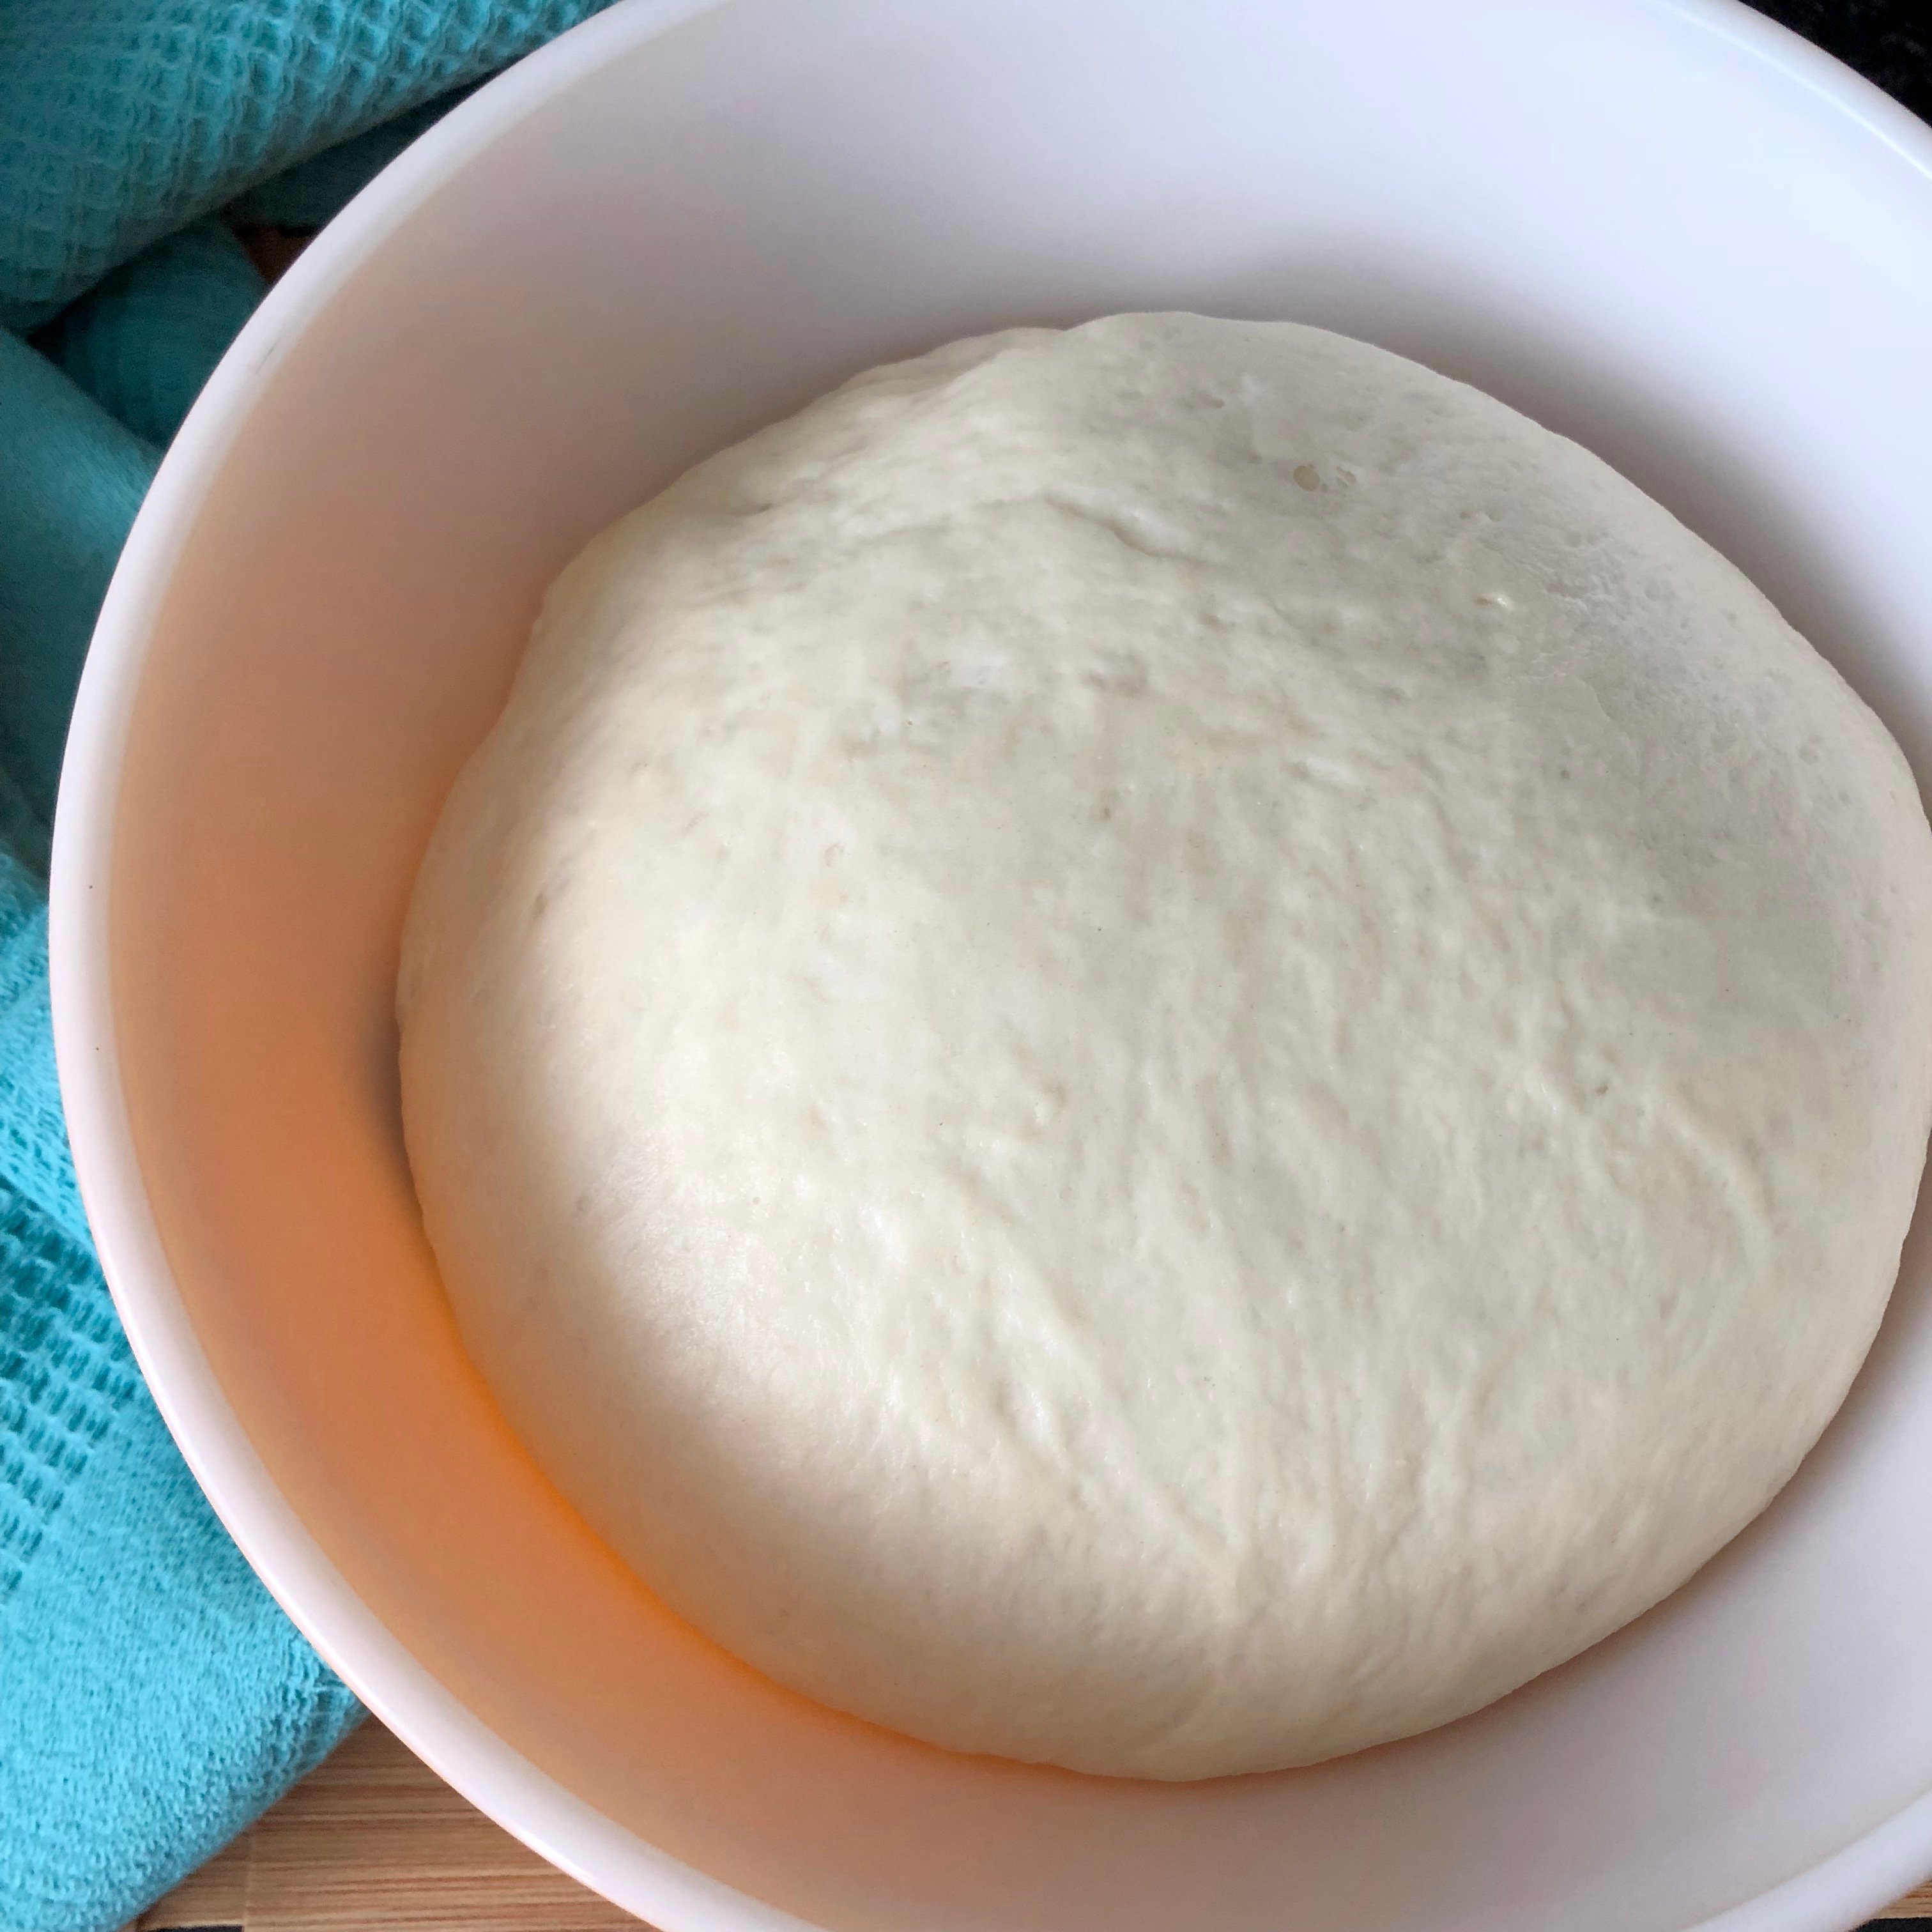
Form a ball and set it in bowl that you have brushed with oil. Rub top of dough with oil and cover until doubled in size (should take about 2 – 3 hours).
Step 4
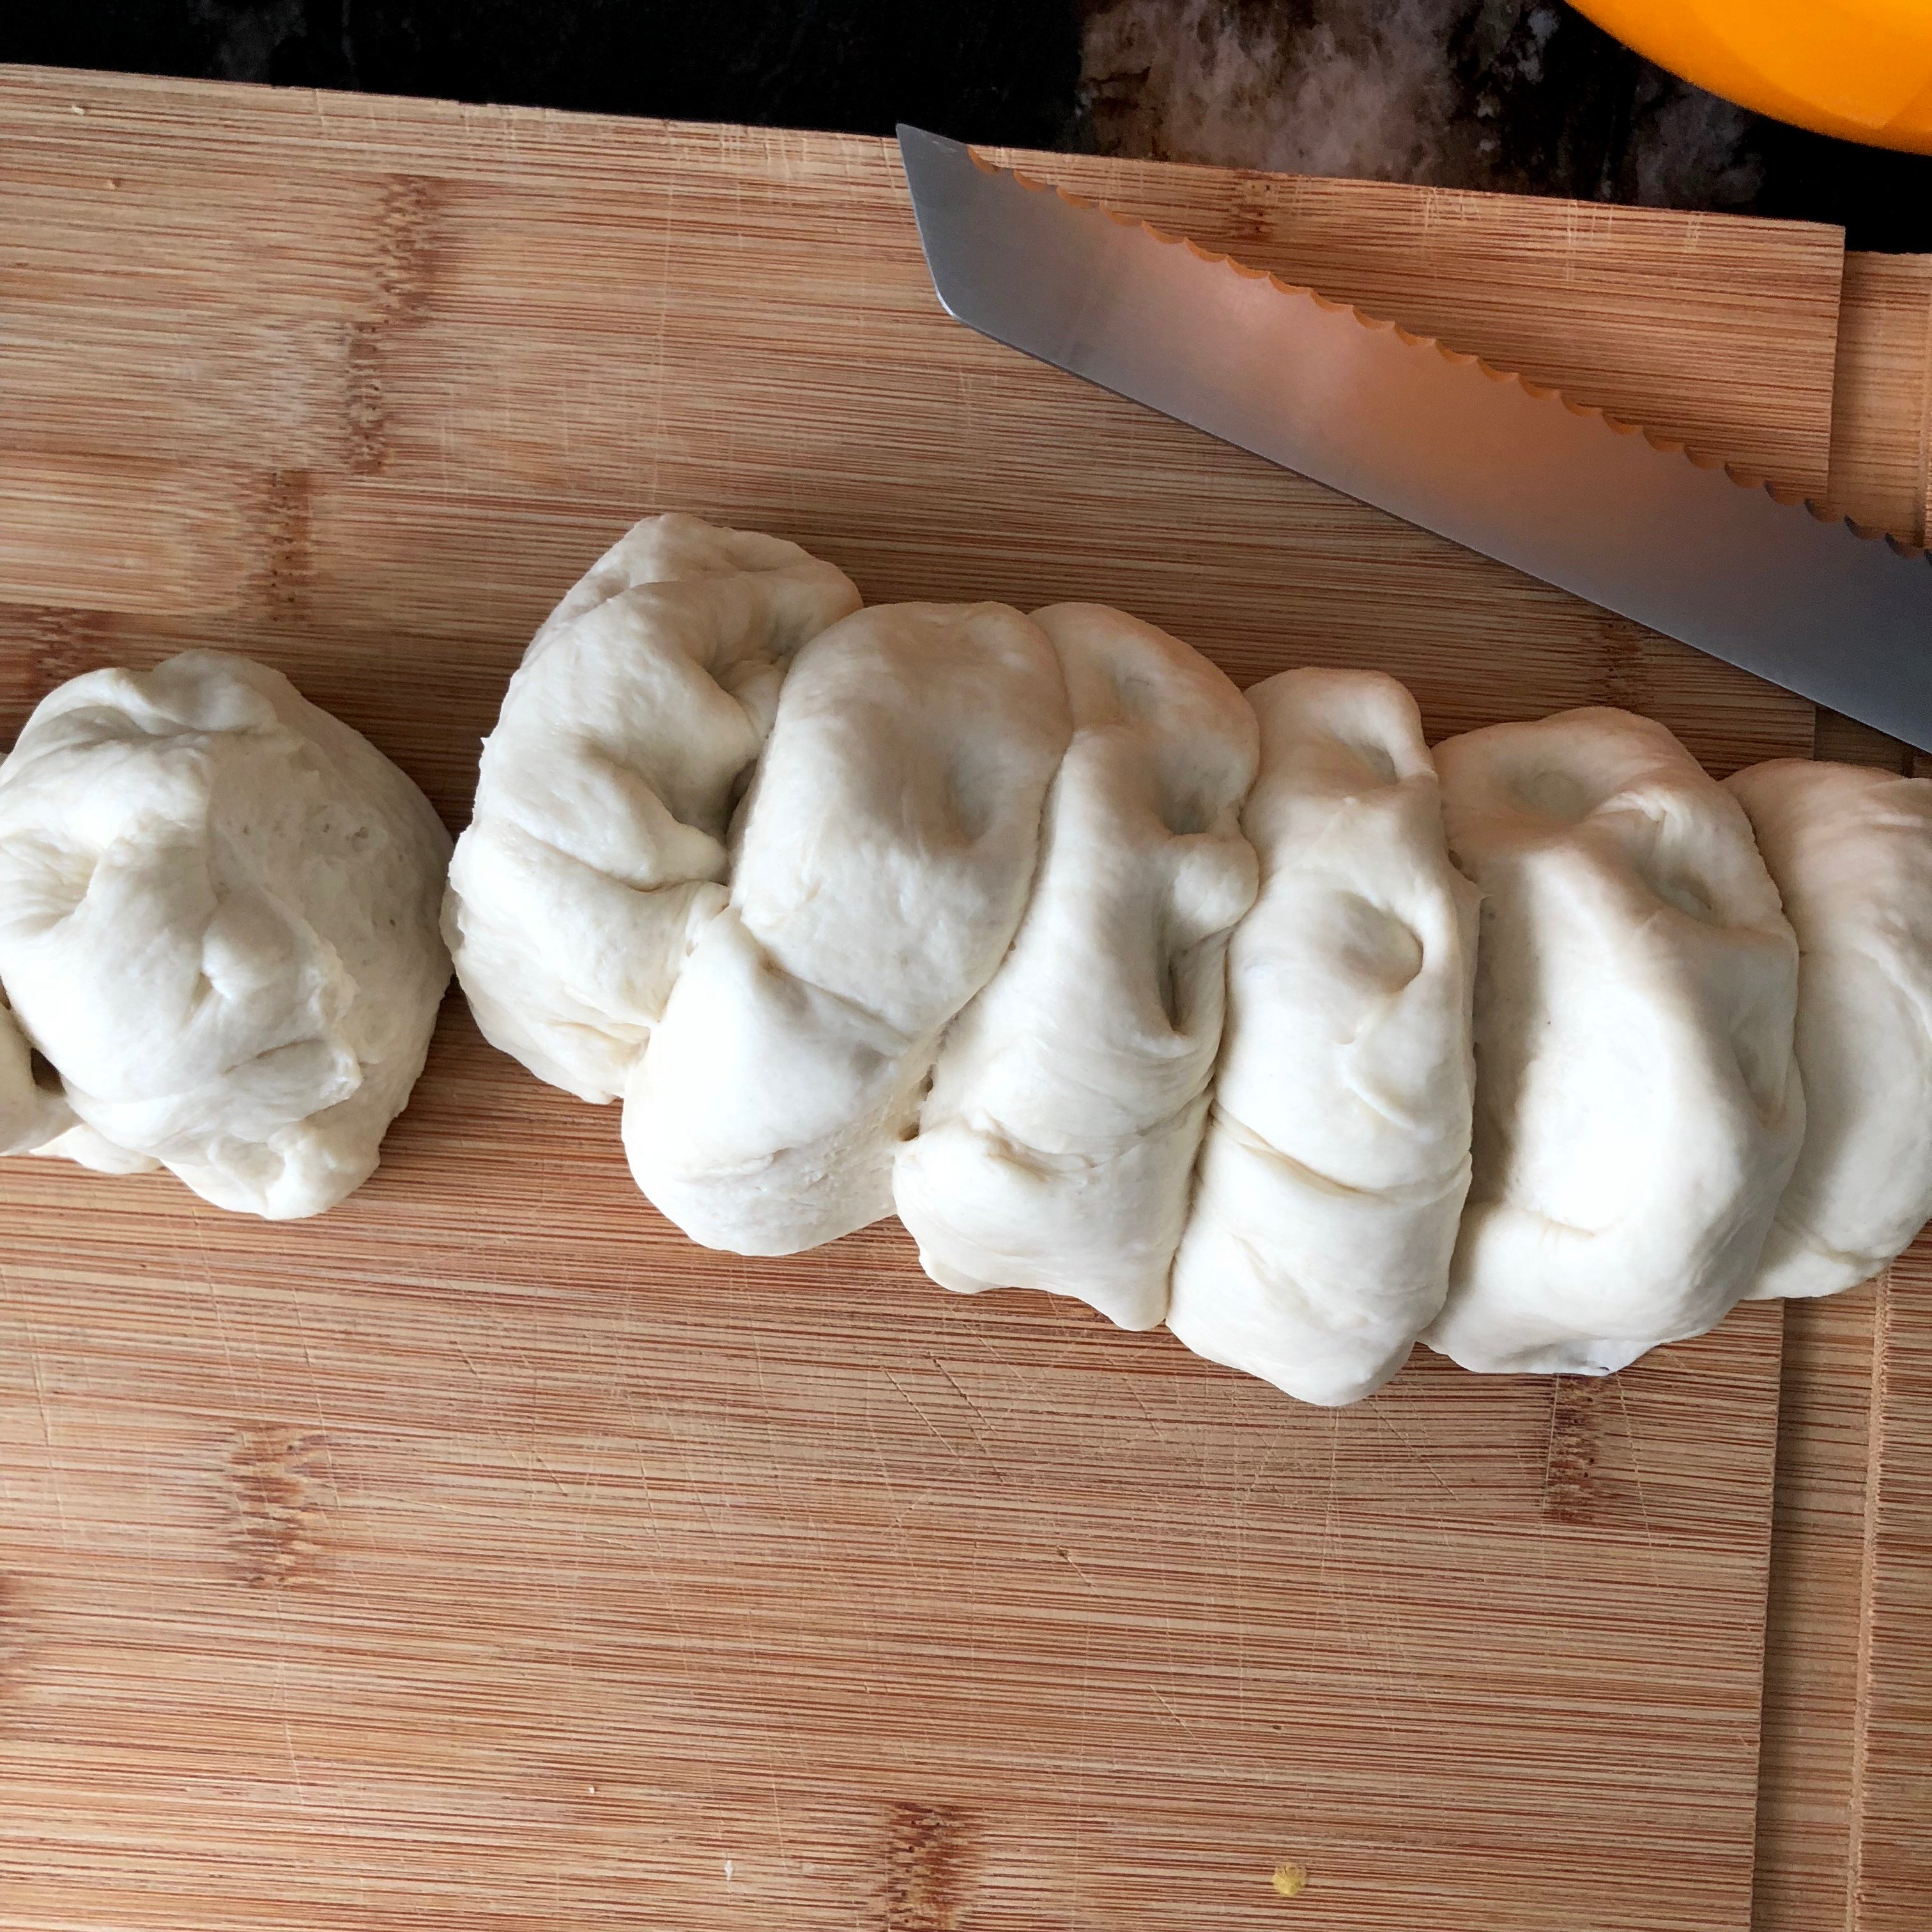
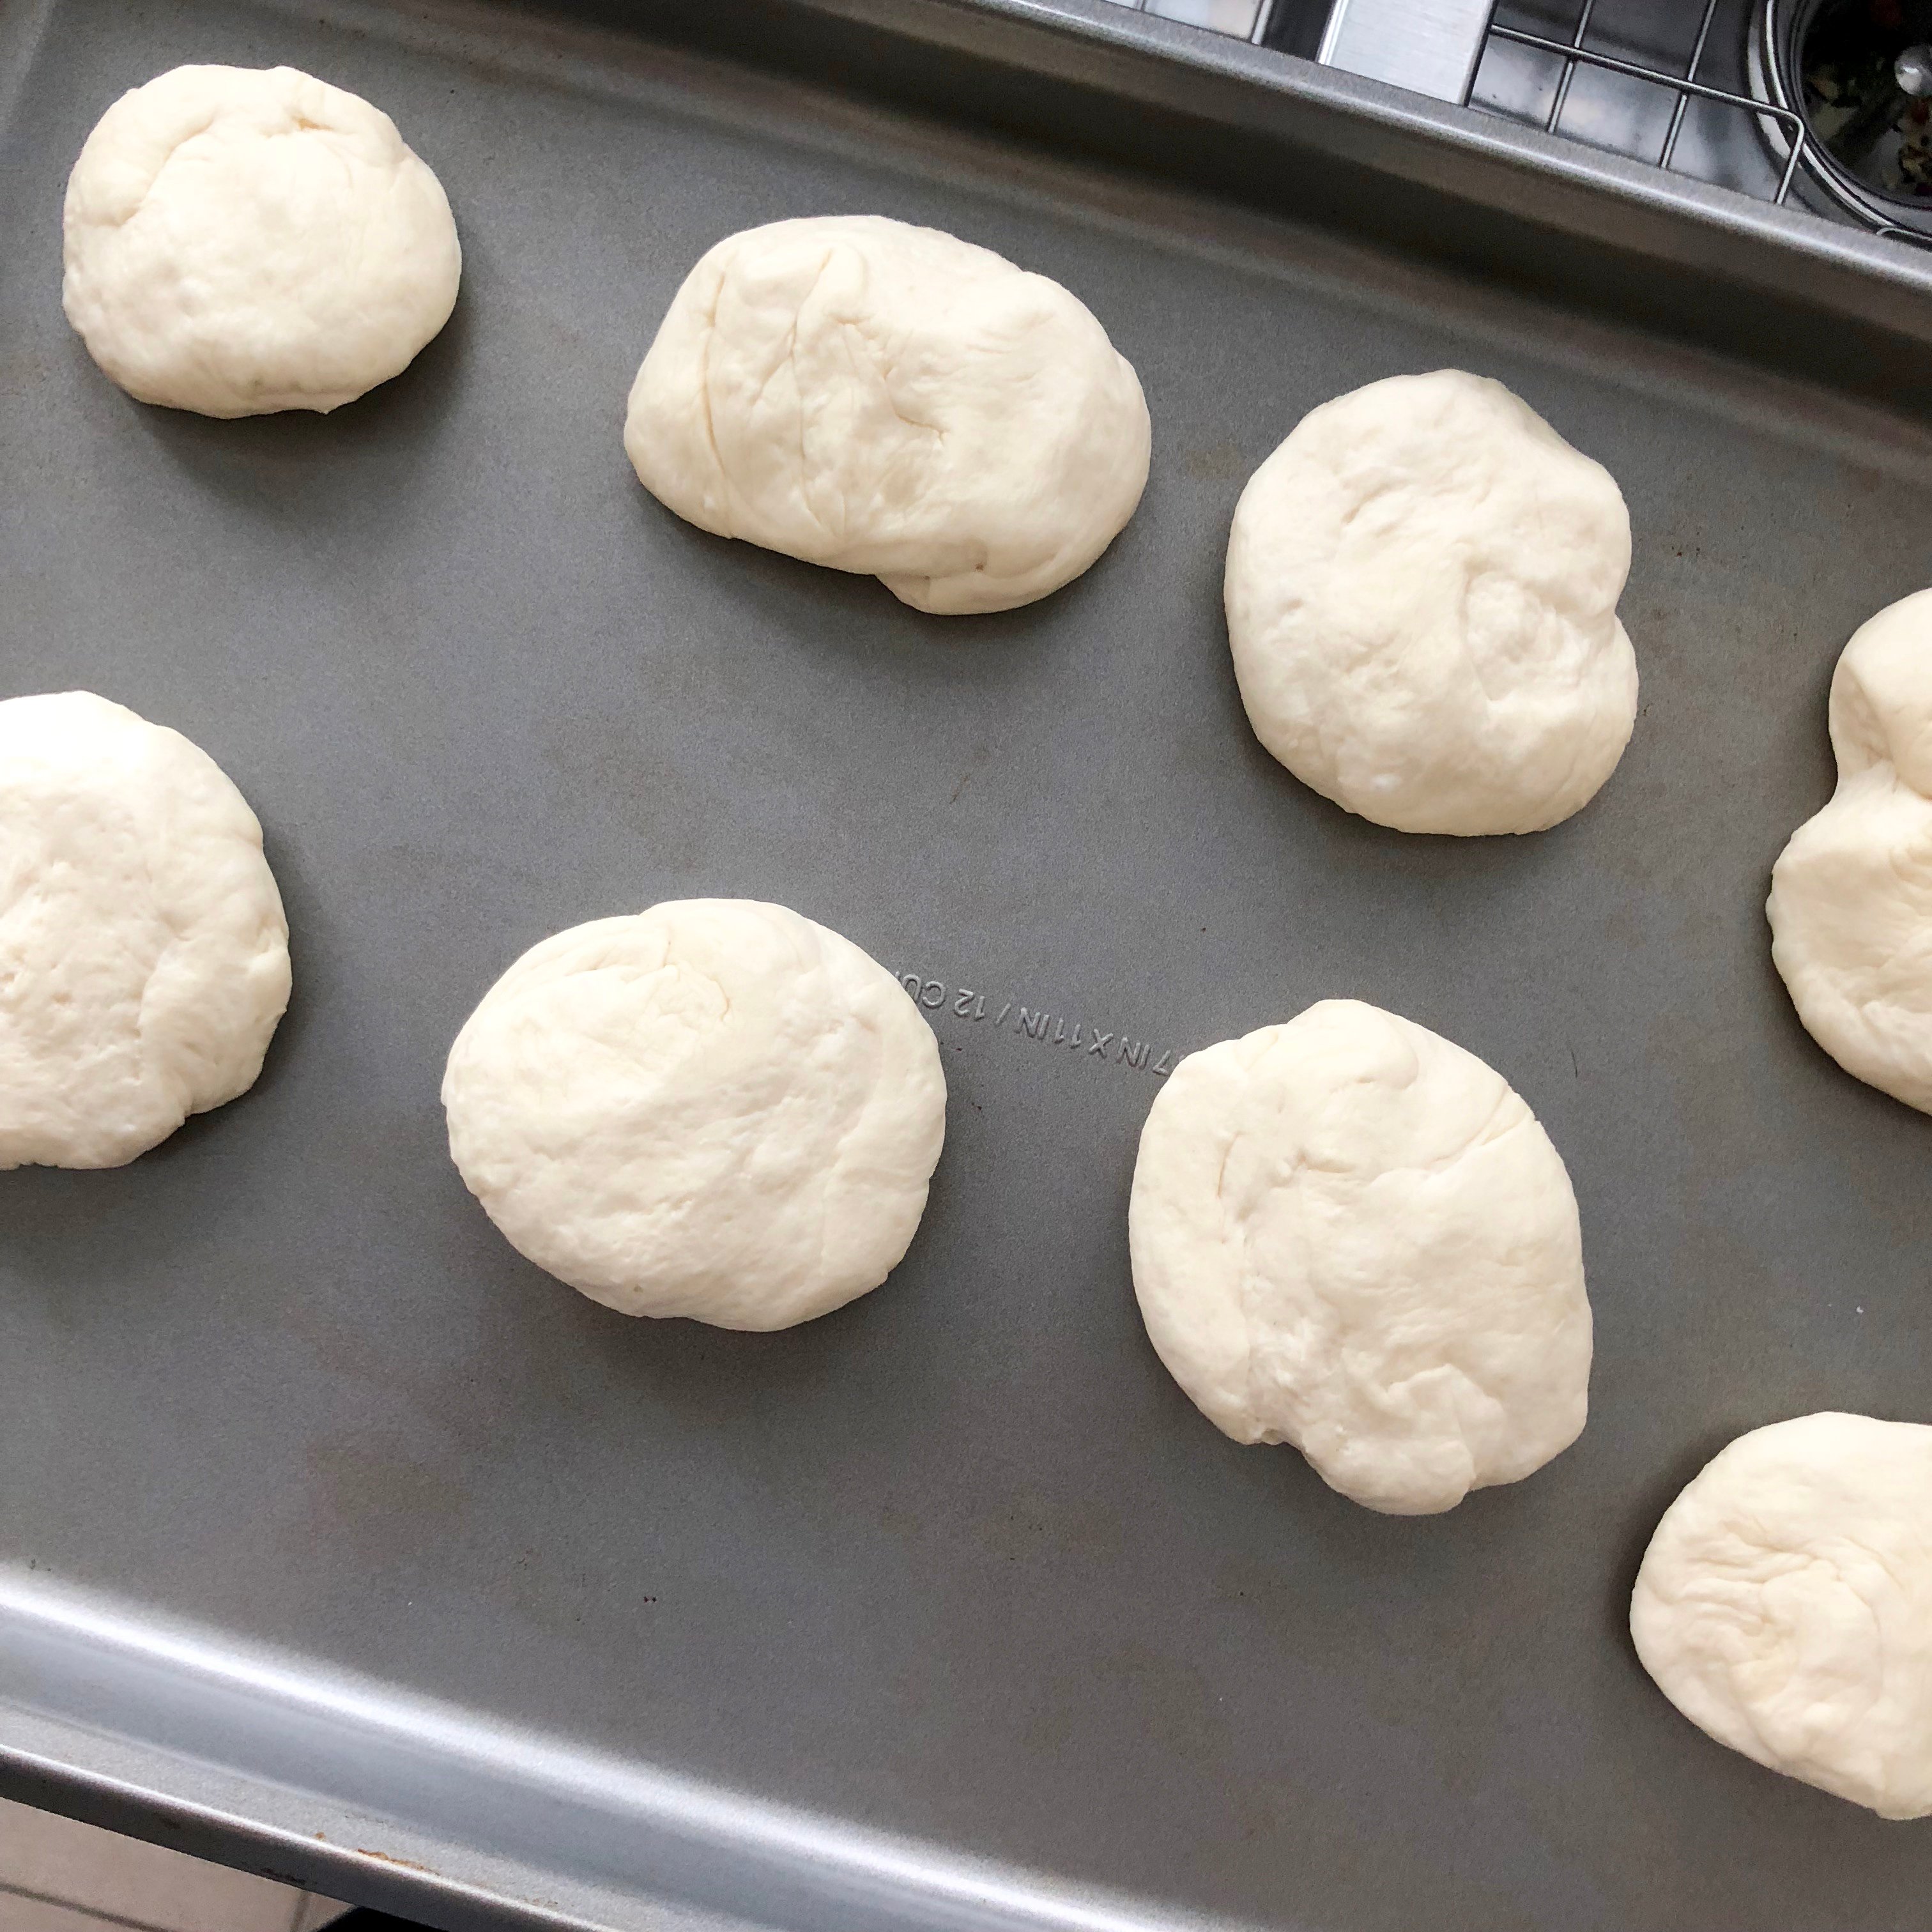
When dough is ready knead it a bit and then divide into 8 equal sized pieces. Form into balls and cover with a clean tea towel. Let rest about 15 minutes.
Step 5
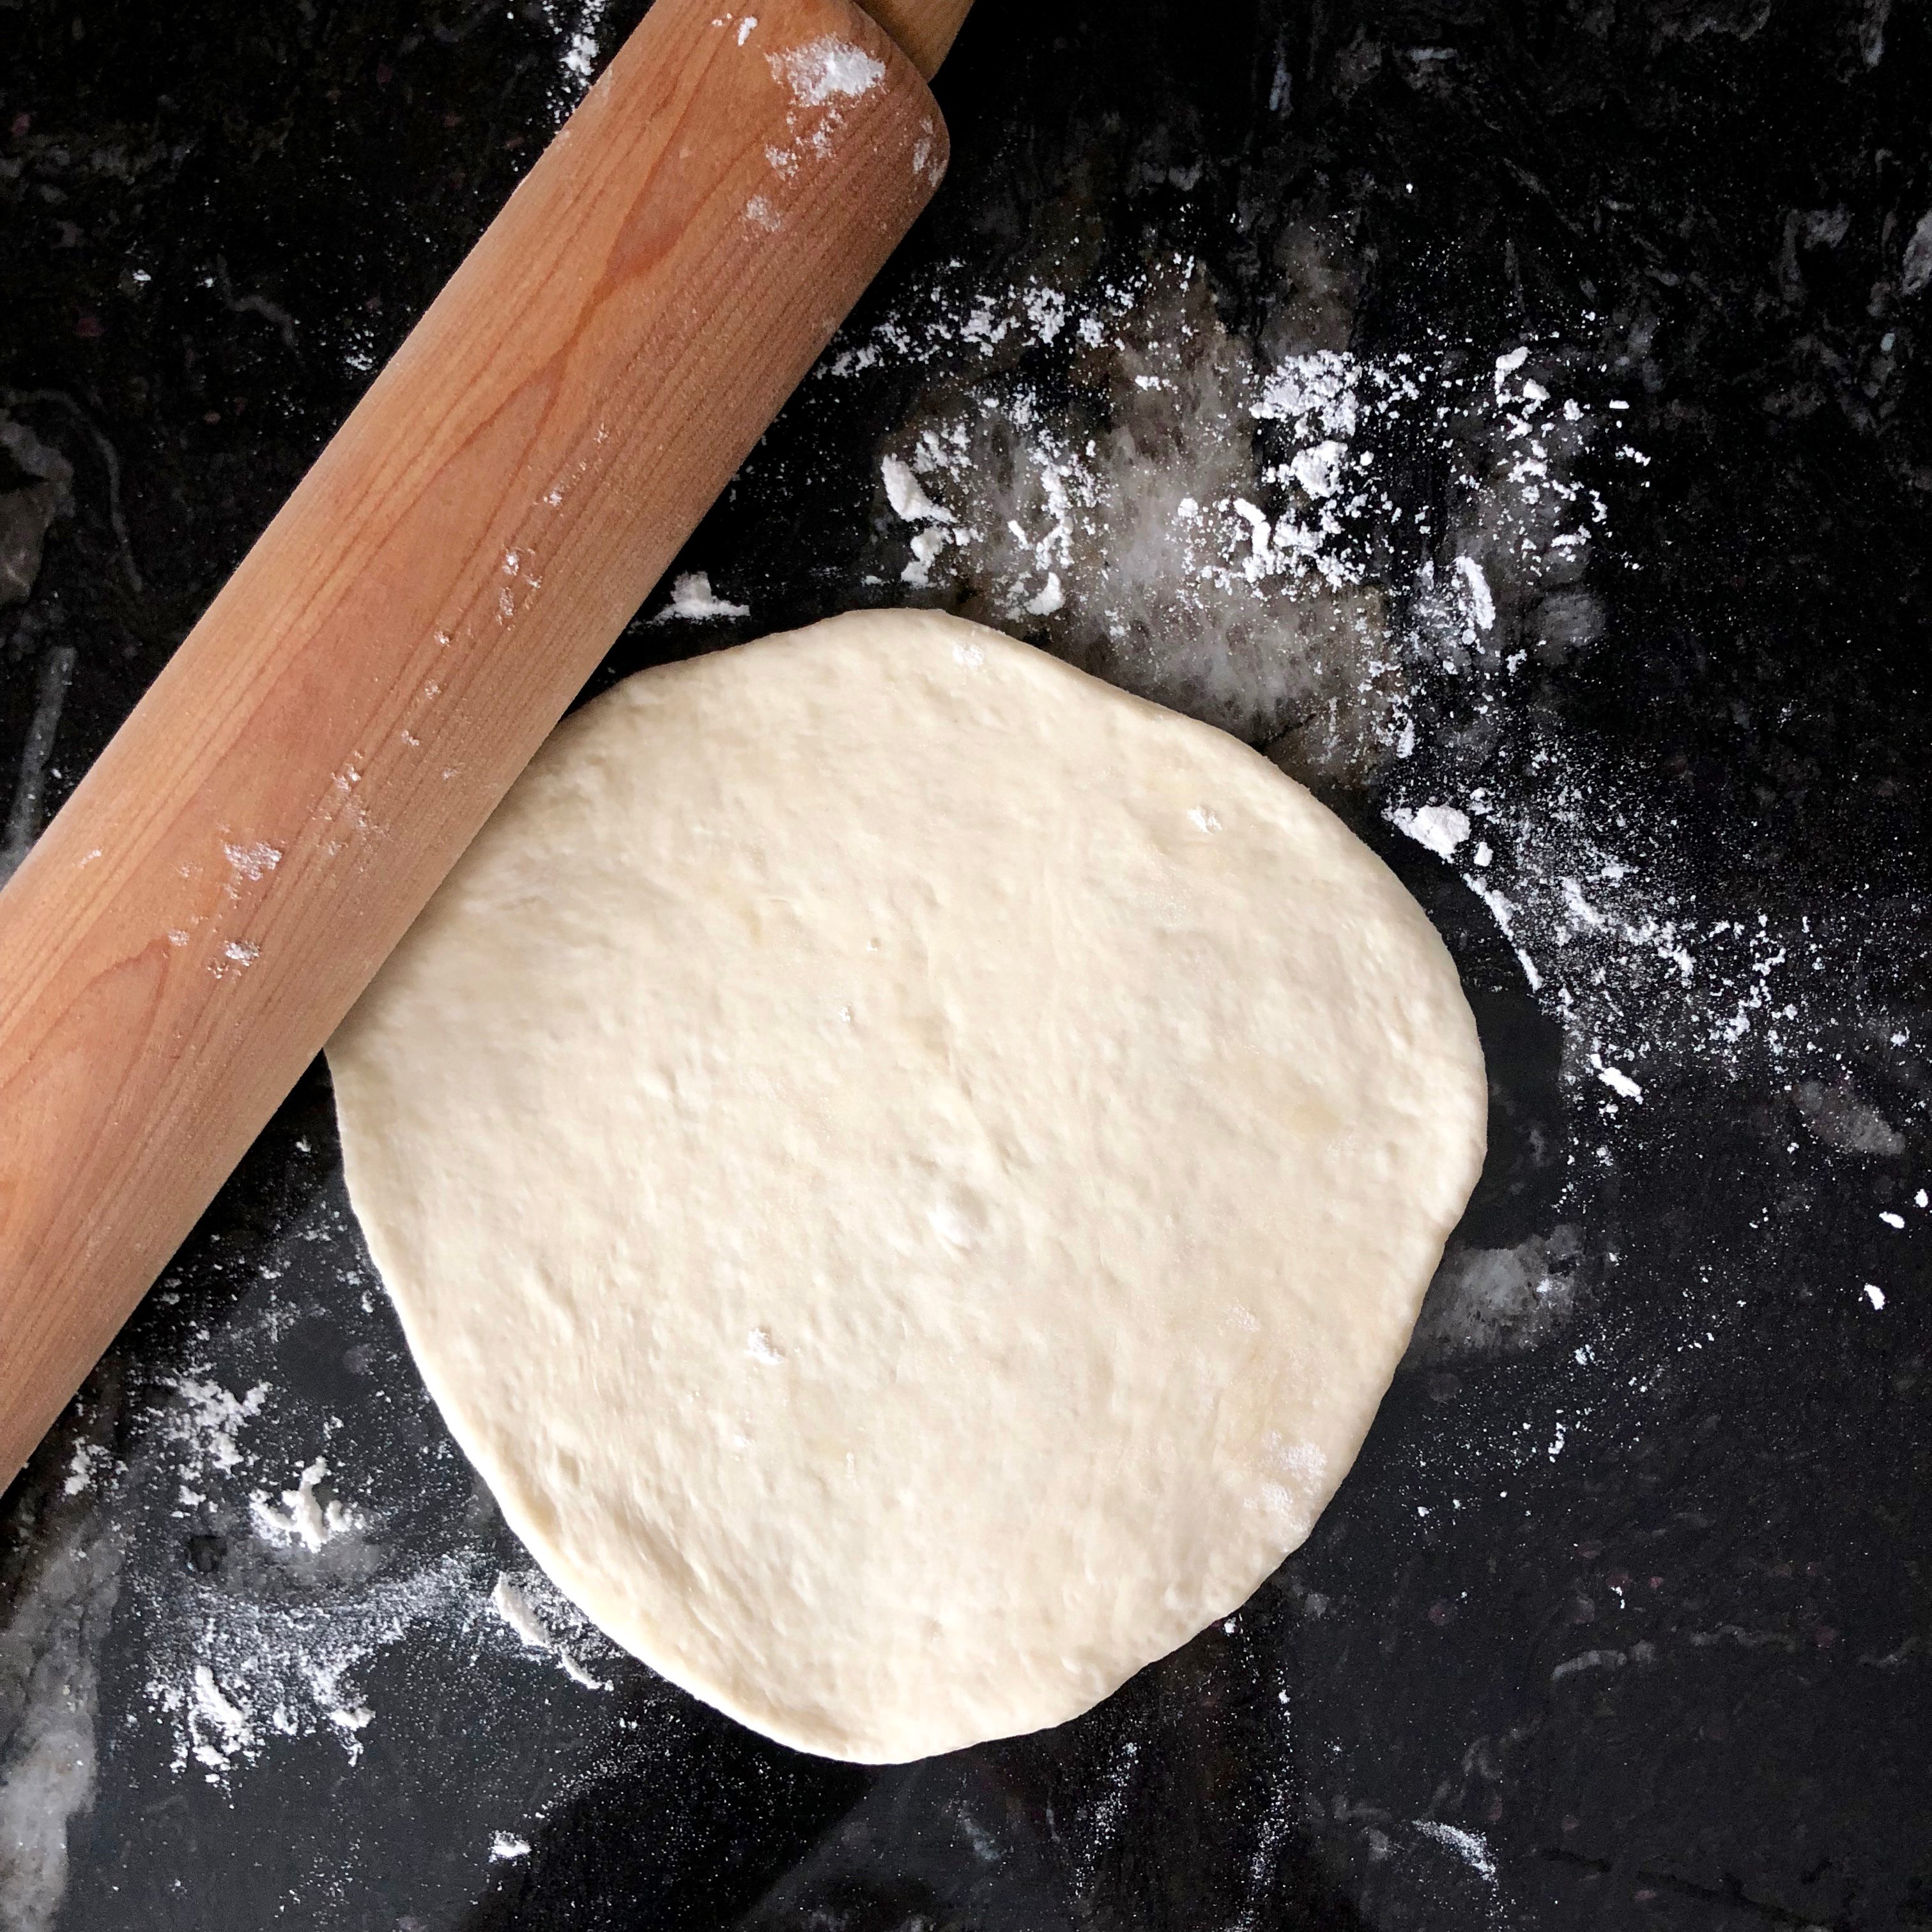
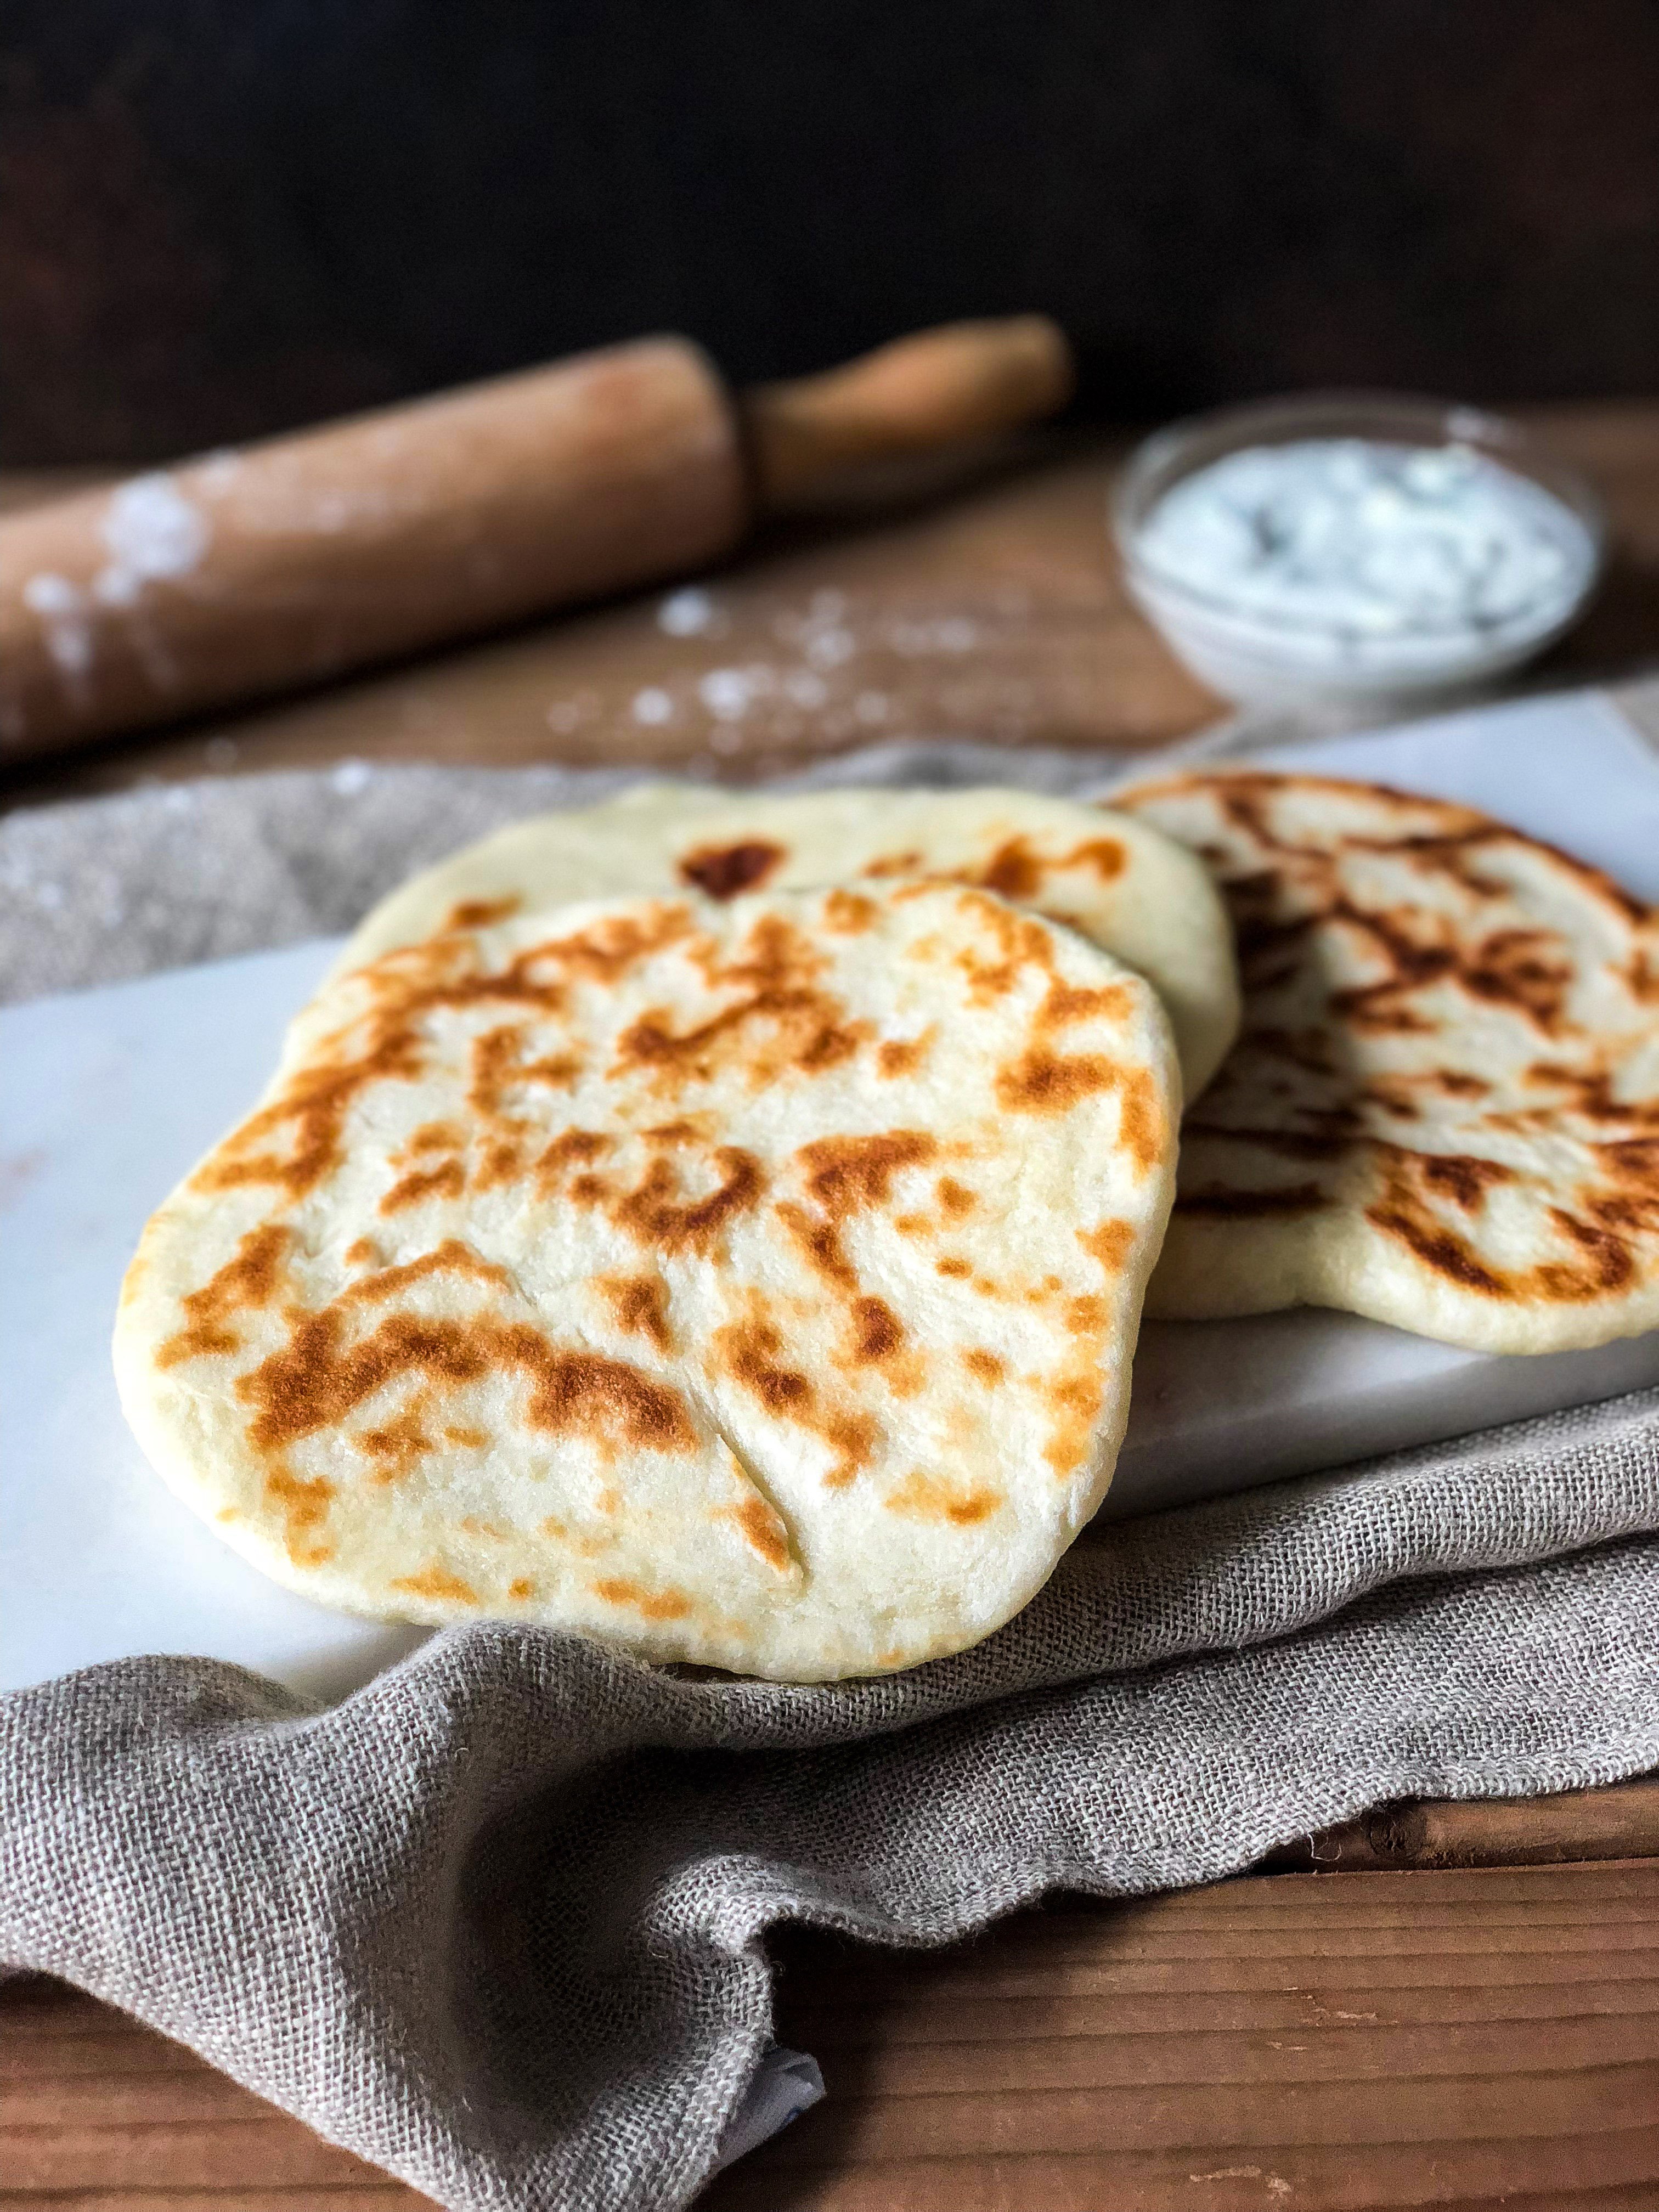
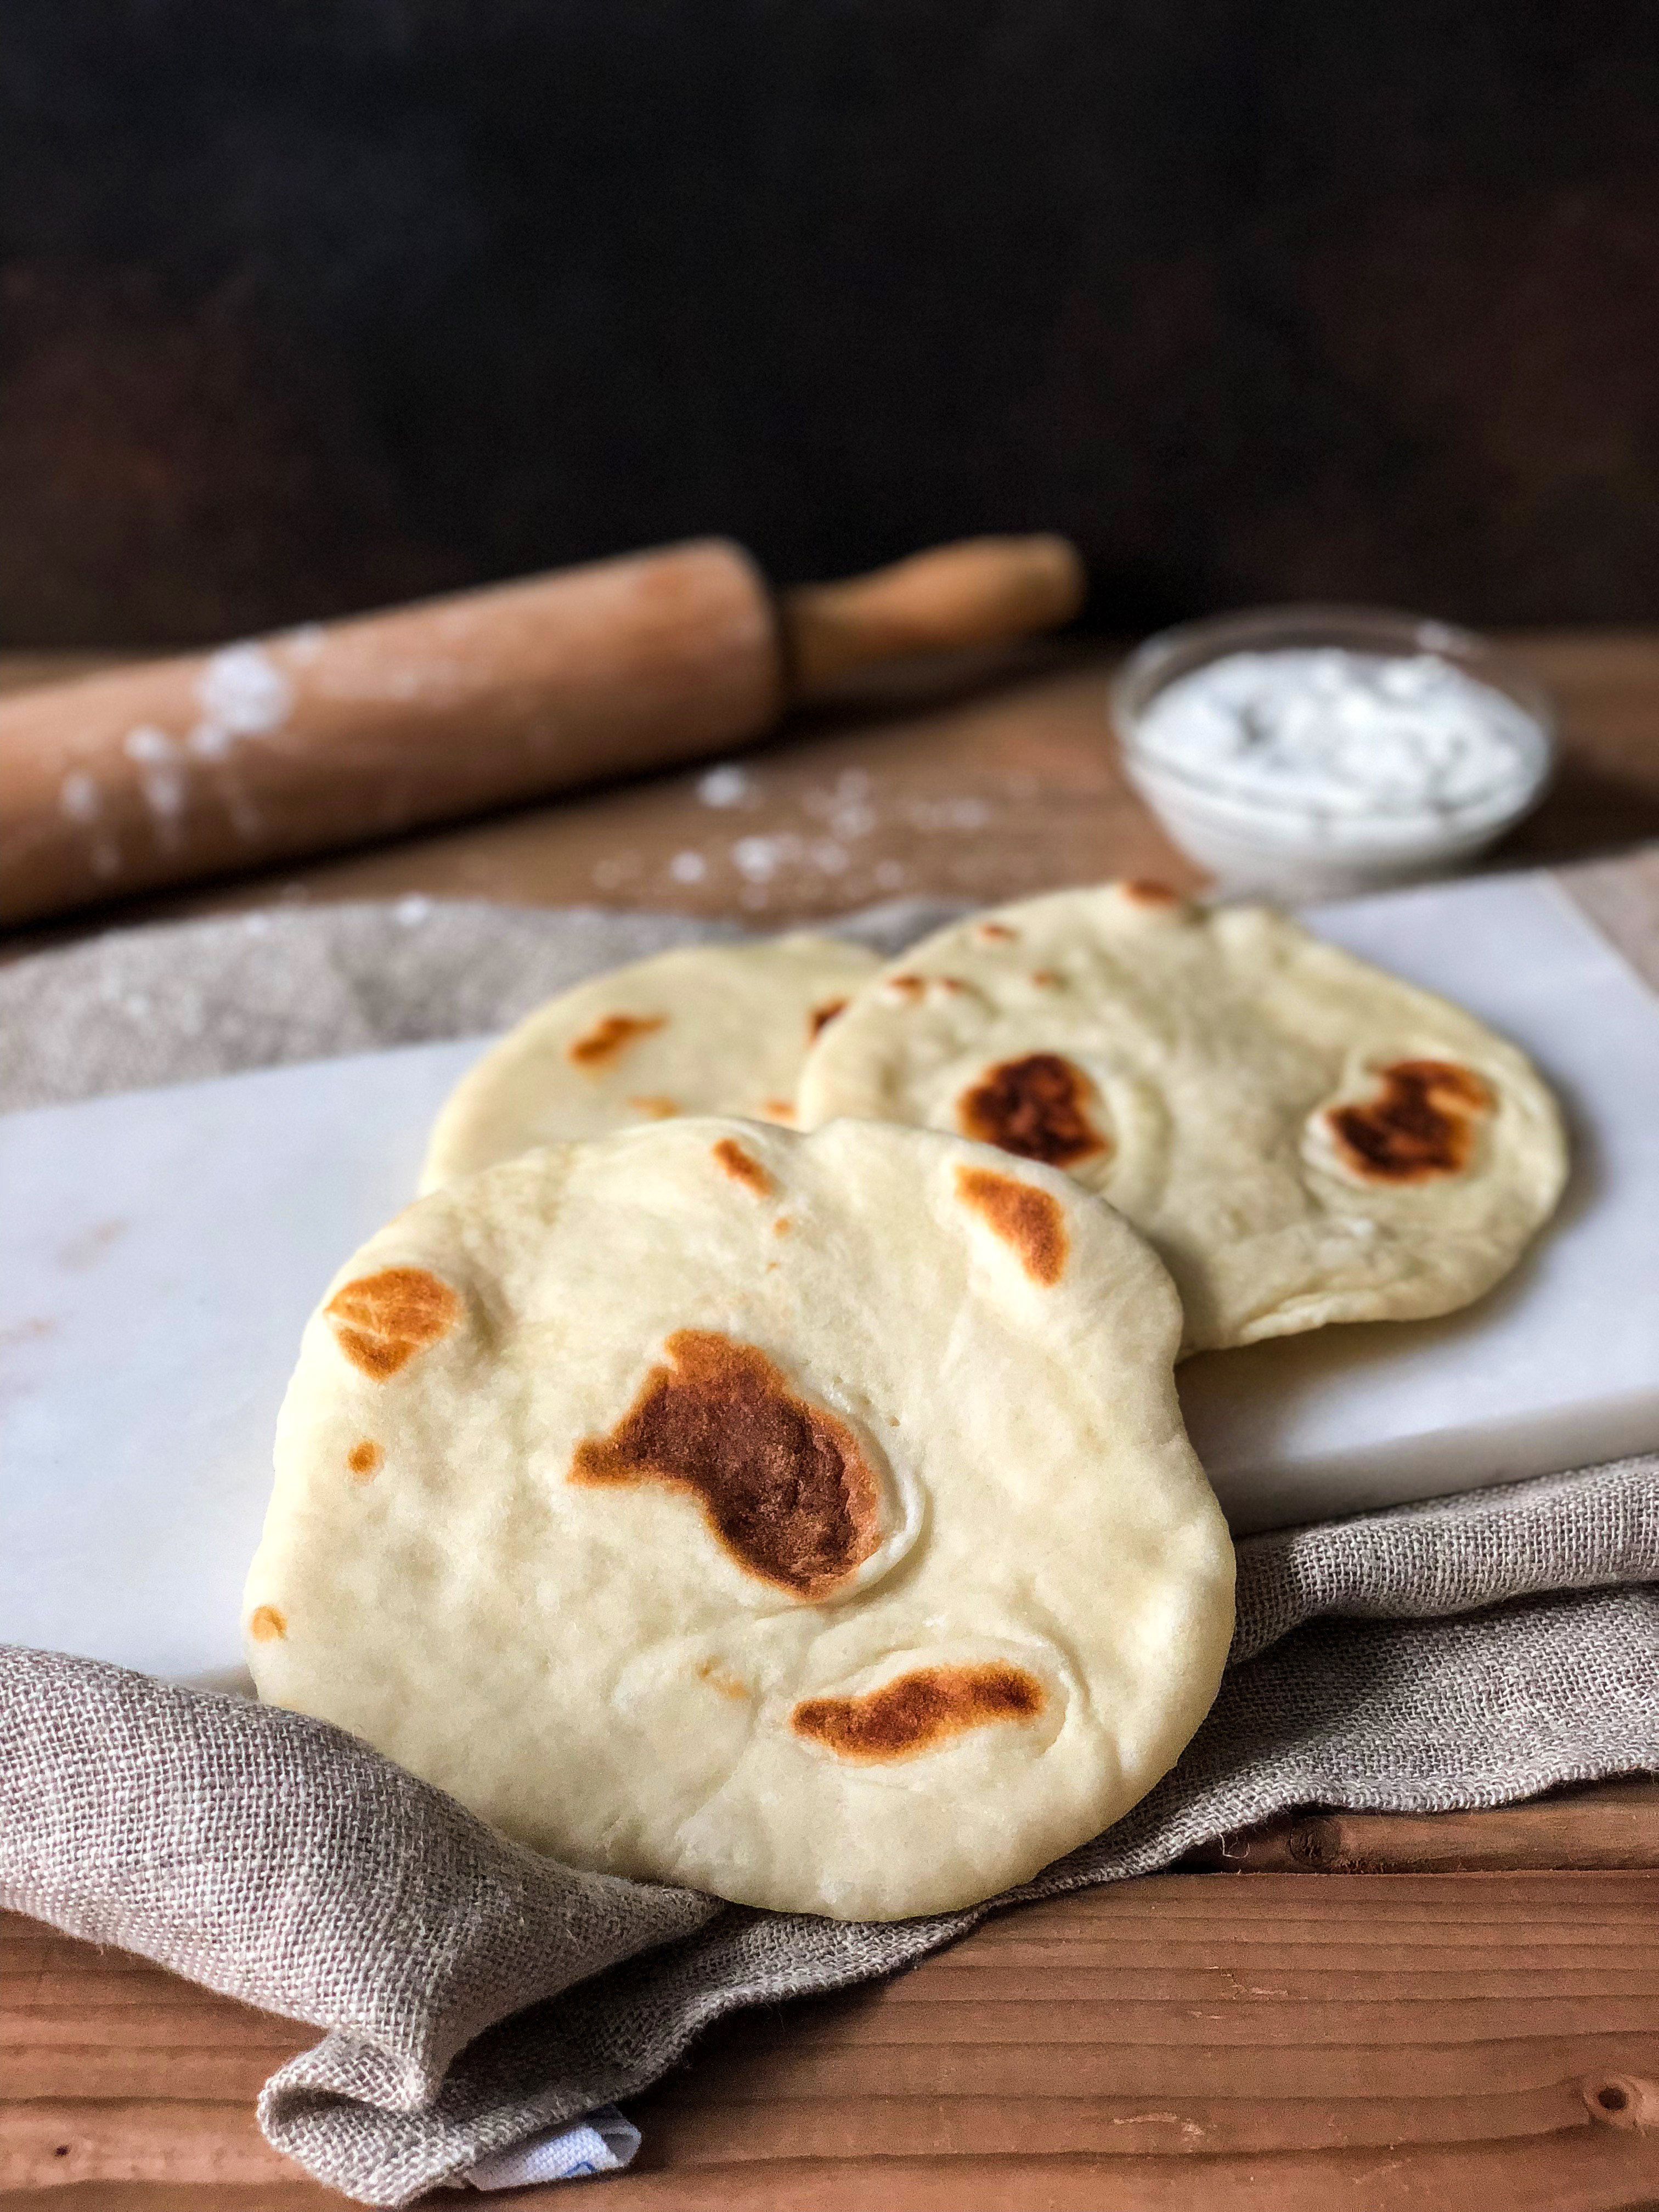
Roll out each ball of dough into a disc which is 6 inches wide and about 1/4 inch thick.
Step 6
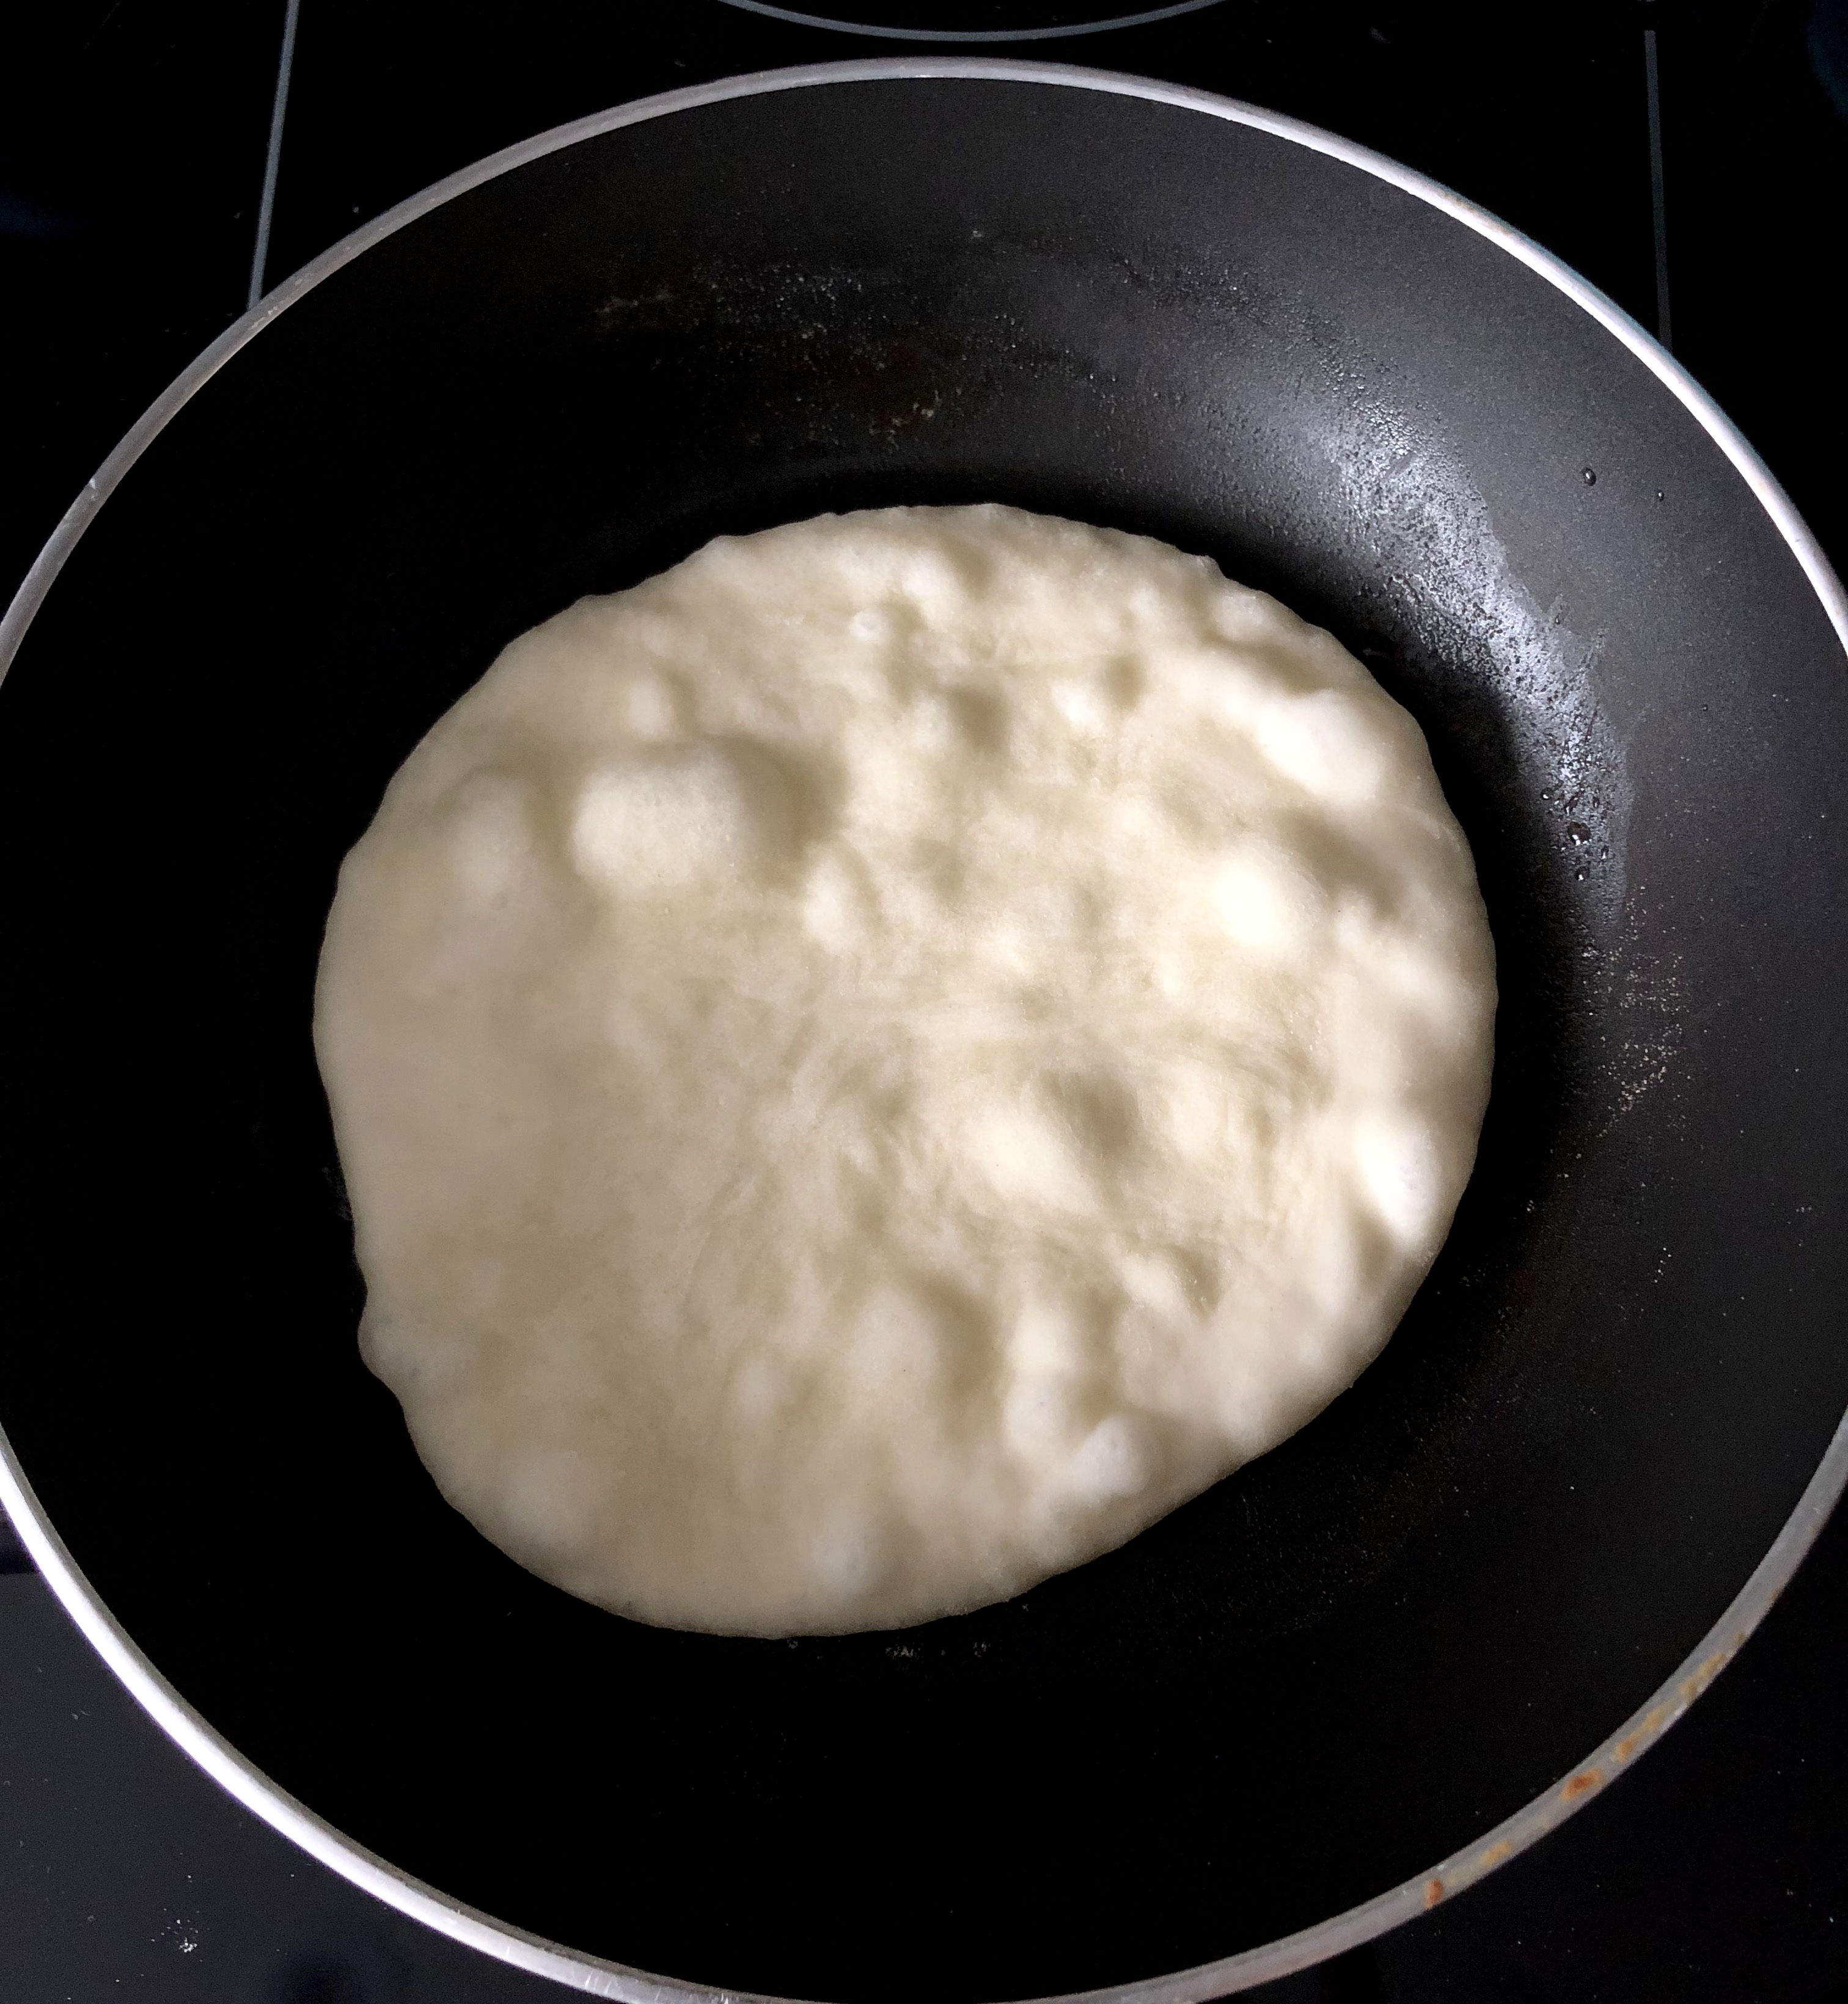
You will cook each pita, one at a time, in a non-stick frying pan brushed with a bit of olive oil. This will take a few minutes per side.
Recipe substitutions
You can add a bit of whole wheat flour to the recipe to make whole wheat pita bread. I would suggest replacing only a 1/3 to 1/2 of the flour with whole wheat flour.
Helpful hints
Making homemade pita bread is actually really easy, but here are some helpful hints and tips that will make the job even easier!
This recipe requires dry yeast. As with all recipes calling for yeast, it is really important that you note the expiry date on the container. If your yeast is past its expiry date, or if there is no bubbling when you mix the yeast with the water, you may as well toss it.
Make sure that your water is lukewarm, and not too hot because that can kill the yeast. You can tell that water is lukewarm by running it over your wrist or hand. It should feel warmer than your skin, but not hot.
Although it is easiest to make this pita bread using a stand mixer and a dough hook attachment, it is not necessary. You can definitely knead the dough by hand. The dough will be a bit sticky, so if you need to you can add a bit of flour (1 tablespoon at a time) to make it easier to manage by hand.
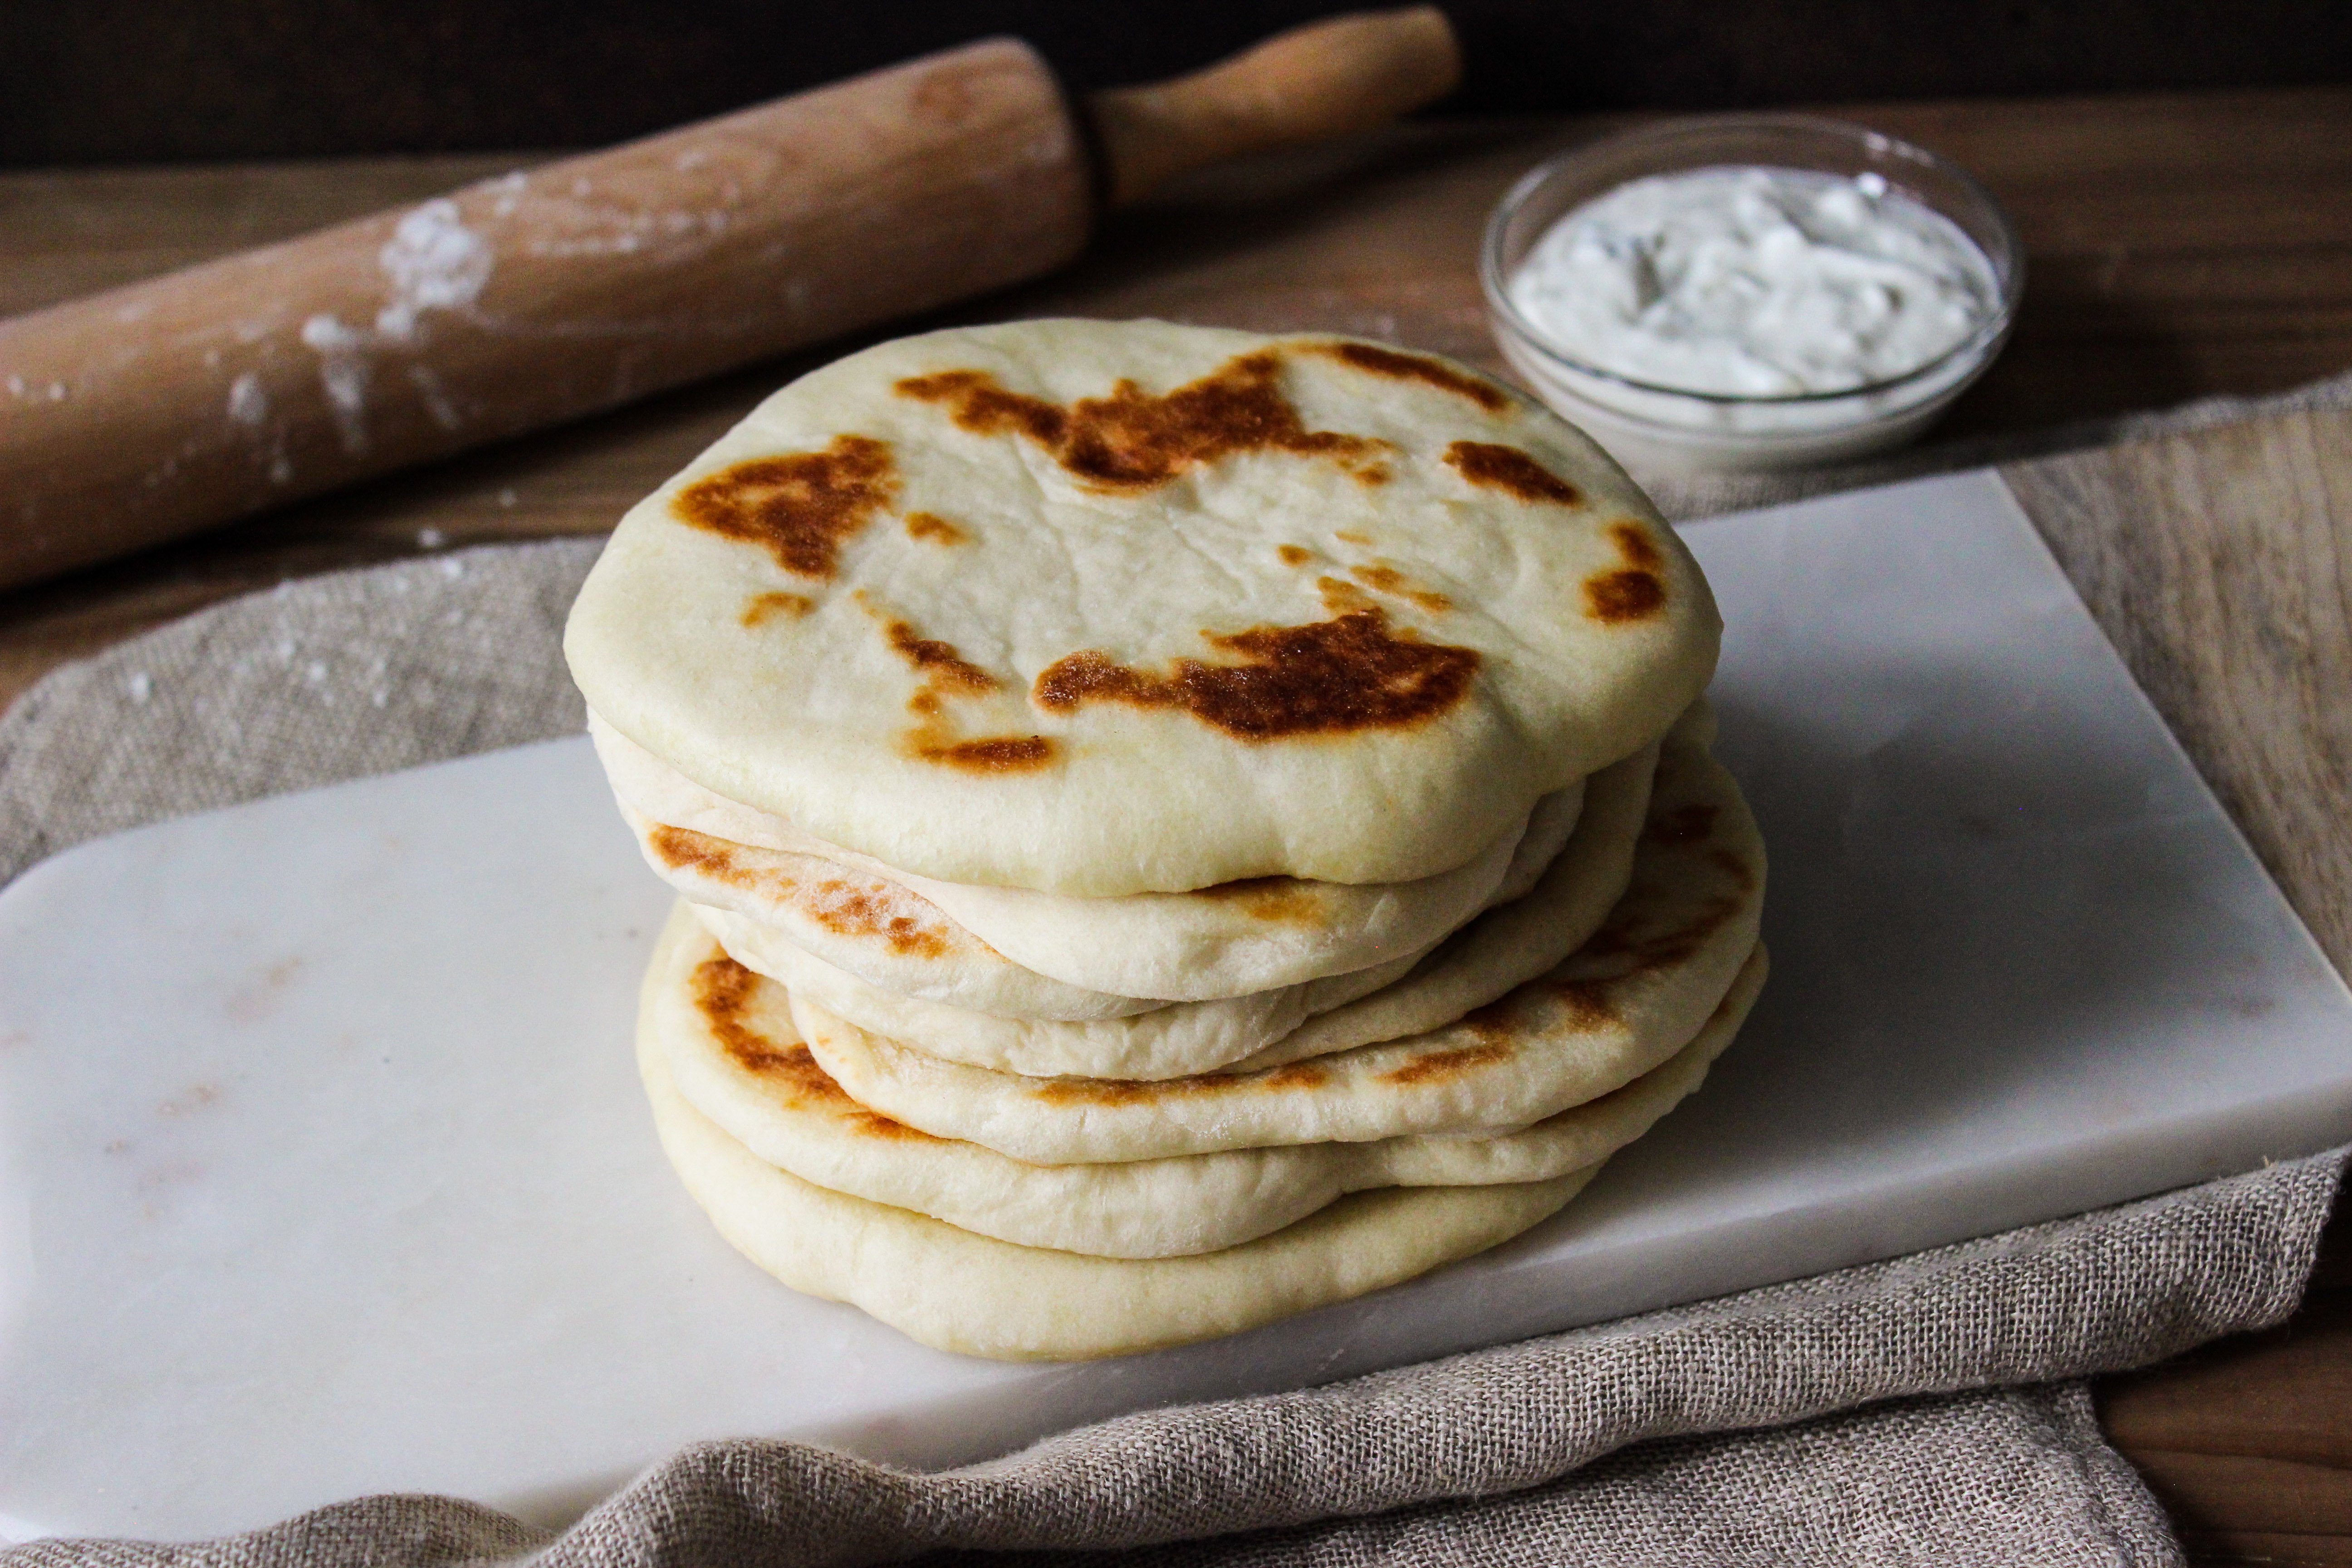
When cooking your pita bread you will possibly see a huge air pocket puff up and this is ideal! However, don’t worry if you only get mini air pockets. The pitas will still be fluffy, they will still be delicious, and will be great for dipping, scooping and wrapping. If you don’t get any puffing up at all it is likely because your skillet was not hot enough.
How to serve
Pita bread is definitely amazing served with homemade Tzatziki and all the other amazing traditional Greek dips and spreads.

I love to use pita bread to wrap up my Pork souvlaki and my Chicken souvlaki. I also like to cut it into wedges and serve it with a Greek salad or a Grilled chicken bowl
Greek pita is the original pita pocket; split a pita apart and fill the cavity with feta and your whole being will be happy. I also love to make a spinach and cheese pita pocket. Pita is a great breakfast-on-the-go when that handy pocket is filled with scrambled eggs, and best late night snack when smeared with some peanut butter, the way Billie‘s husband loves it!
Video – Greek pita bread
Frequently asked questions
What is pita bread?
Pita bread is a soft, round, flat bread common in Greek and Mediterranean cuisine. It is known for the interior pocket that gets created when the water in the dough turns to steam during cooking, causing the bread to puff up.
Is it worth it to make your own pita bread?
Absolutely! As someone who grew up in a Greek home and enjoyed homemade pita bread, but who has also eaten plenty of the store bought versions, I can tell you that nothing compares to homemade! There is nothing quite as fluffy or delicious.
Do I need a stand mixer to make pita bread?
Nope! I often do use my stand mixer just because it is easier, but you can definitely make this recipe by kneading the dough by hand. This is still how my parents do it, and some would argue that it is actually better to do it that way – to really get a feel for the dough. Whatever you choose, I describe both methods in my recipe!
Storing & freezing
Keep any leftover pita bread in a sealable bag. They are best eaten warm so you can reheat them in a dry frying pan or in the microwave. You can also place them in a preheated oven or even a toaster if you prefer, just long enough to heat them through.
To freeze:
- Cool your pita bread completely
- Place parchment paper between each pita bread you will be freezing and transfer to a freezer-safe bag. Press down to remove as much air as possible.
- Freeze for up to 3 months
- Reheat in the microwave or oven, from frozen, when ready to enjoy
Related recipes
If you love this pita bread recipe then I think you will also like these:
Alevropita A quick and delicious recipe that is made with a few simple ingredients, including feta. This is a recipe that quickly disappears!
Grilled bread with oregano and olive oil Next time you fire up the grill be sure to take a few slices of country bread, brush them with olive oil and sprinkle with oregano. Grill them, and enjoy!
Kourkoutopita with trahana I love this classic old-world Greek recipe! It includes something called trahana, and it is easy to put together, and so classically Greek!
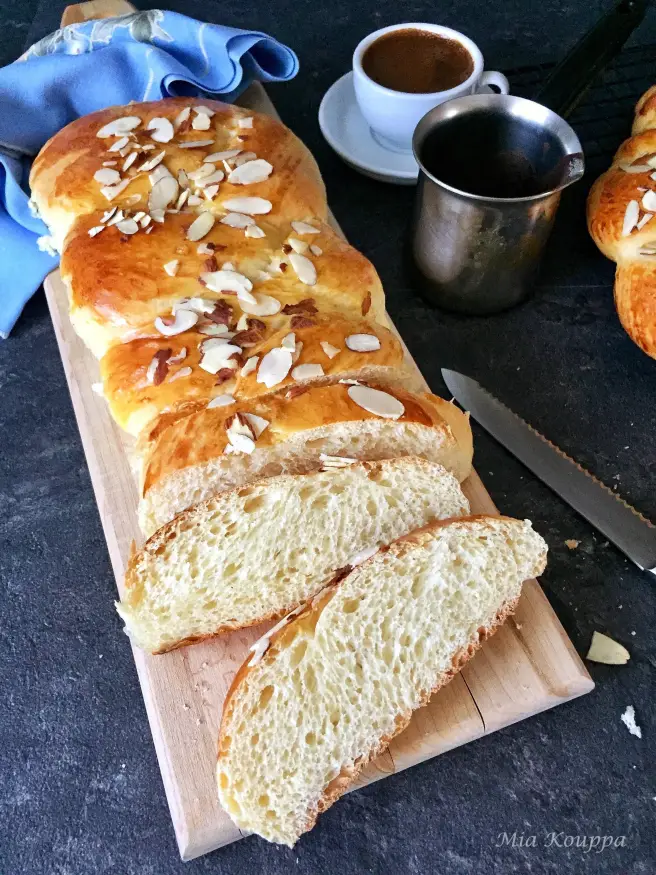
Tsoureki, Greek Easter bread (Τσουρέκι) Usually made at Easter time, I am not sure why we reserve this bread only for that holiday! This sweet bread is so good, and this recipe is perfection. I really need to start making this more often!
We love hearing from you! If you have made our recipes, or if you have a question or comment, or simply want to say Hi!, please leave a comment and star rating below! Also be sure to follow along with us, on Facebook, Instagram and Pinterest. We have lots of fun over there.
This post may contain some affiliate links, which means that we make a small commission off items you purchase at no additional cost to you.
Sign up for our Newsletter
Pita bread
Ingredients
- 2 teaspoons (8 grams) active dry yeast
- 1 cup (250 mL) lukewarm water
- 2 ¼ cups (337 grams) all-purpose flour
- 1 teaspoon sugar
- 1 ½ teaspoons salt
- 1 tbsp (15 mL) olive oil
Instructions
- Combine the yeast and water, stir gently and let sit approximately 5 minutes, to dissolve. You should see some bubbling on the surface of the water.2 teaspoons (8 grams) active dry yeast, 1 cup (250 mL) lukewarm water
- In a stand mixer, add the flour, sugar, salt, the oil and the yeast mixture.2 ¼ cups (337 grams) all-purpose flour, 1 teaspoon sugar, 1 ½ teaspoons salt, 1 tbsp (15 mL) olive oil
- Using the bread hook attachment, mix on low speed, until the dough is soft and smooth, about 5 minutes.
- Alternatively instead of using a mixer, you can mix everything in a bowl, and knead by hand. Keep in mind that the dough will be a little sticky. If it’s too sticky however, and sticks to the side of the mixing bowl, or your hands, add a tablespoon of flour at a time, to a maximum of 1/4 cup.
- Form a ball with the dough and place it in an oil lined bowl. With clean hands, rub a little olive oil over the dough. Cover with tea towels and let rise in a warm, draft free place until it has doubled in size. This should take 2 to 3 hours.
- Once your dough is ready, knead it gently, and turn it out onto a flat surface. Cut the dough into 8 equal pieces. Shape each piece into a ball, flatten them a bit with the palm of your hand, and place on a cookie sheet. Cover with a tea towel and let rise again for 15 minutes.
- On a very lightly floured surface, take one dough piece at a time, flatten it with your hand and then roll it into a flat circle with a rolling pin. You should end up with a circle of dough which is about 6 inches wide and 1/4 inch thick.
- Add a little olive oil onto a non-stick pan and heat to medium-low. Cooking one pita bread at a time, cook the first side for a minute or two (we like to rotate the pita every 30 seconds), until the bread begins to puff up in places. Flip the bread and cook the second side for another minute or two, rotating the pita every 30 seconds. Brush the pan with olive oil after you have cooked two pita breads. Repeat the process until you have used all your dough.
- While you are finishing up with your pita breads, place the ones you have cooked on a plate and cover them gently with a paper towel.
- If you don’t eat them right away, let your pitas cool and place them in a resealable bag. Because these are best eaten warm, you can reheat the pita in a frying pan or microwave when you are ready to enjoy them.
- Enjoy!
YUM!!!!
Thanks Jeanne! We agree…these are definitely “yum” 🙂
I just want to make these pitas immediately, Helen & Billie! I have never made them in a frying pan. This is going on my ‘must try’ list! Thanks so much for sharing another wonderful recipe.
Thank you so much Denise! We hope you love them as much as we do! Making them in a frying pan, gives them a completely different taste, which we hope you enjoy 🙂
They look great! ❤ Your step by step is very well presented. Thanks for sharing. 🙂
Thank you so much! We’re so happy to hear that the step by step photos are helpful. We try hard to make our recipes easy to follow! Have a great day 🙂
Yesterday I made homemade gyros and could not find pita at the supermarket so I decided to try your recipe. I am never going back to store-bought pita again,the whole family loved them! Thank you for your great recipes I’ve tried several and have never been disappointed!
Hi Taso!! Thank you so much for your note! We’re so happy you tried our pita! We’re so glad you and your family are enjoying our recipes! Kali Anastasi 🙂
My son and I just made the Pitas. They are absolutely delicious. We will definitely make them again. My only regret is I wish I had doubled the recipe they were so good. 😄❤️🇨🇦
Oh that’s amazing Lori!! We are so happy to hear that you enjoyed them, and that you made the pita bread with your son! Thank you so much for taking the time to let us know!
Can I make these with gluten free flour?
Hi Patty, we’ve never tried to so can’t know for sure but we imagine that this would work. xoxo
Can the dough be kept in the fridge over night, if I wanted to cook half for dinner one night and the other half for dinner the next night ??
Perfect!
Yay! Thanks for giving the recipe a try 🙂 So happy that you loved it!! xoxo Helen & Billie
Can you use ‘fast action’ yeast (doesn’t need to be reconstituted with water) and if so, do you just leave out the water?
Hi Diane – that is a great question. Unfortunately we can’t advise you with much certainty as we have not done the substitution you are suggesting. Not sure it would make sense to omit the water however – we add 1 cup in the dough mixture. Seems like a lot to just leave out. Hope that helps! xoxo Helen & Billie
Thanks for getting back to me. I’ll try it with the water and let you know 🙂
Good luck! And yes 🙂 Please let us know! xoxo Helen & Billie
This was a simple but delicious. The pita bread were very soft and paired nicely with my homemade gyros. I am using the leftovers a base for pizzas! I did use 2 pans to make the pita quicker. Another great Mia Kouppa recipe!
Oh yay!! So glad that you tried the recipe and loved it Irene 🙂 Thank you for taking the time to comment – we truly appreciate it! Hope you continue to find much to love here with us 🙂 xoxo Helen & Billie
Recipe is easy to follow and allowed me to make pita exactly as pictured as a first timer. 10/10
Wonderful! We are so happy that you found the recipe easy to follow 🙂 We try hard to make sure that even novice cooks and bakers have success with our recipes, so your feedback is super encouraging! Hope you continue to find much to love here with us! xoxo Helen & Billie
During a fasting season, will this recipe still work without oil? Or do you have a different recipe for that?
Hi there! Great question. If you are abstaining from only olive oil, then you can swap it out for vegetable oil. If you are avoiding all oil then you can use the same amount of melted margarine, or omit it all together. There will be an impact on the final product, but it should be totally fine! Enjoy! xoxo Helen & Billie