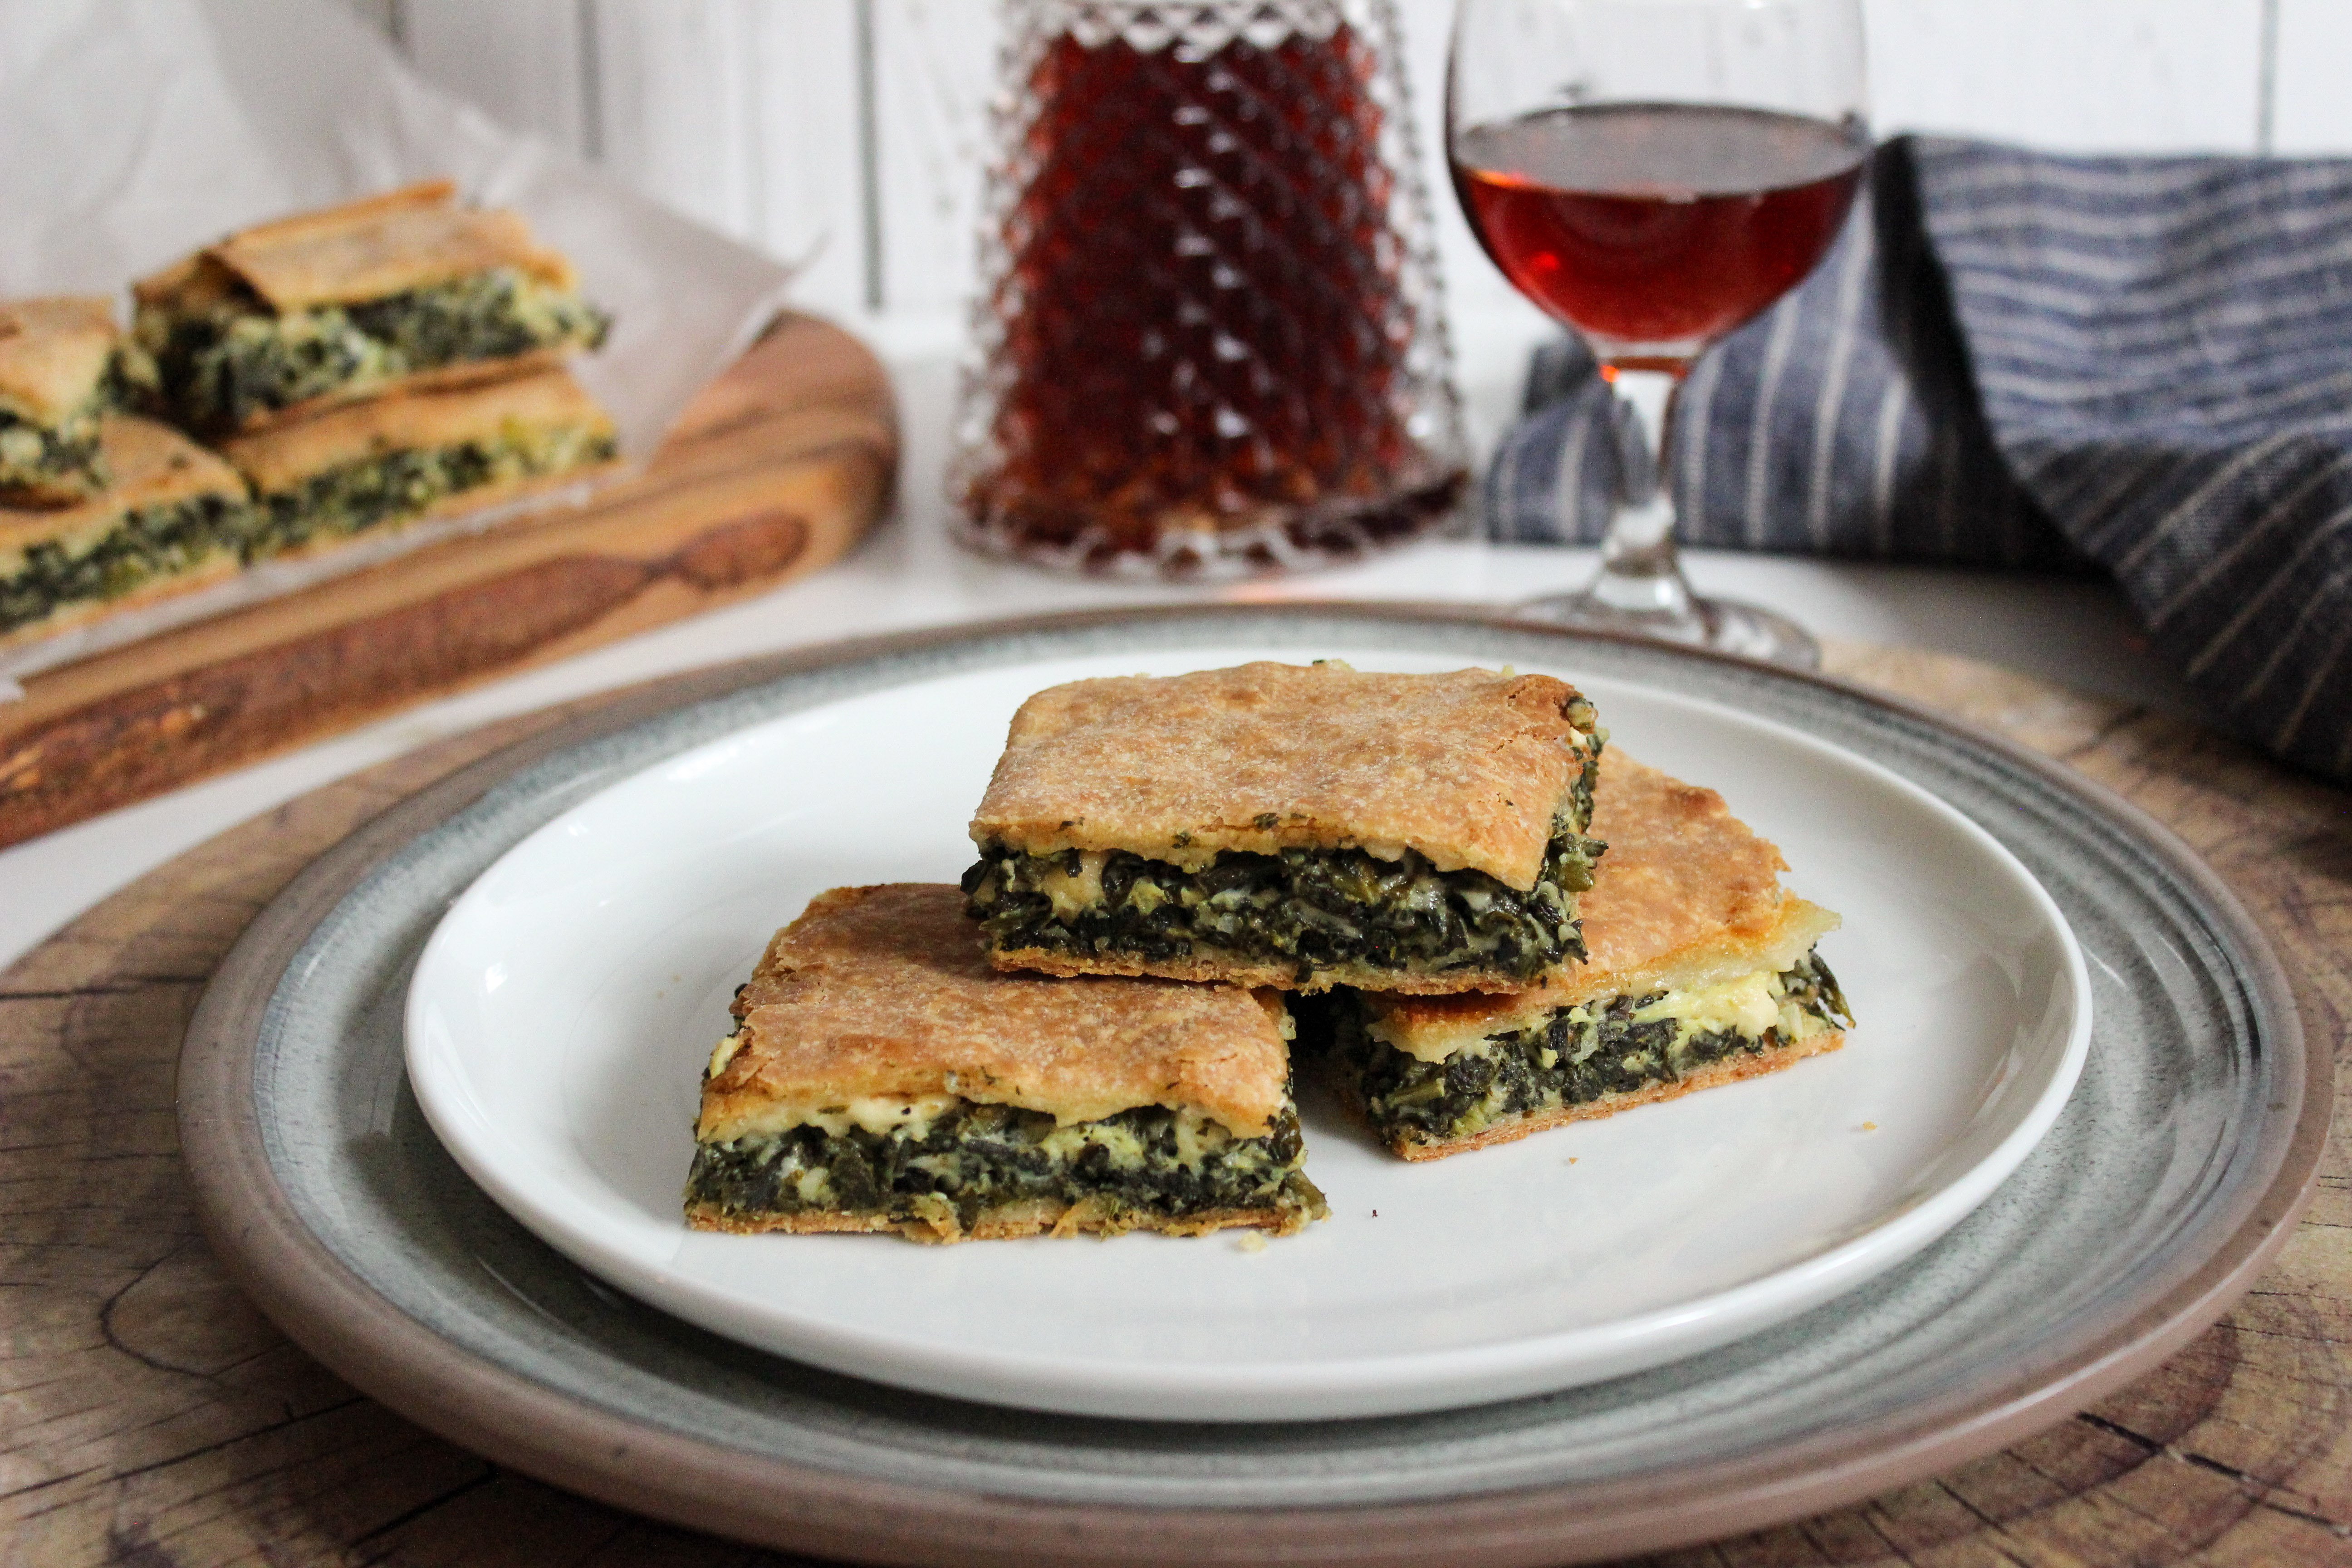
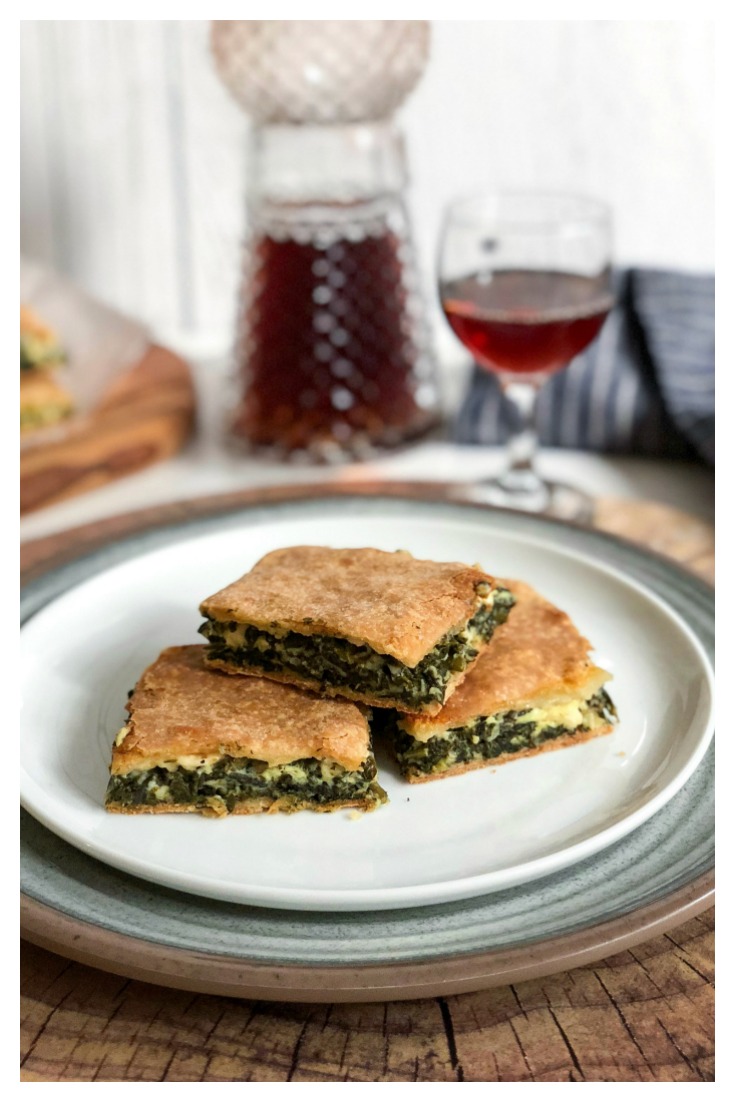
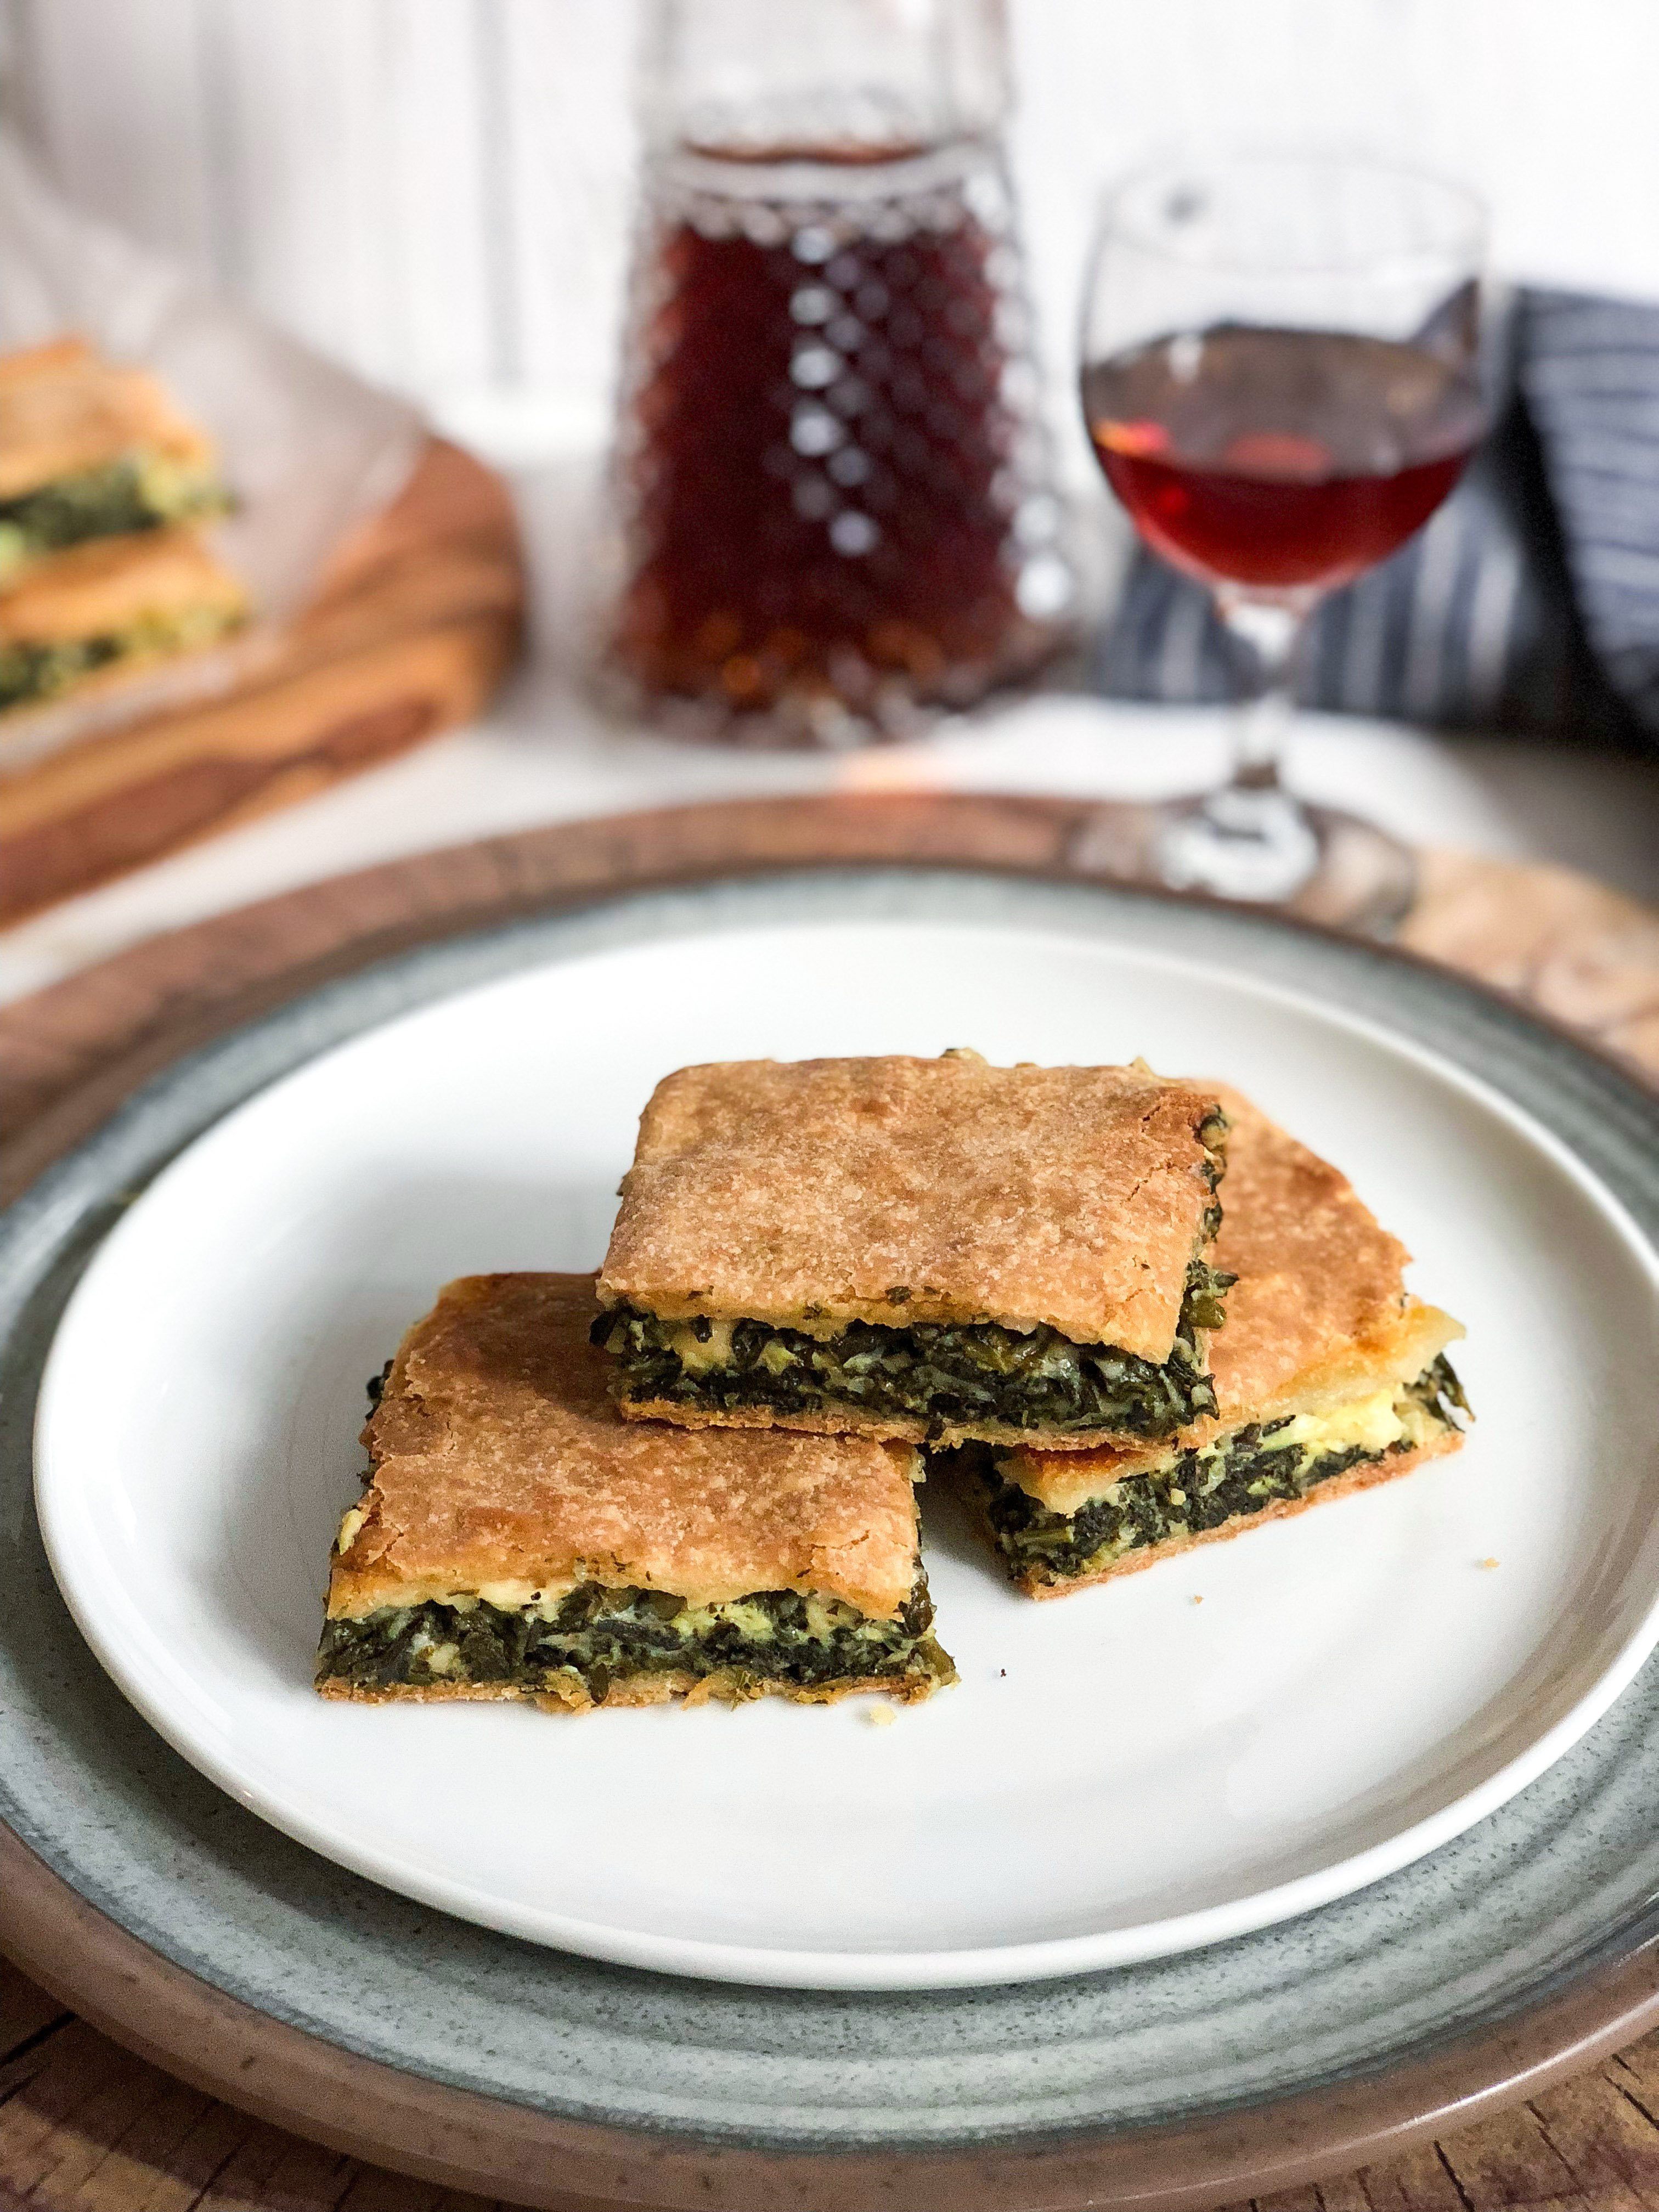
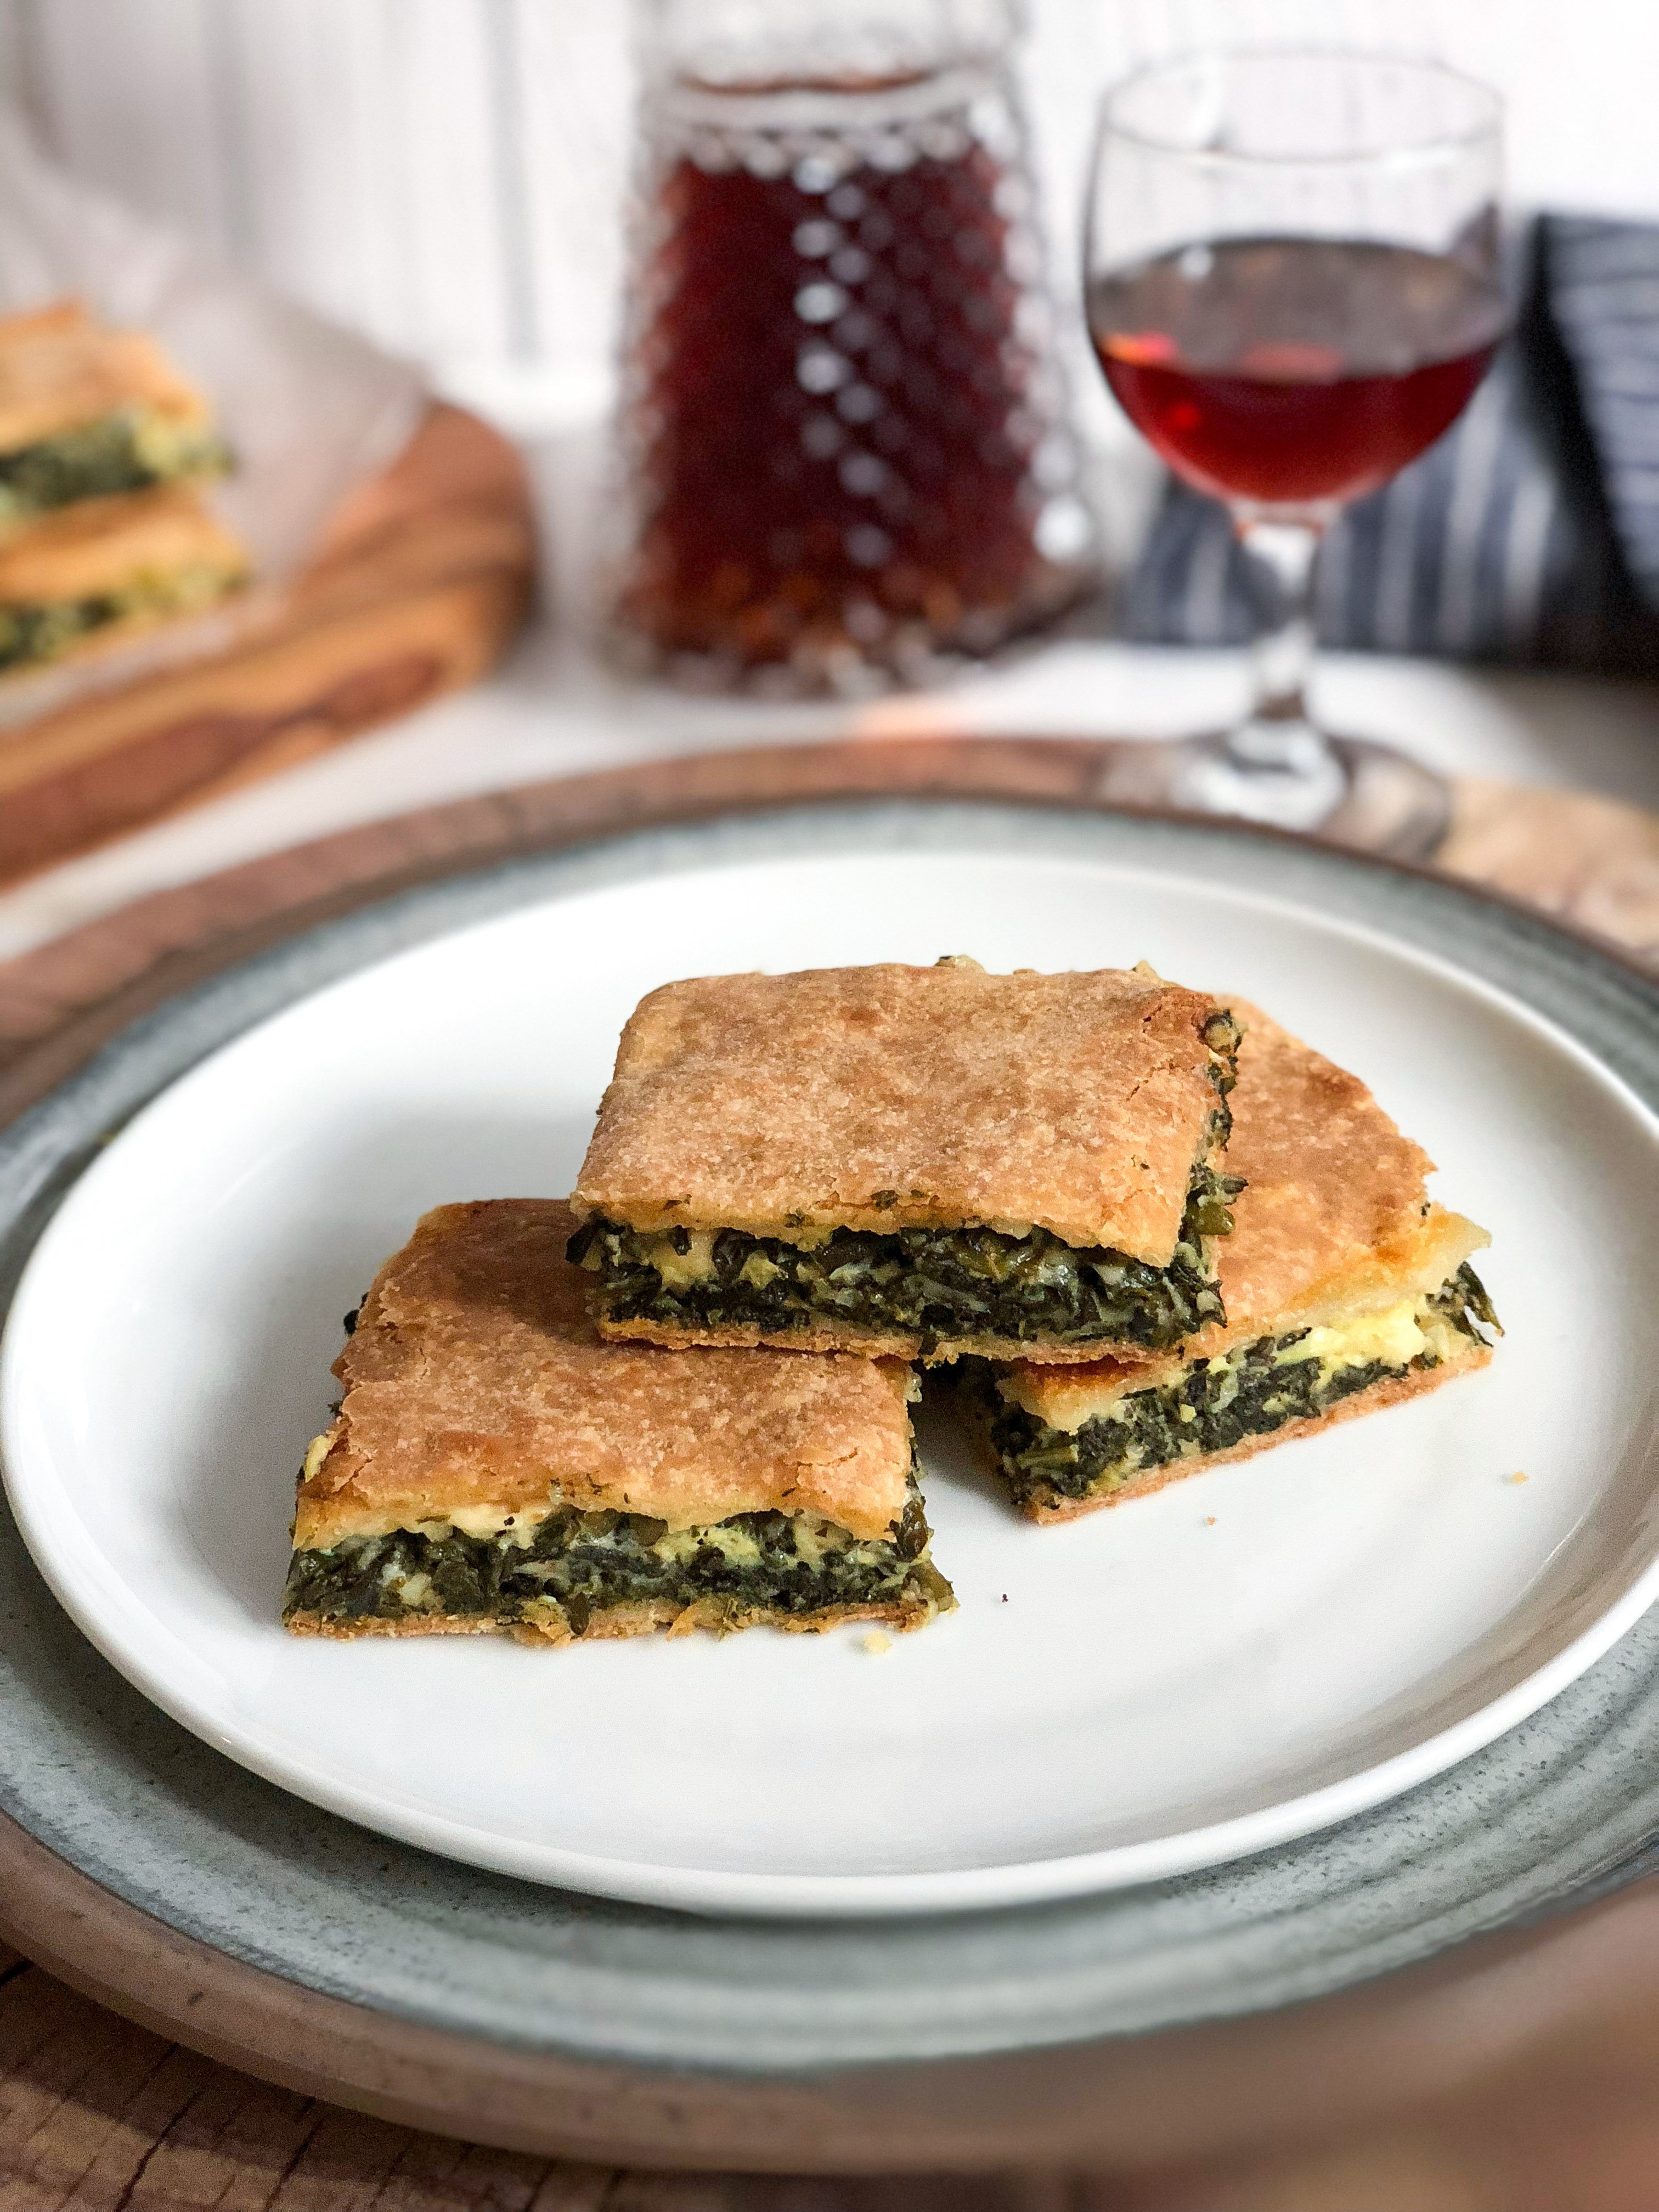
Spanakopita (Σπανακόπιτα)
Spanakopita or spanakotyropita (because it contains cheese) is the quintessential Greek pie. Made with homemade phyllo that is rolled thin and baked in a pan until golden brown. Learn how easy it is to make the filling and to roll your own dough for this traditional Greek recipe.
Growing up in a Greek home it was never a struggle to eat our greens. We have always loved spanakopita, and whether our parents made little spinach triangles, or offered us a version of spanakopita with rice instead of cheese (keeping it perfect for lent), we gobbled it all up. Spinach was also the star of dishes like spanakorizo and black-eyed peas and spinach, which we loved to varying degrees when we were young and difficult. Now that we are older, and busy, we sometimes turn to what I call spanakopita hacks, like this Sheet pan spanakopita quesadilla.
Why I love this recipe
It represents Greek cooking
Spanakopita truly is the King (or Queen) of Greek cuisine. I doubt that there is a food more loved than this. Regardless of culinary and cultural background, and whether or not you grew up in a Greek household, you have probably heard of spanakopita. The lucky amongst us will have also tasted it, and the most fortunate know how to make it on their own, so that it can be enjoyed whenever the craving hits. Spanakopita is the reason Greek parents can’t relate to other parents when they say “You know how kids are! We have to puree and sneak vegetables into everything…Jack and Jill won’t touch anything green! Kids, right?!” Wrong. I think Jack and Jill just need to be offered a piece of spanakopita.
Key ingredients
For the filling
Spinach It is incredible how much spinach shrinks when you cook it! I tend to buy baby spinach when I can, because then I don’t have to deal with tough stems that would need to be cut off. Of course, if I can get my hands on spinach grown in the garden, I go for that.
Green onions Also called spring onions or scallions, I use the white and green parts for a delicate flavour.
Fresh herbs Many fresh herbs would work well here but I use parsley, dill and mint for amazing flavour.
Eggs The eggs really help to bind the filling together.
Feta Adding feta makes spanakopita so delicious. Of course, I only use Greek feta, and you can learn all the reasons why by reading about feta facts.
Bread crumbs I like to add unflavoured bread crumbs to my filling because they add a bit of bulk, but more importantly the absorb any excess liquid. This helps ensure that you don’t end up with soggy phyllo.
Olive oil Adds body and flavour to the filling.
Salt & pepper Everything savoury is better with salt and pepper. Basic seasonings that add so much to a dish.
For the phyllo
Flour When I make phyllo I use regular all-purpose flour, sometimes called plain flour. It is easy to find, not too expensive and so versatile.
Water Regular room temperature tap water works well here.
Olive oil I add Greek olive oil to my phyllo dough for the flavour.
Red wine vinegar Adding vinegar to the dough helps to make it less elastic by breaking down some of the gluten bonds. This makes it easier to roll it out thinly.
Eggs This phyllo dough is rich and the eggs also help slow down the gluten development of the dough.
Milk I add milk (any type of dairy milk will do) to the phyllo dough for moisture, and flavour.
How to make it
Step 1
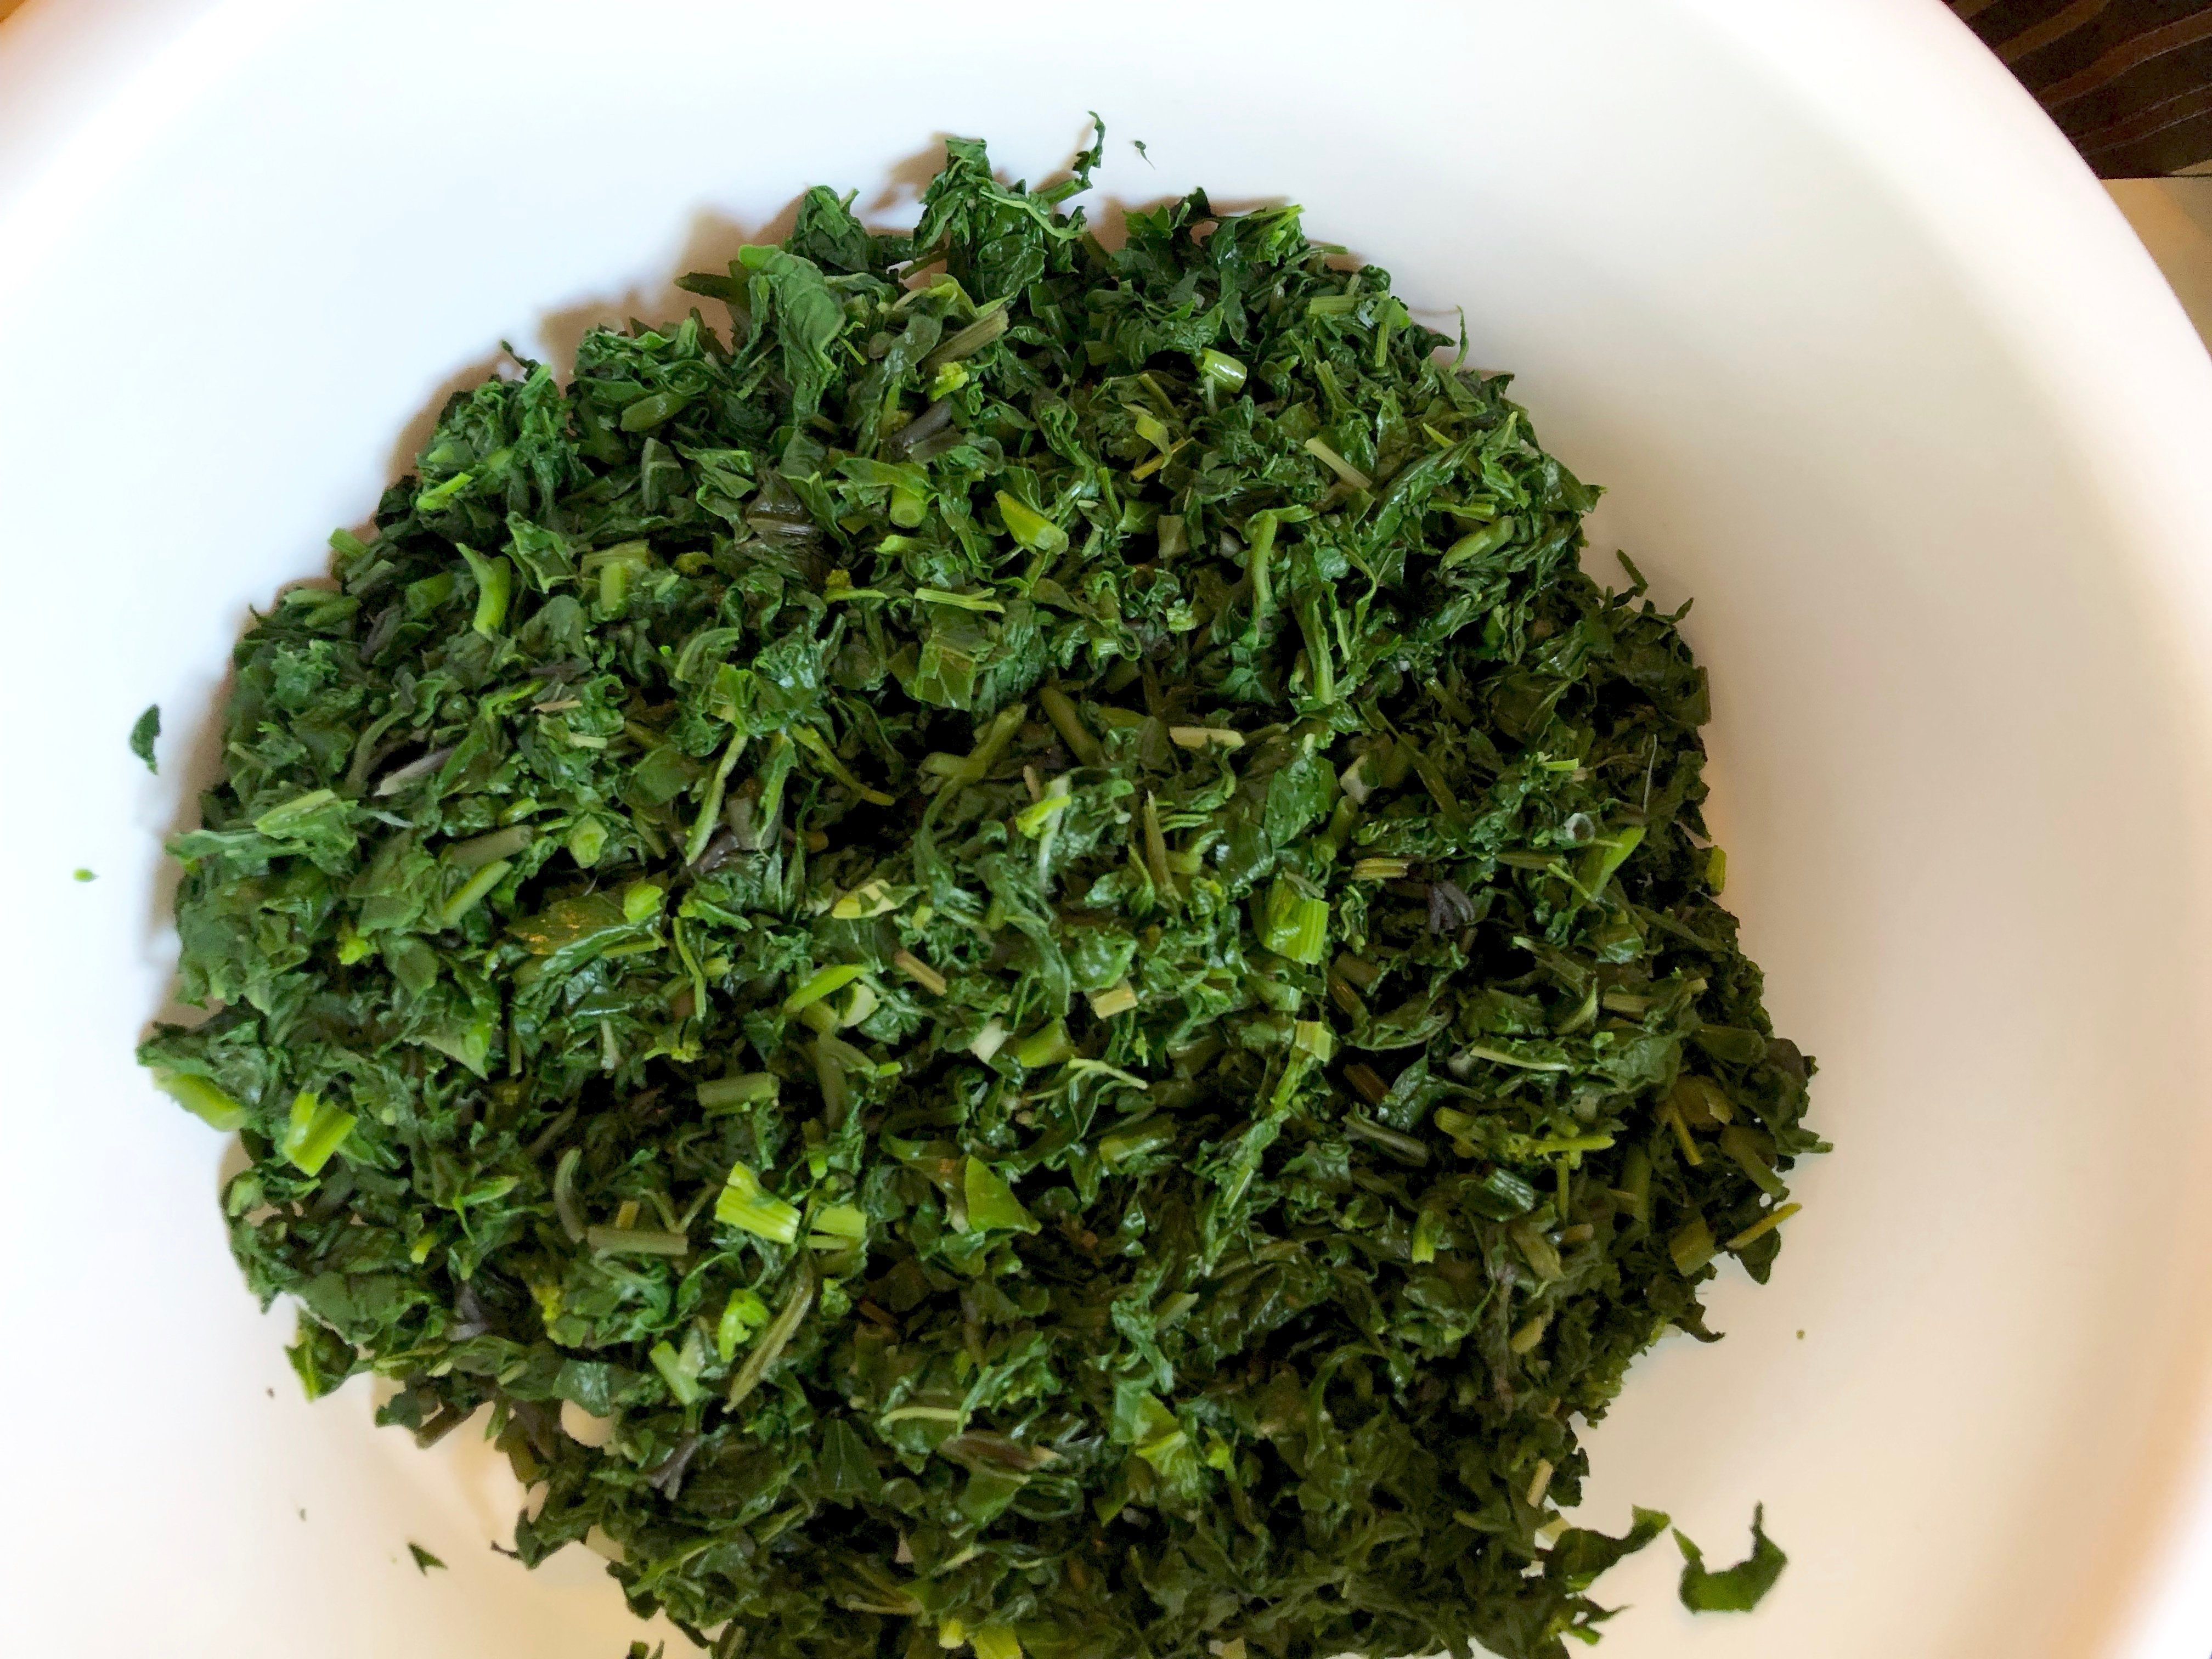
I start by preparing the filling for the pita. I wash my greens well (spinach, green onions and herbs) and plunge them into a pot of boiling water for 30 seconds. I then drain them and set aside to cool. Once I can handle them I squeeze out as much water as possible. I find it helpful to use a piece of cheesecloth or fine tulle to do this. Otherwise, you can simply use your hands. Removing as much water as possible is very important.
Step 2
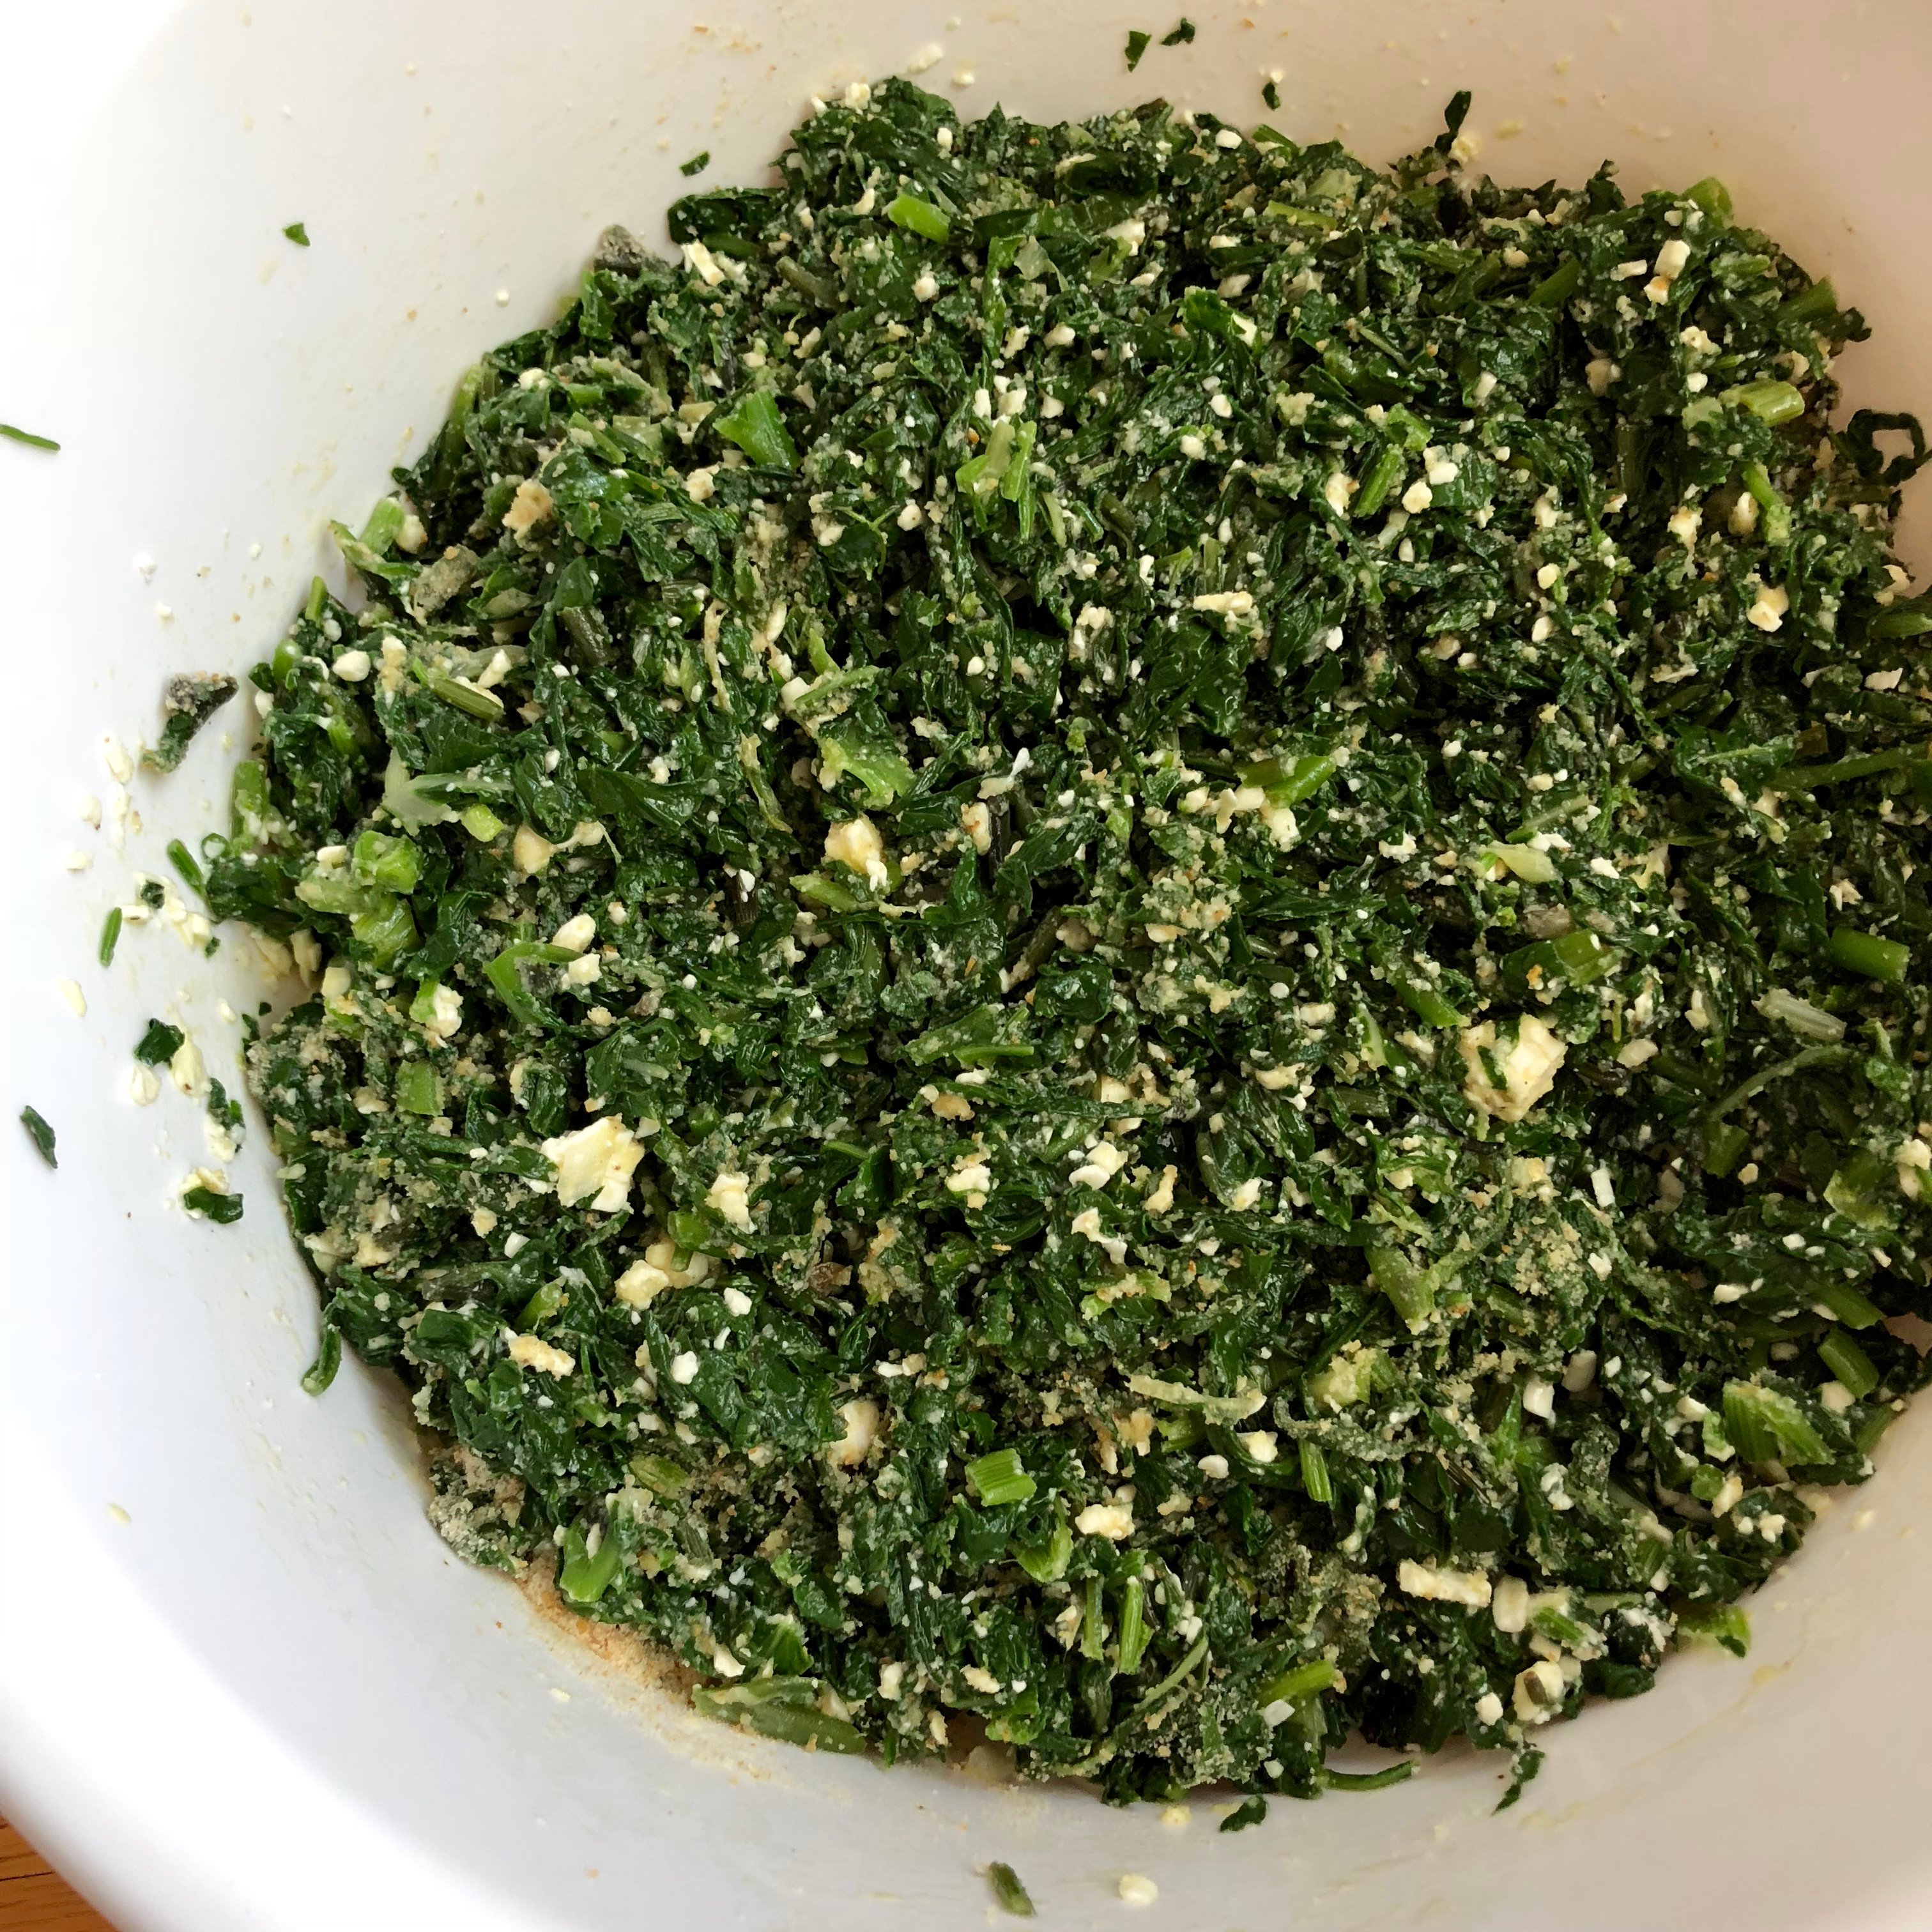
I then place my greens in a large bowl and add feta, eggs, olive oil, bread crumbs, salt and pepper, and stir to combine.
Step 3
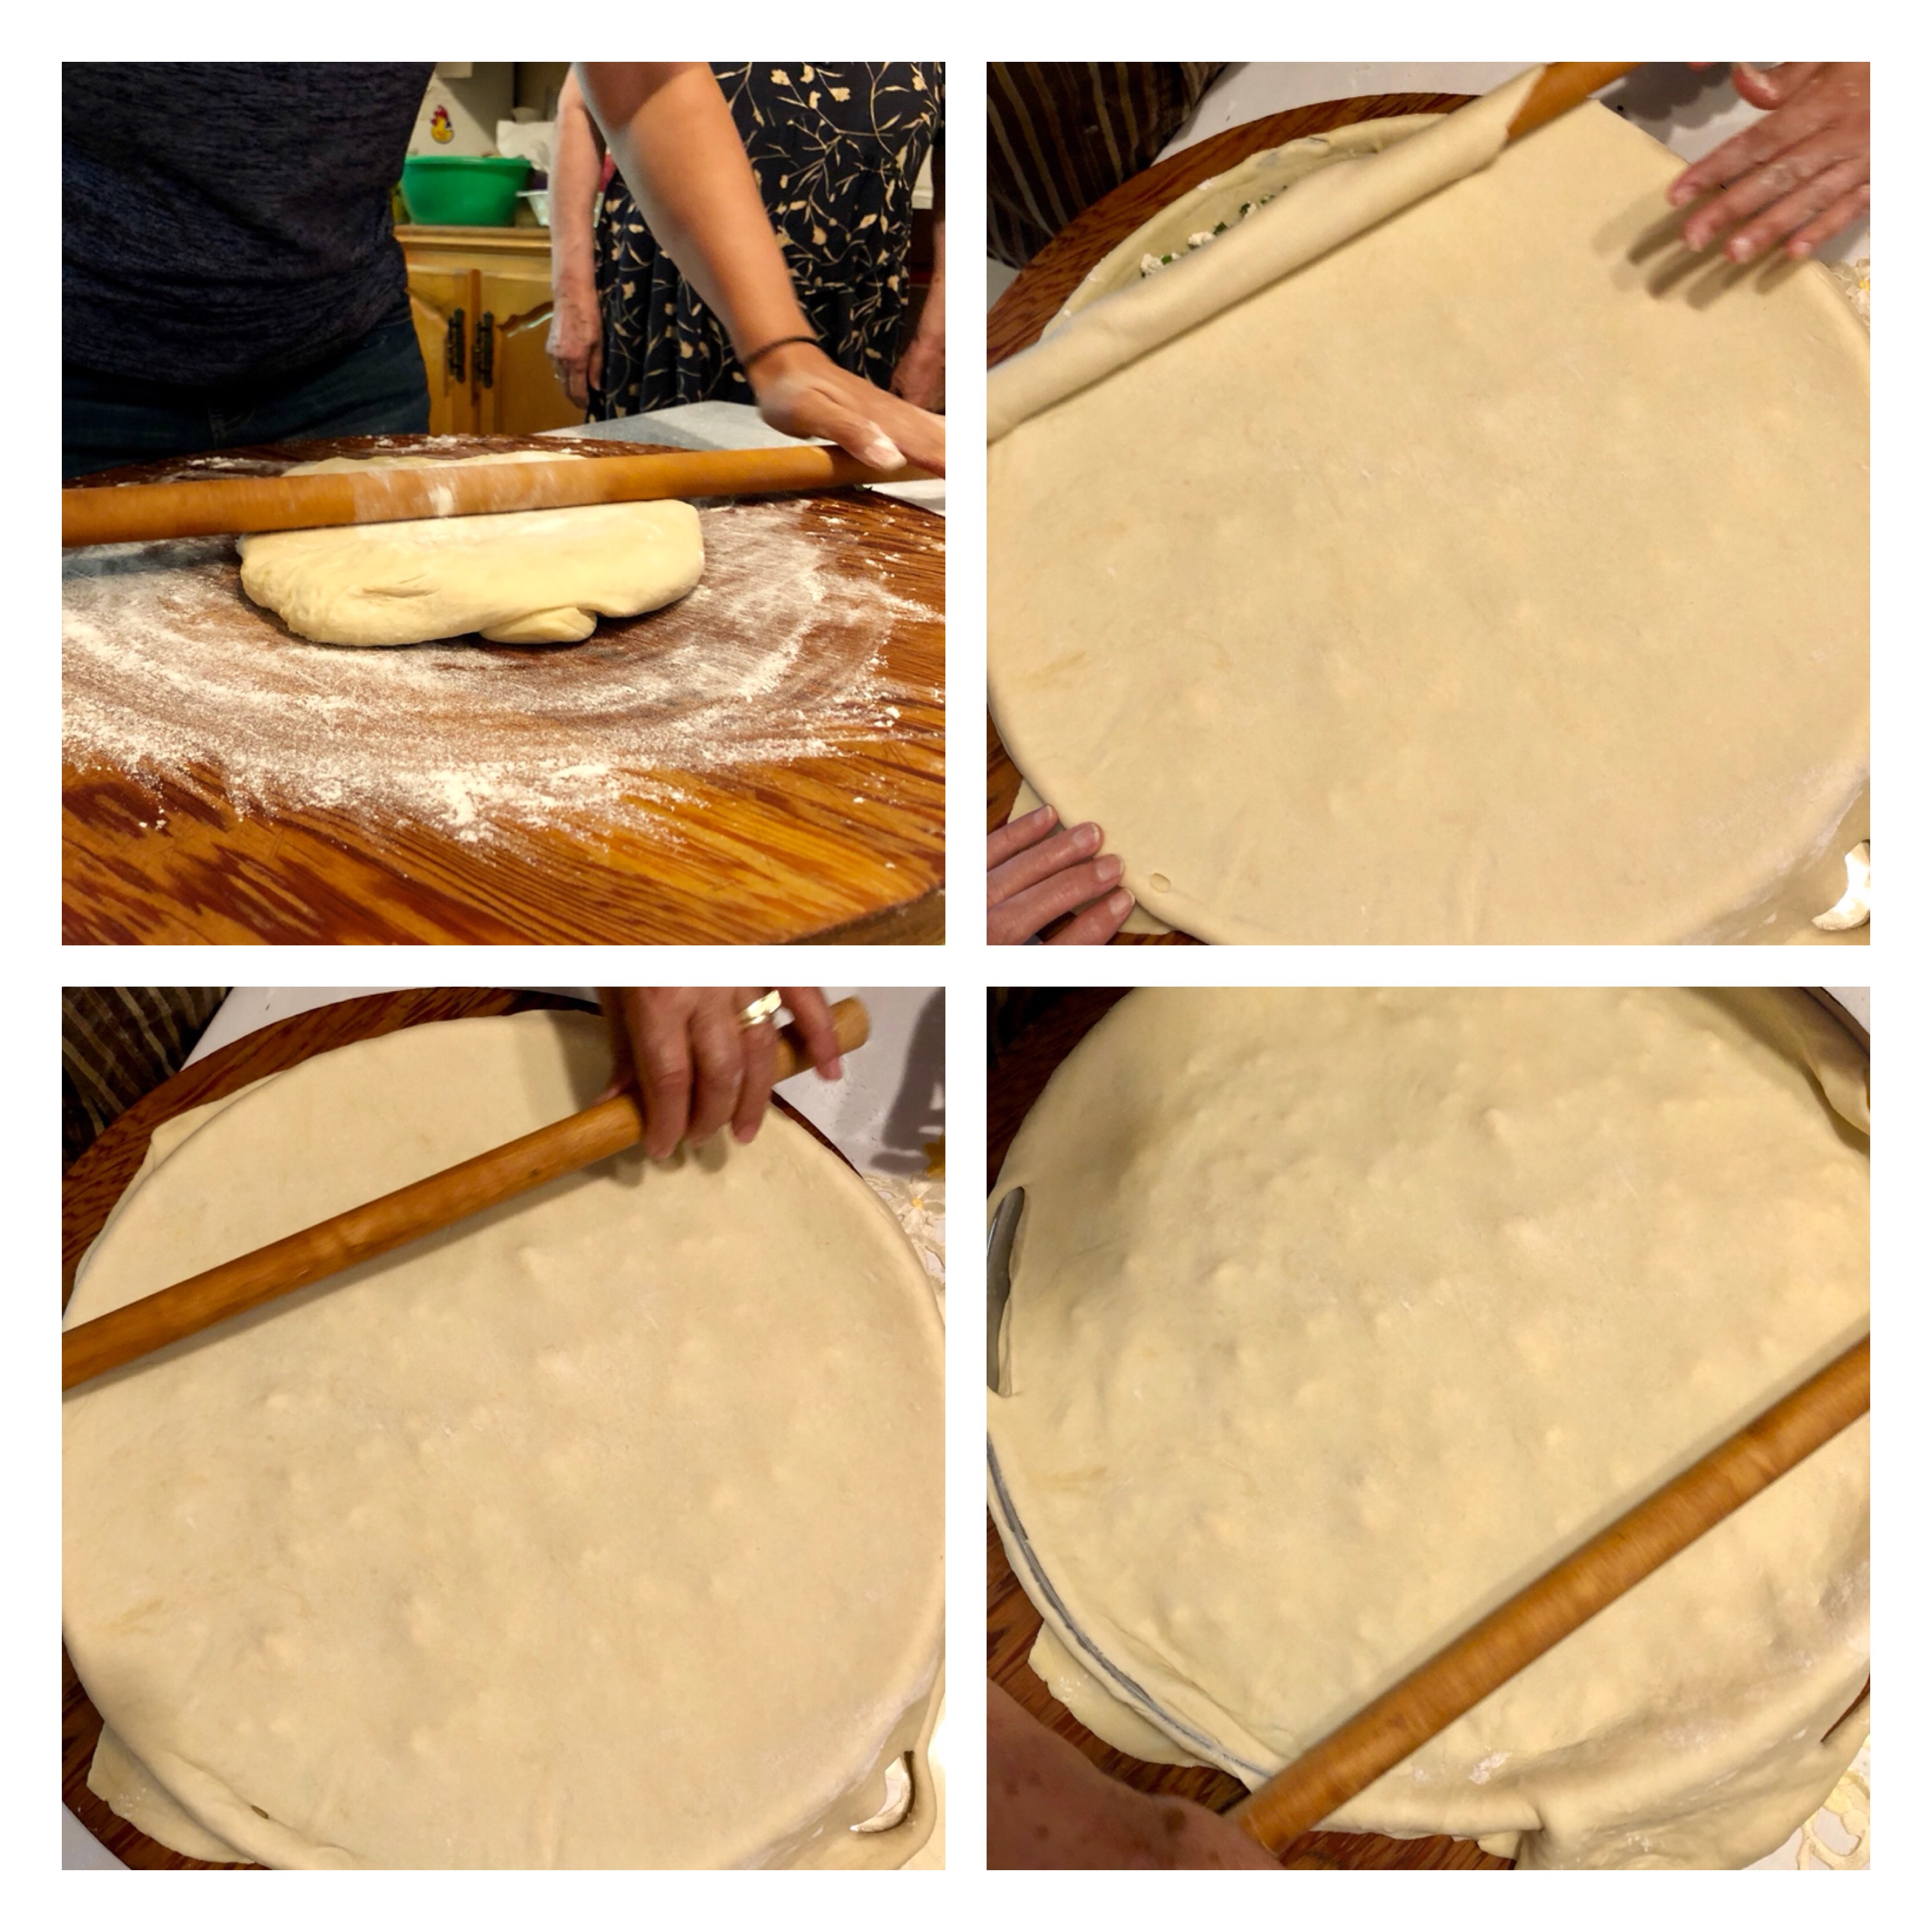
Next I begin making my phyllo. In a large bowl I sift the flour and add in the water, olive oil, red wine vinegar, beaten eggs, and milk. I then knead well until my dough comes together; this will take several minutes. Sometimes I need to add a bit more flour so that the dough is malleable but not too stiff.
Step 4
Preheat oven to 350 degrees Fahrenheit. For me, this is the best temperature to bake pita.
Step 5
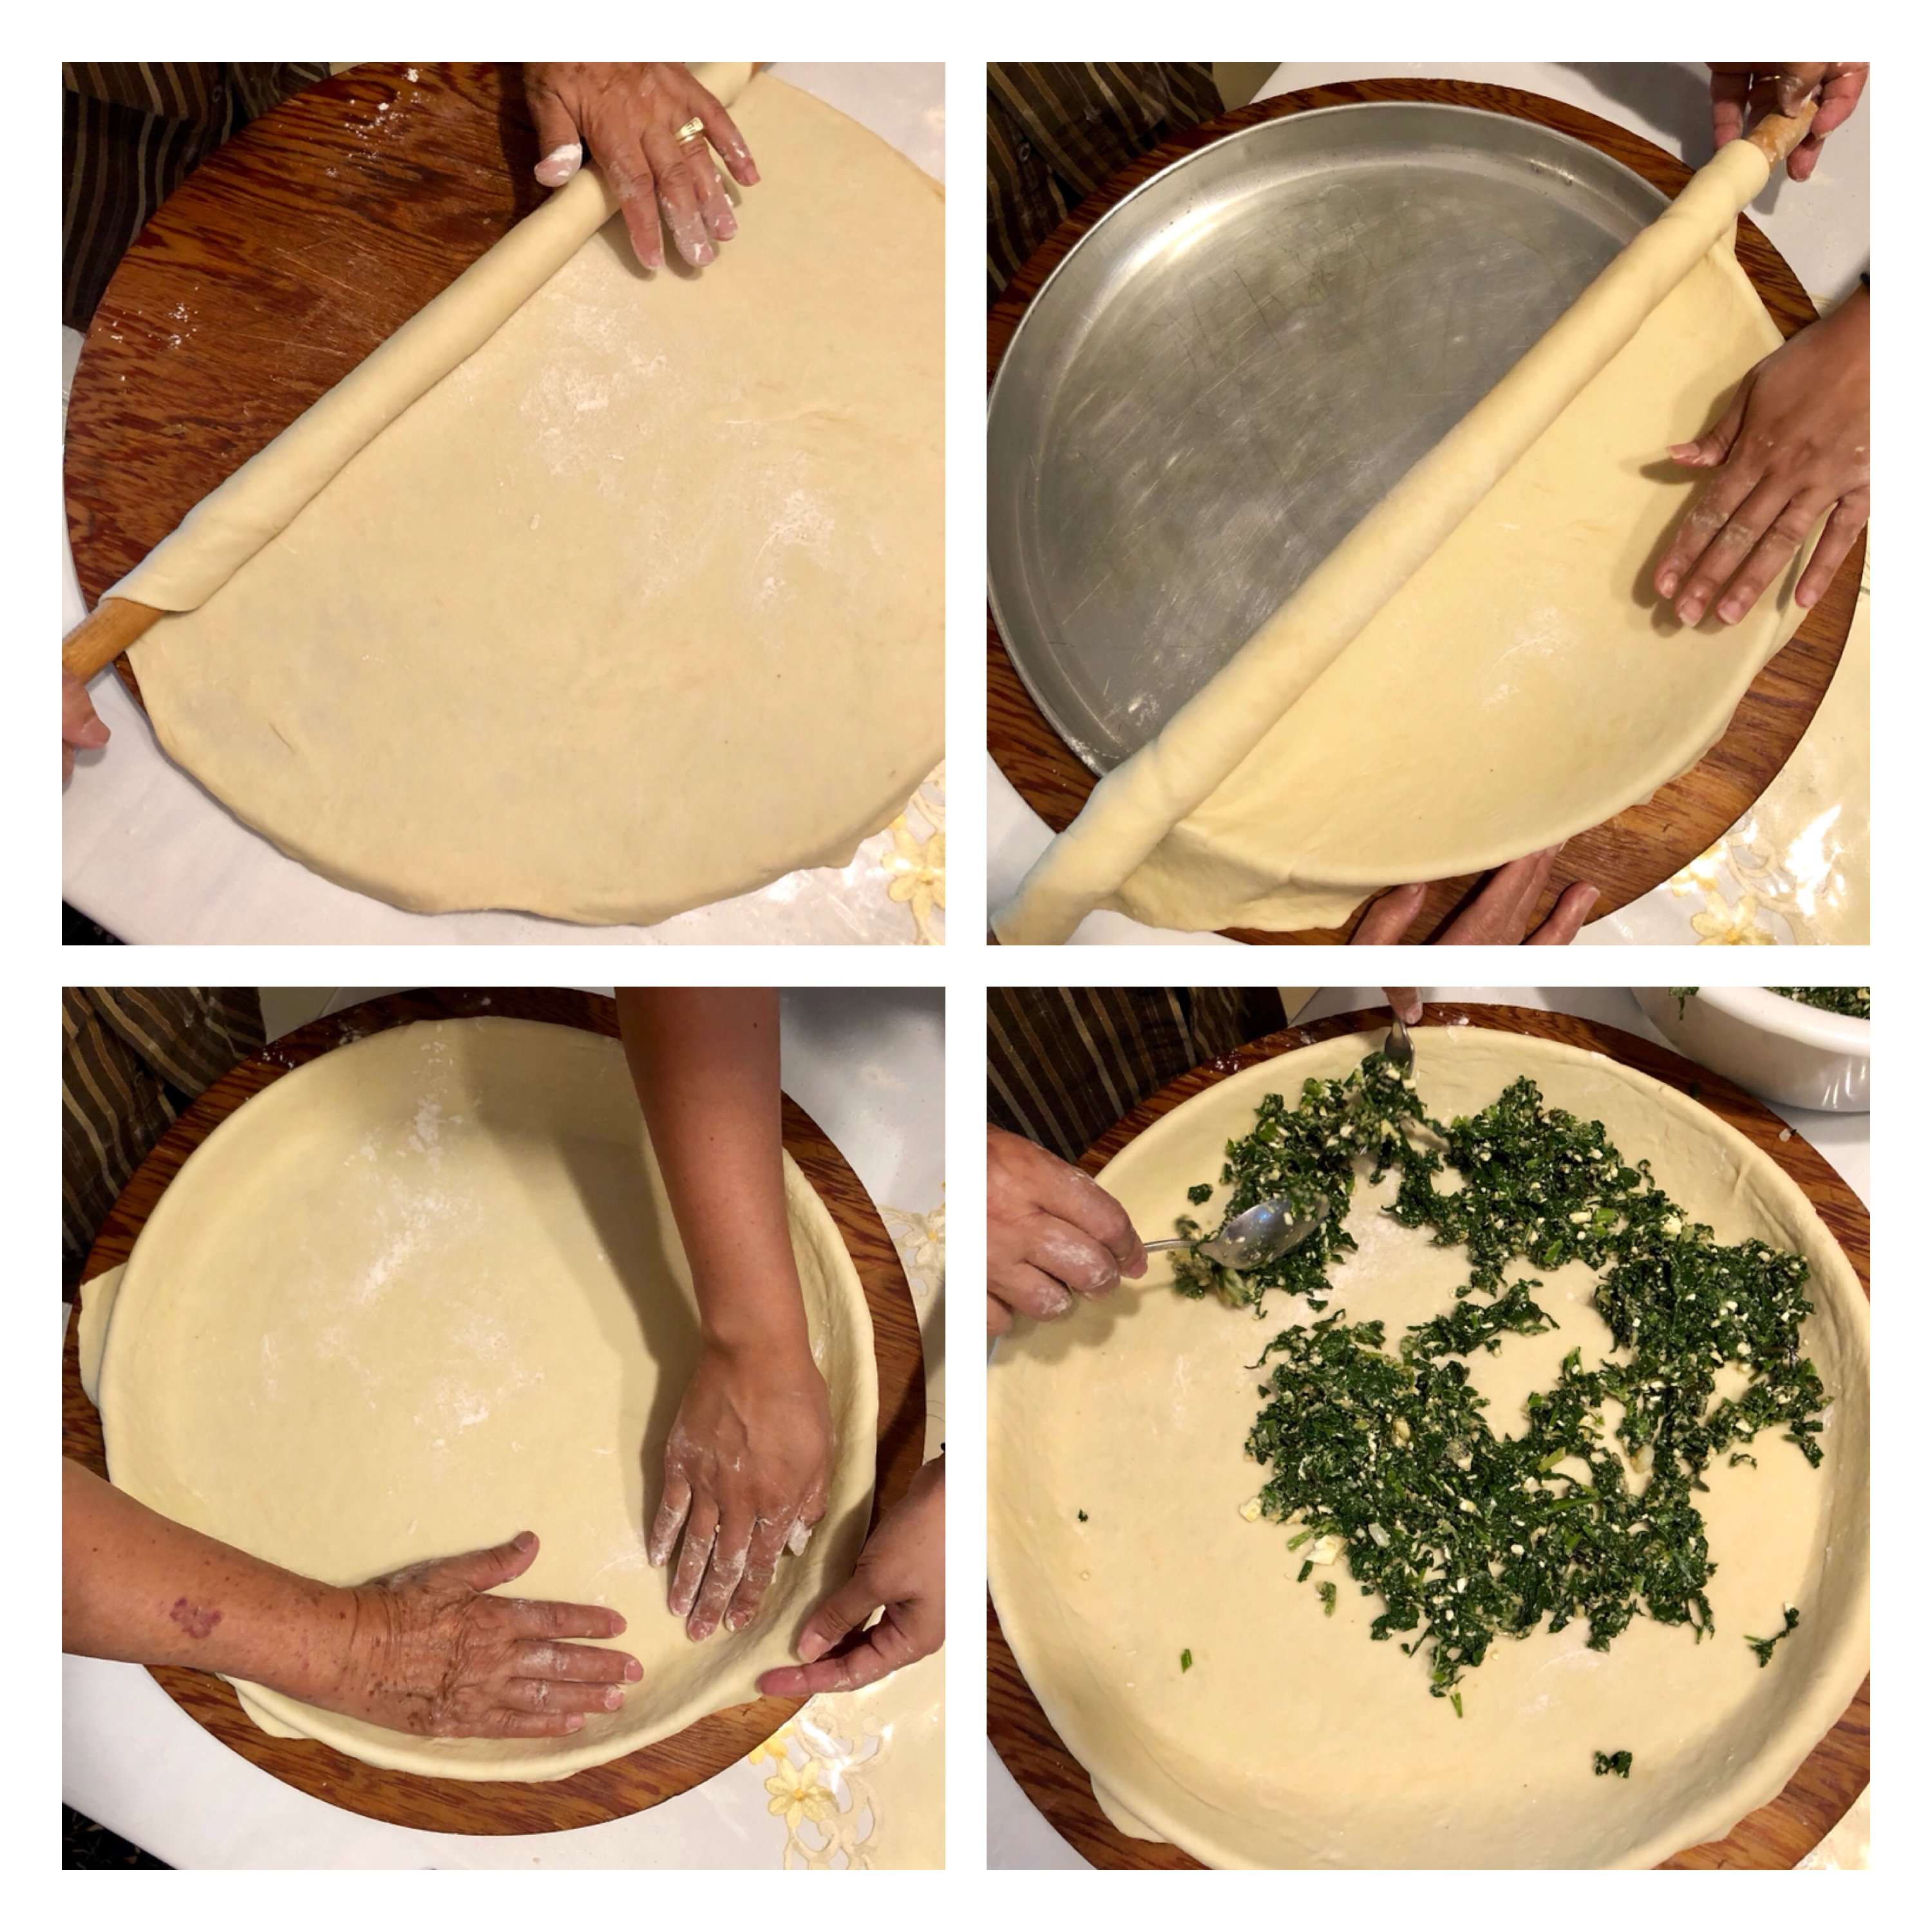
I divide my dough in half and begin to roll out one of the halves with a rolling pin. (See detailed hints in the post.) I aim to have my phyllo thin enough that you can almost see through it, but not so thin that it tears.
Step 6
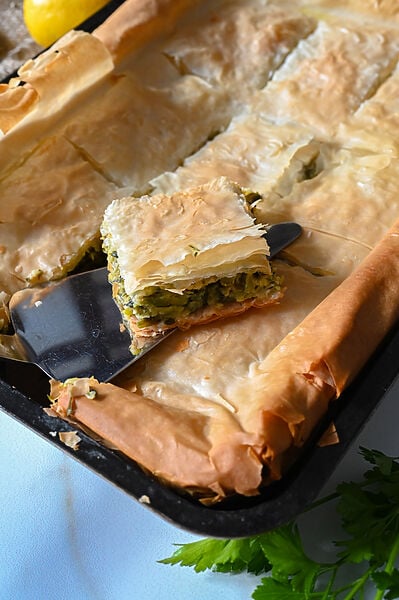
I then grease the bottom of my pan and place my dough into it, being sure that it hangs over the sides. Next I pour the filling on top of the phyllo. I crumble the remaining feta over the spinach filling.
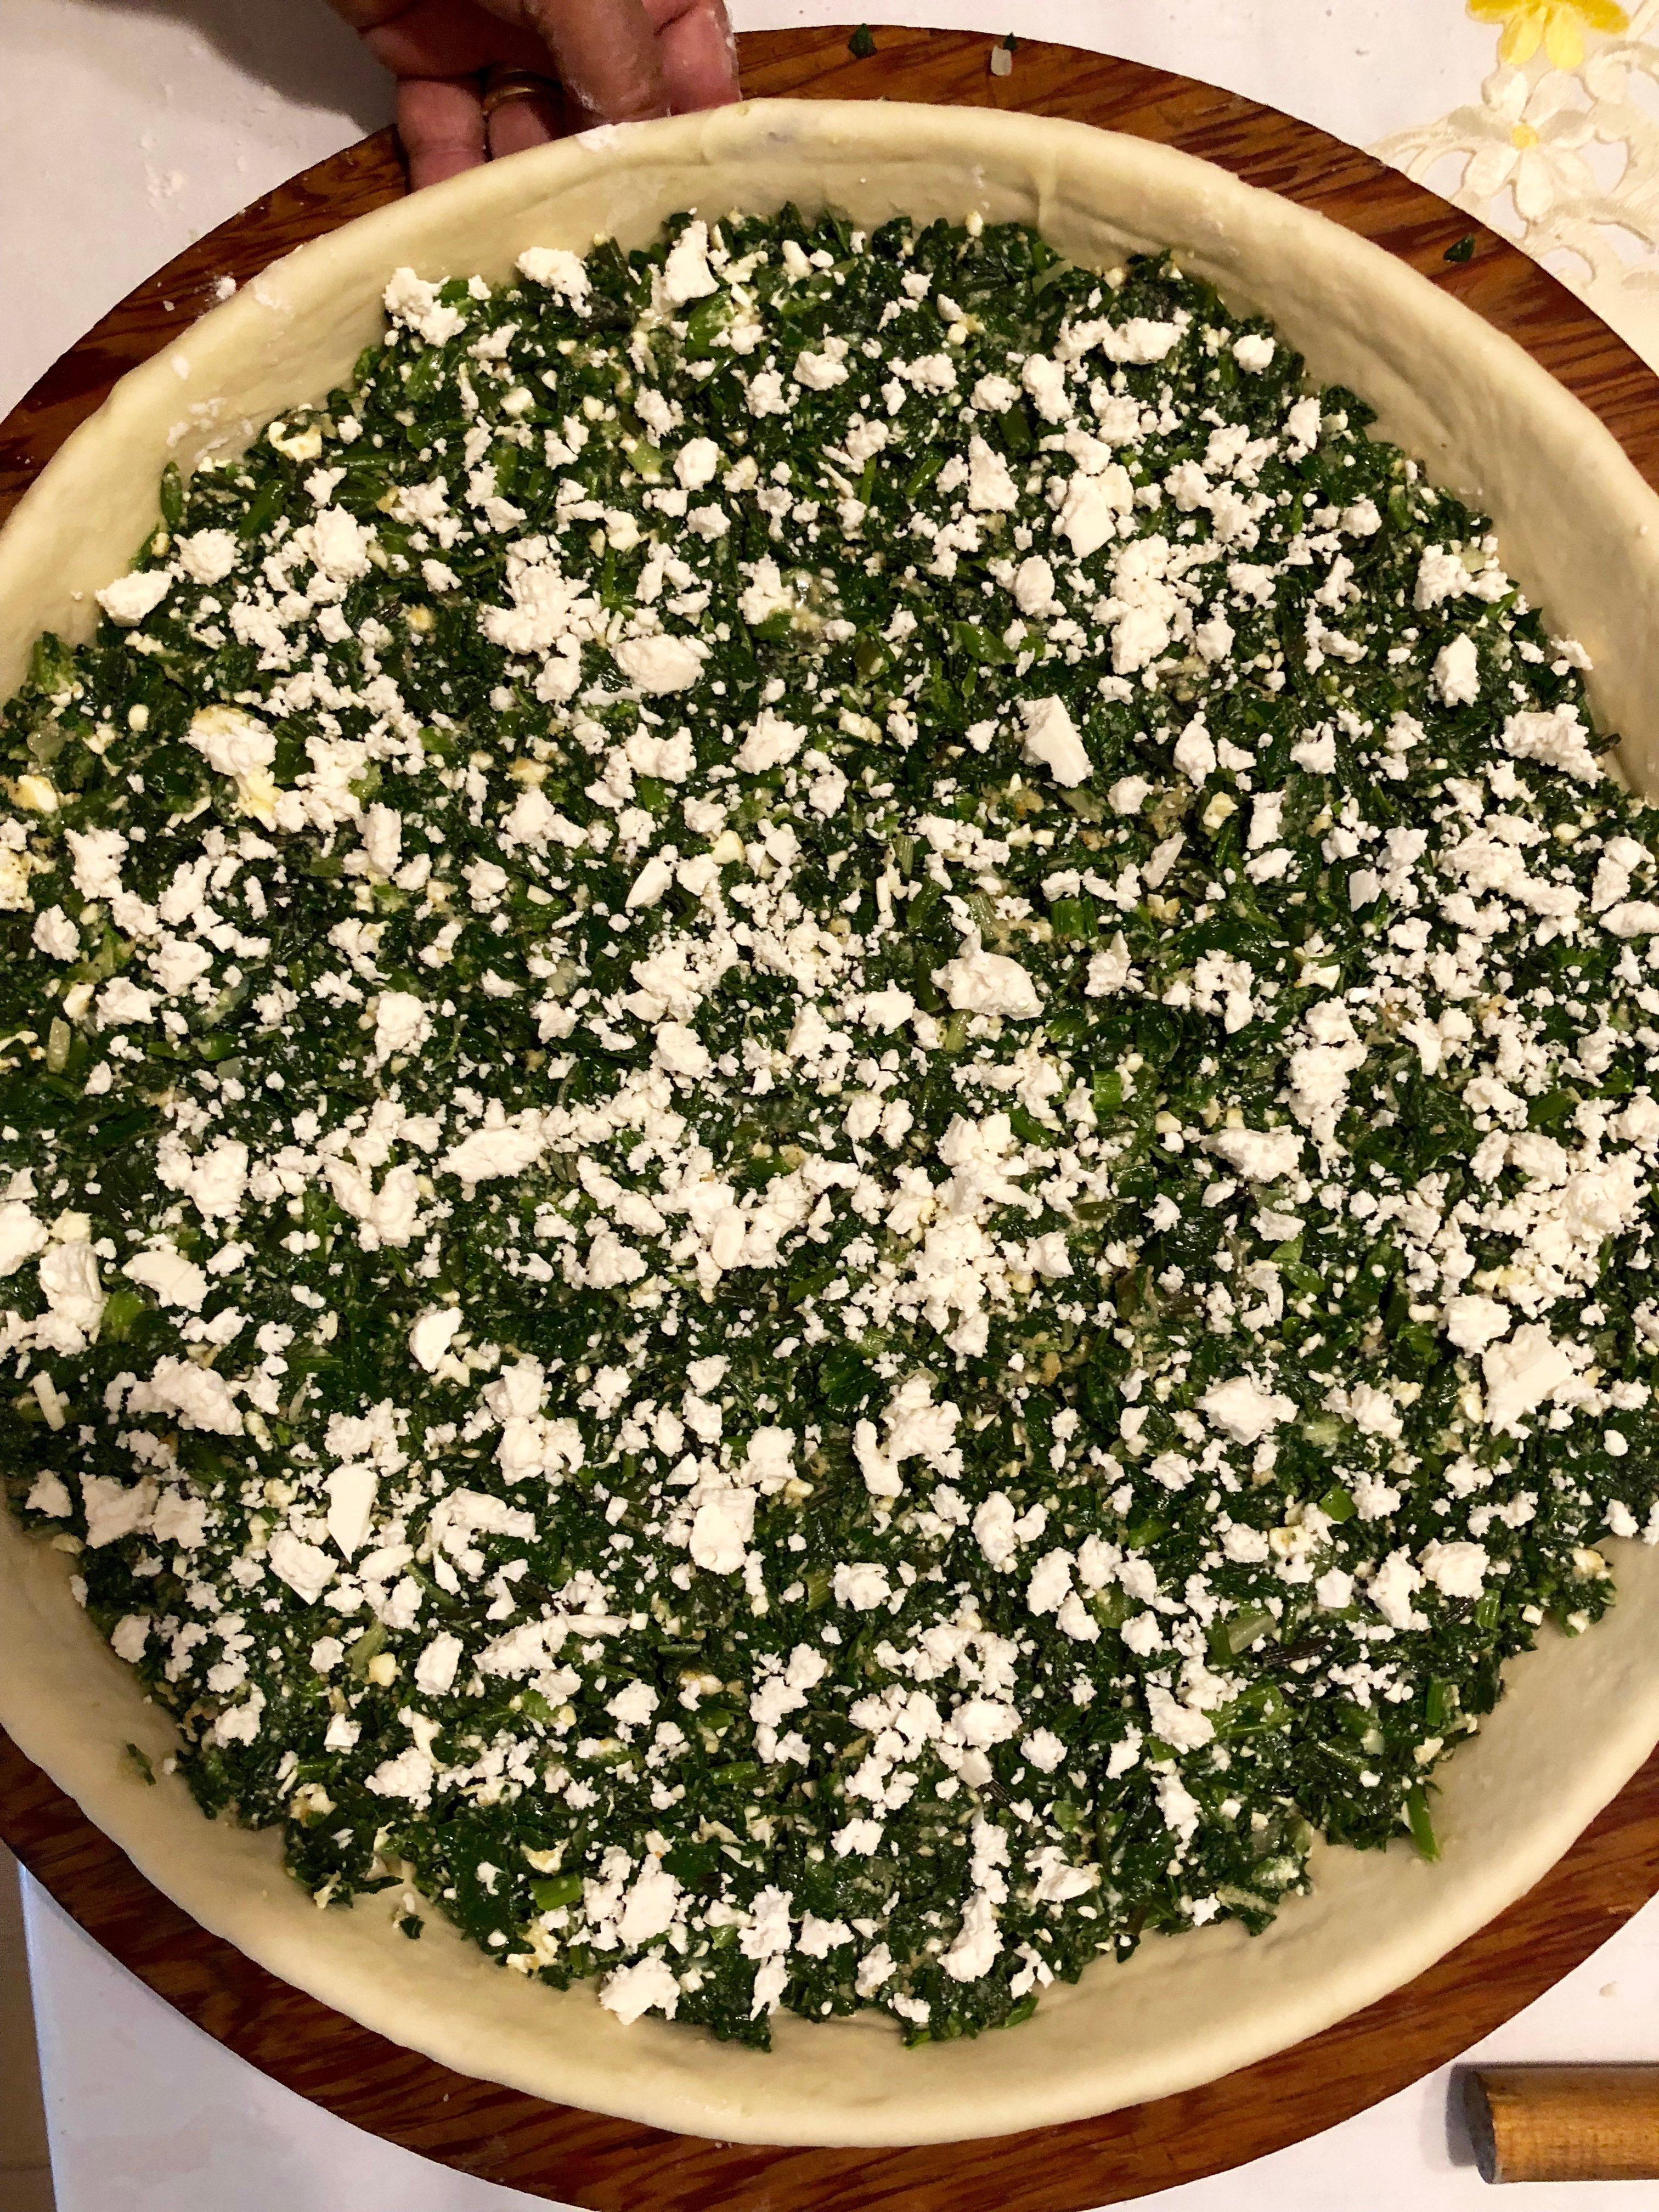
Step 7
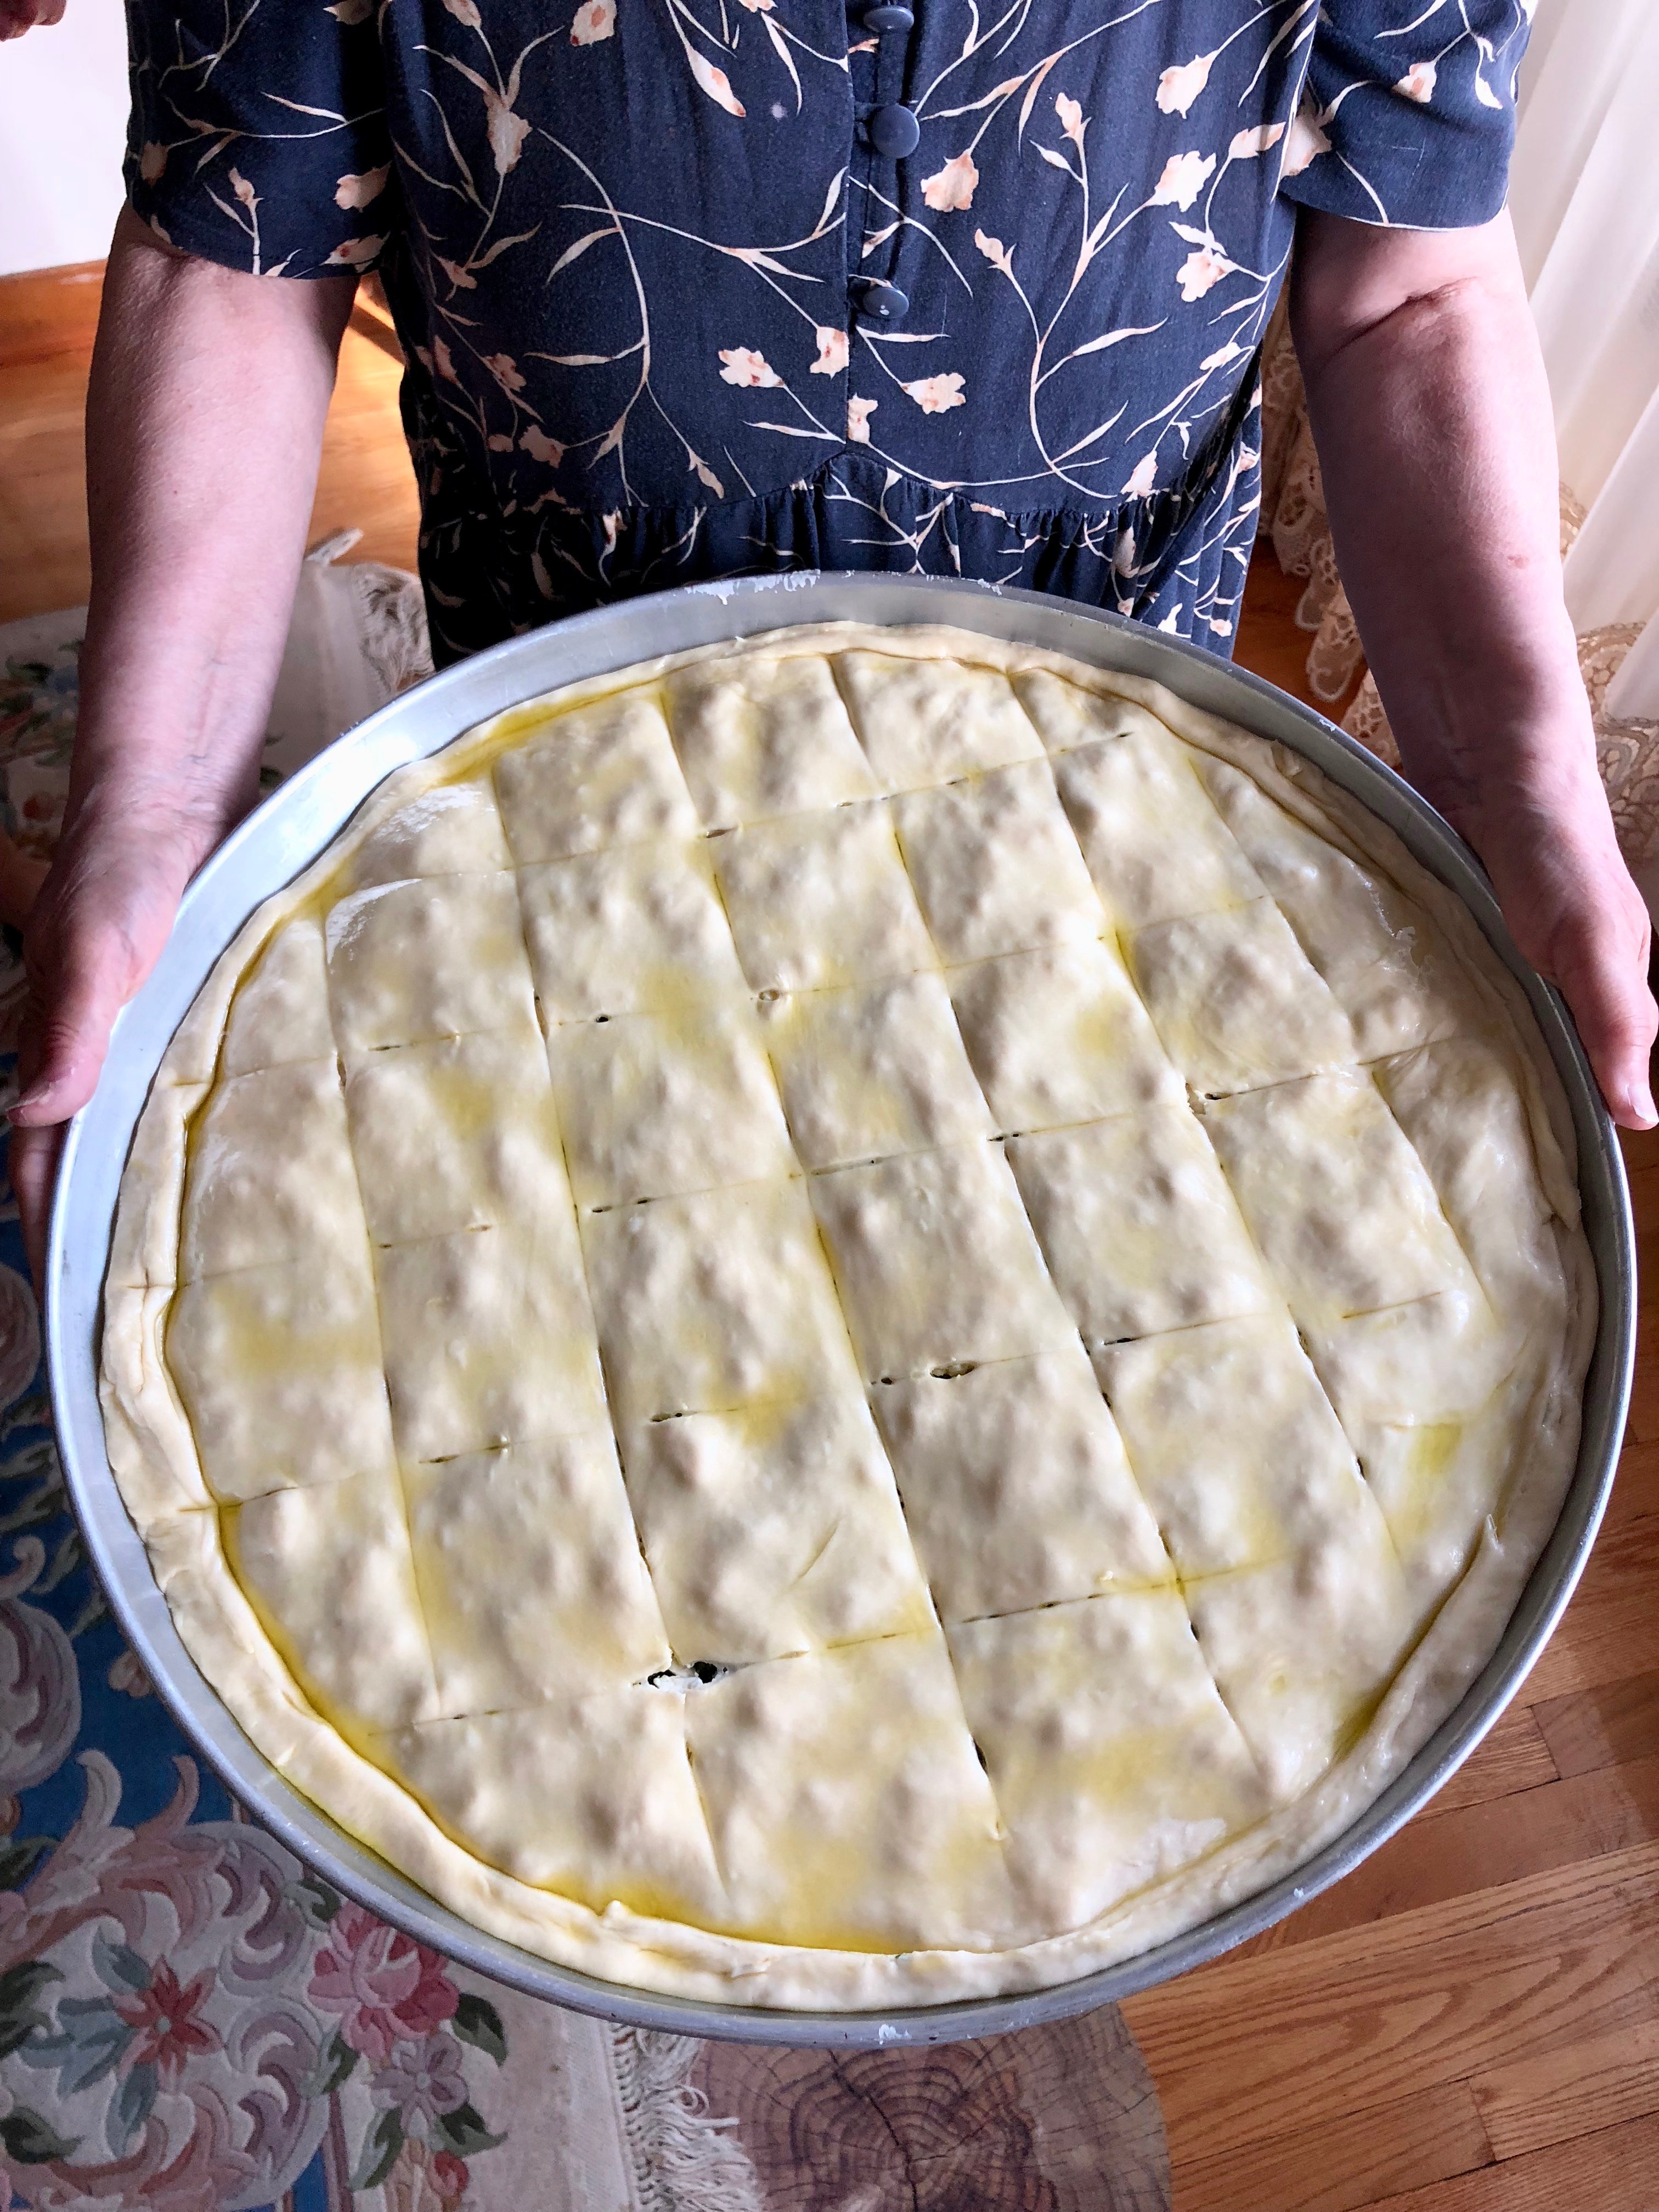
I take the remaining phyllo dough and roll it out so that it is large enough to cover the top of my pan. I press down gently so that the phyllo dough sits directly on the spinach, and I crimp the edges so that the top and bottom layers of phyllo are pressed together.
Step 8
I cut off any excess phyllo around the edge of the pan.
Step 9
Using a sharp paring knife, I score the top layer of phyllo in a diagonal pattern in order to mark the serving size pieces I will cut when my spanakopita is done. I then brush the top of the phyllo dough with some olive oil.
Step 10
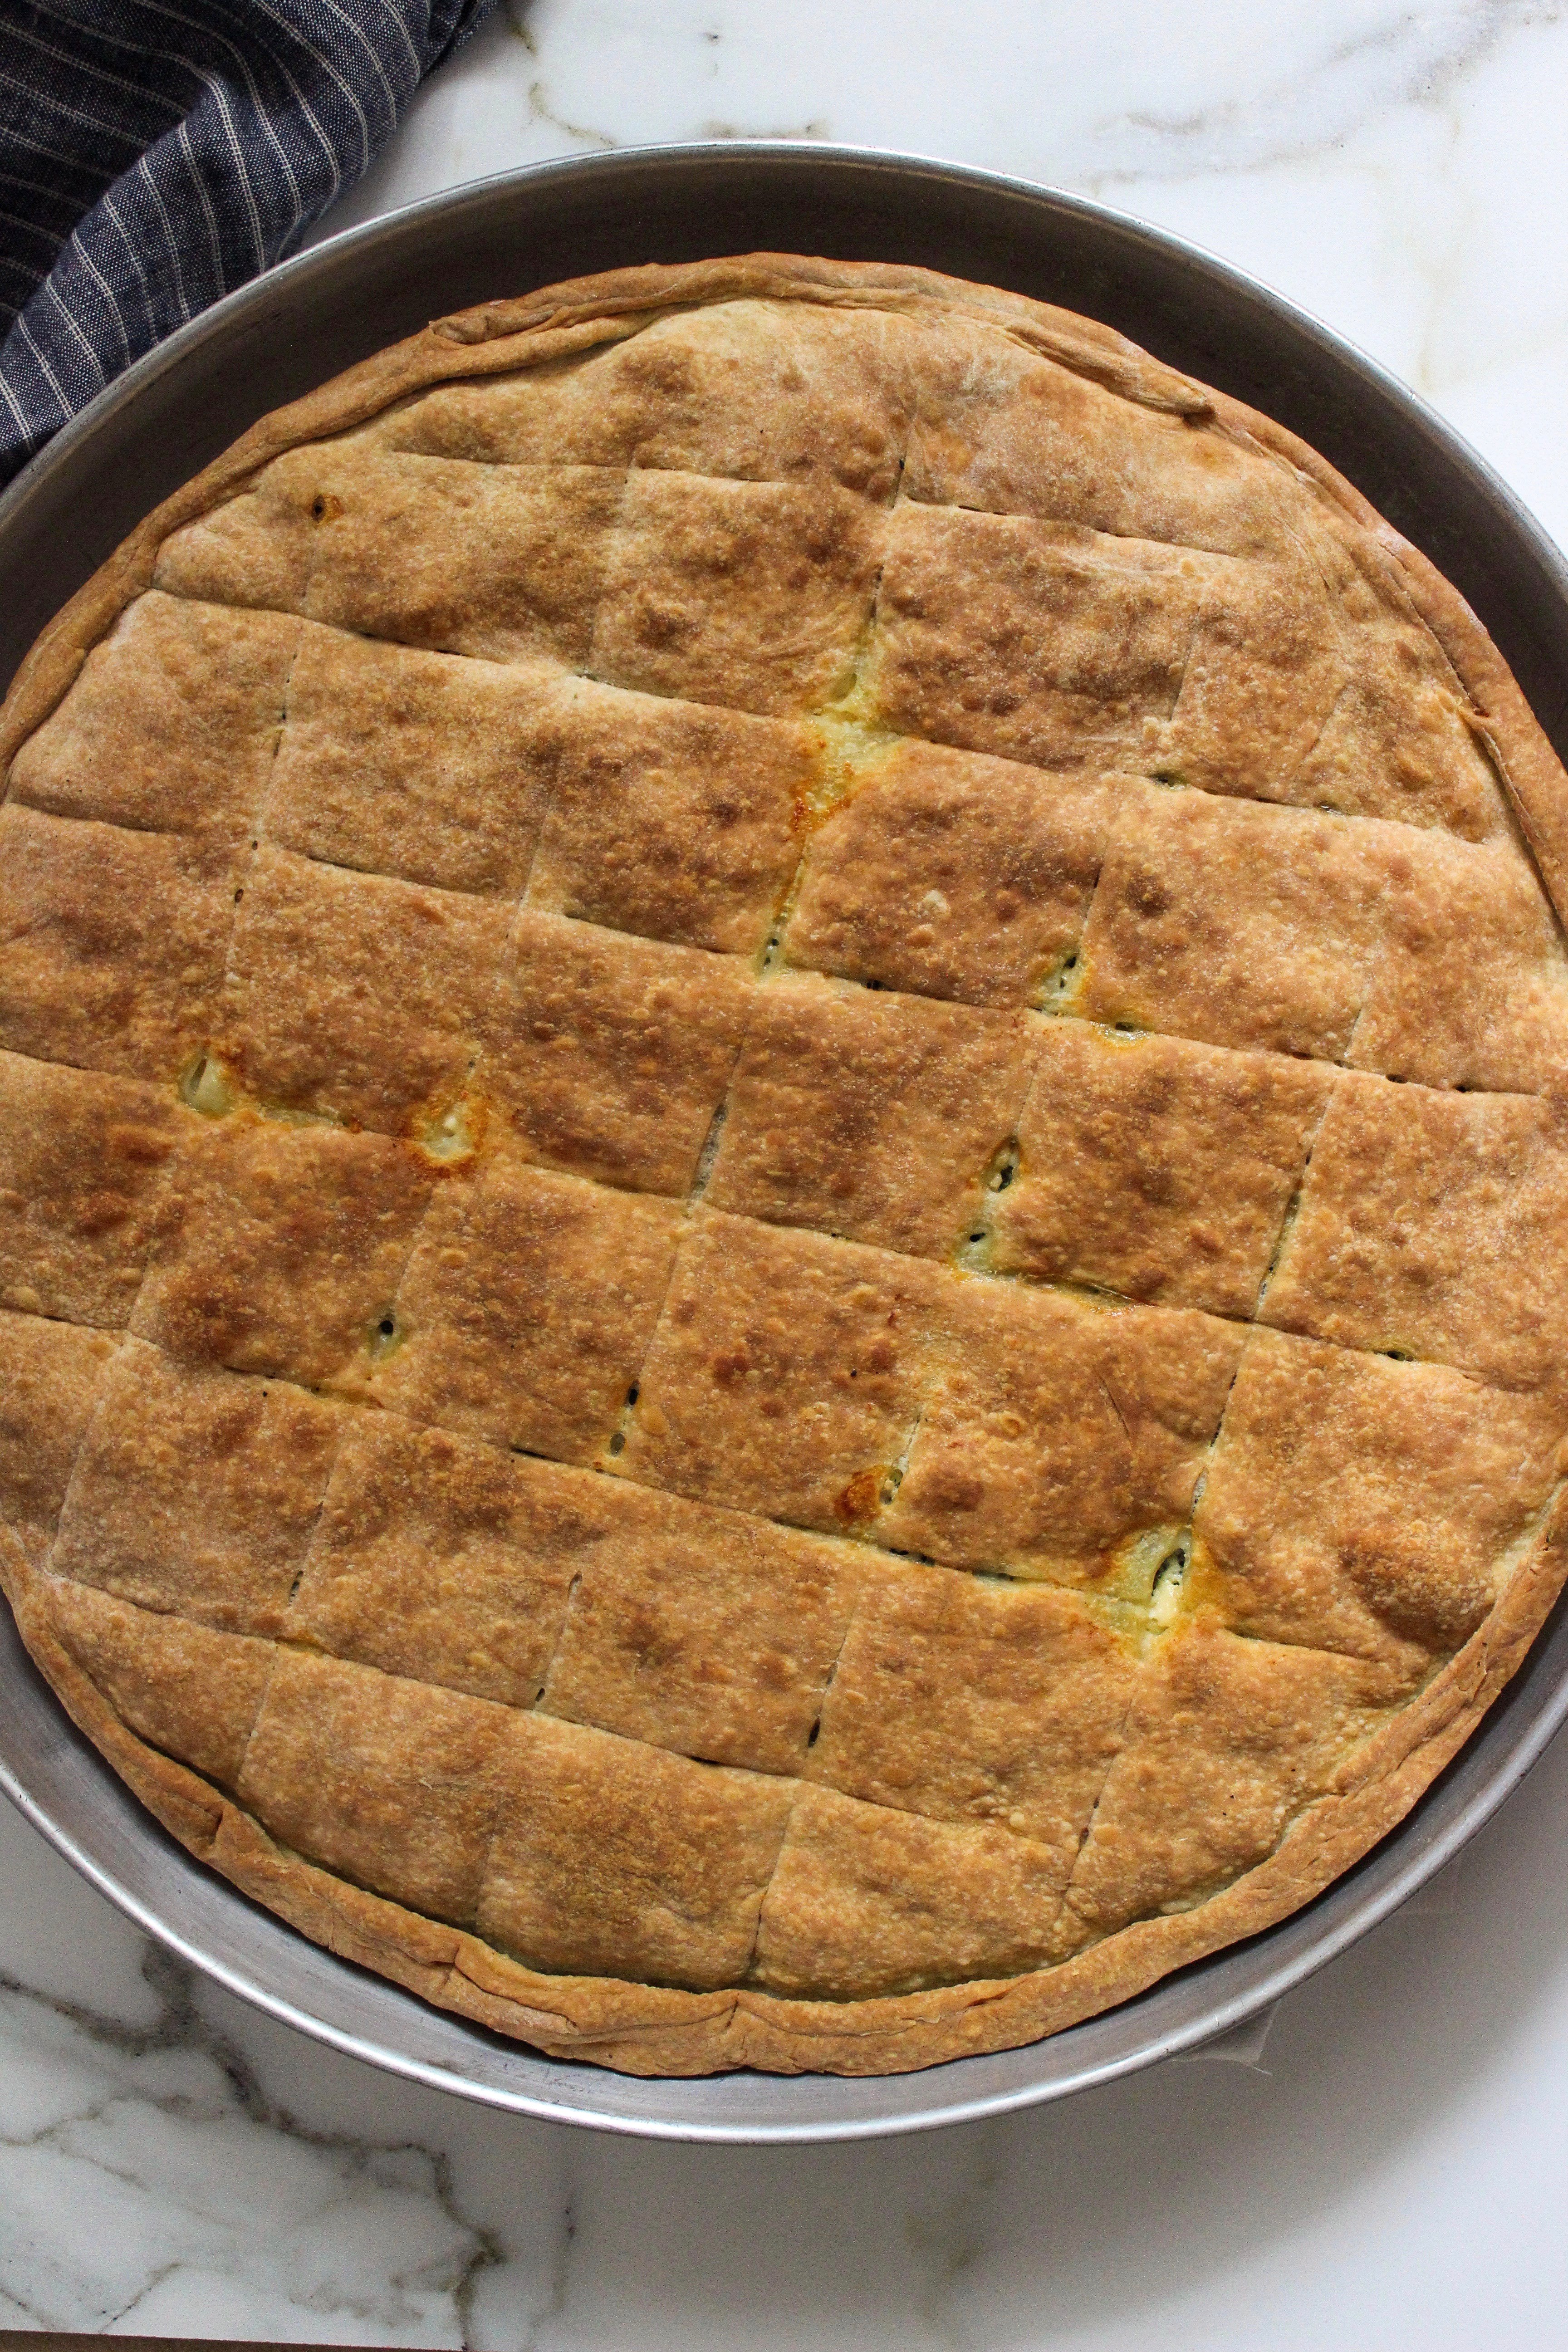
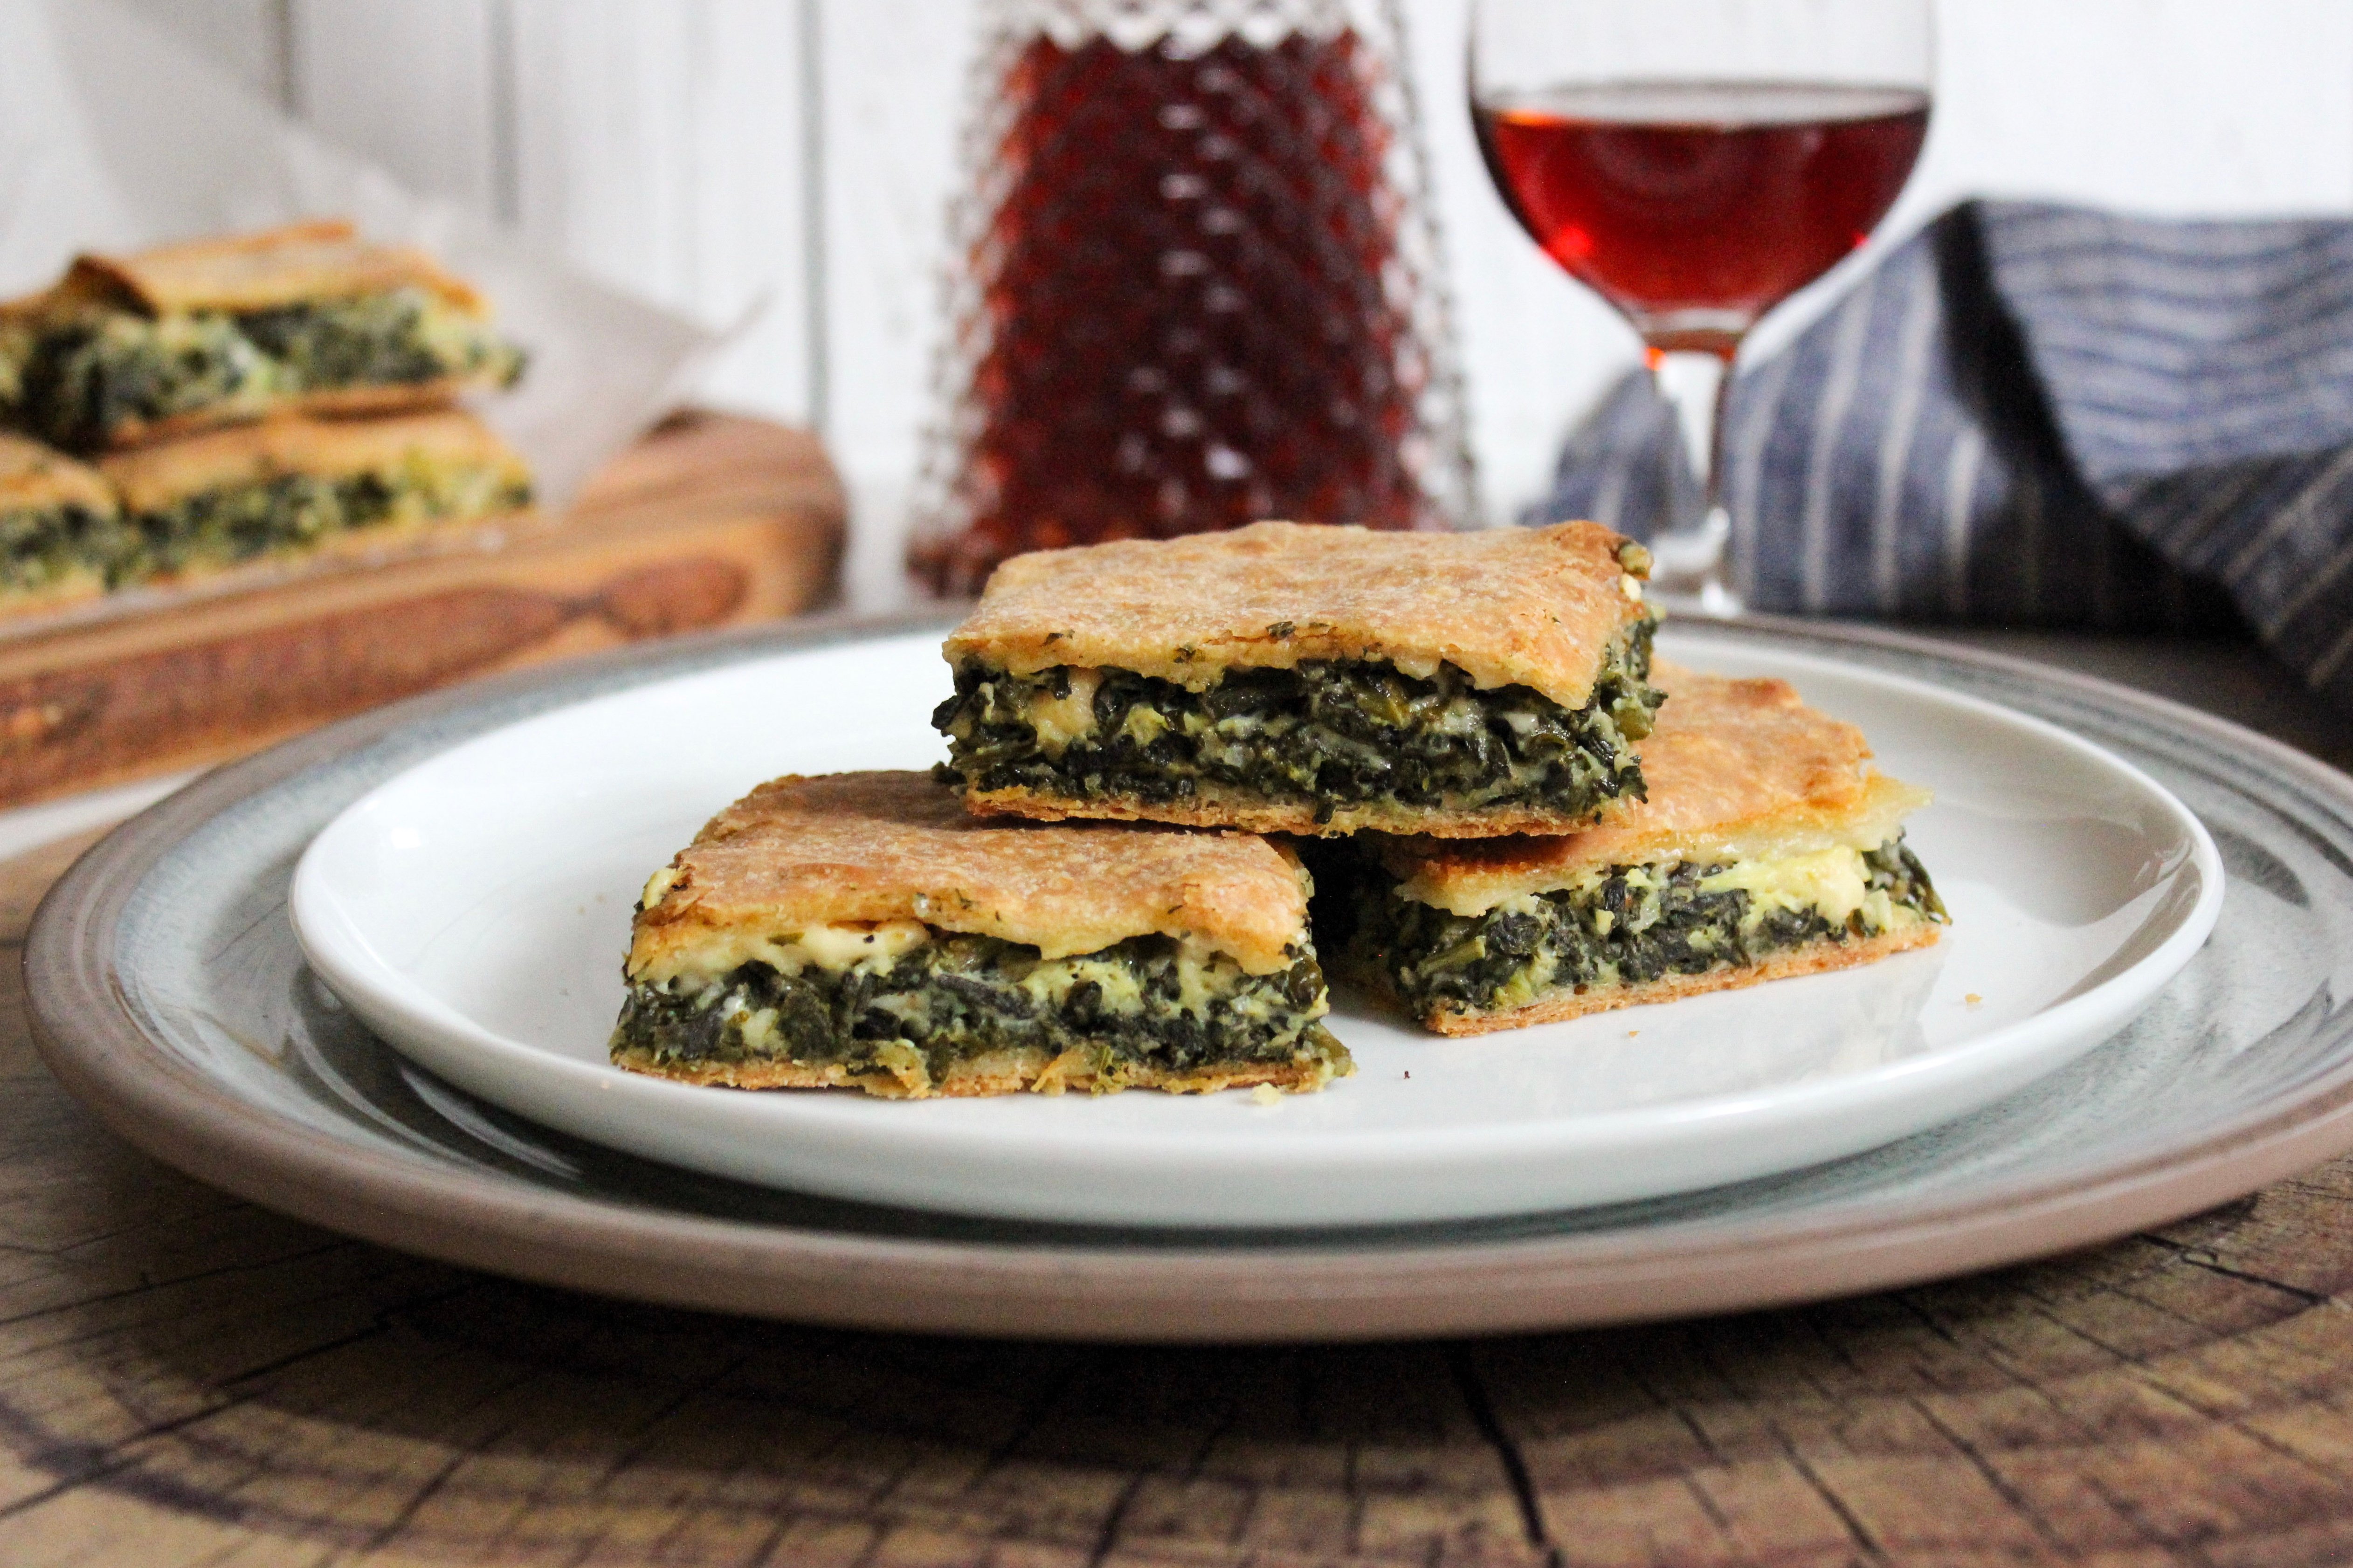
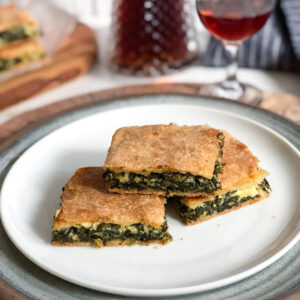
I bake my spanakopita on the middle rack of my oven and bake for 60 minutes, or until your phyllo is a nice golden brown colour.
Step 11
I allow it to cool, and then cut into pieces using the scoring as a guide.
Recipe variations
There are probably as many versions of spanakopita as there are Greek men named George, and I bet each one is amazing (the spanakopitas and the Georges). There are probably an equally large number of recipes for phyllo (filo). If you have never made spanakopita or phyllo before, I suggest you give this recipe a try, and stick to it as closely as possible. Then, as you become more confident in your spanakopita skills, you can experiment. A little swiss chard here, a bit less dill there, and before you know it…you will have your own twist on this classic Greek dish.
Other variations include omitting the feta to make a pure spanakopita (some people refer to the pies which contain spinach and cheese as spanakotyropita – in my family, we don’t).
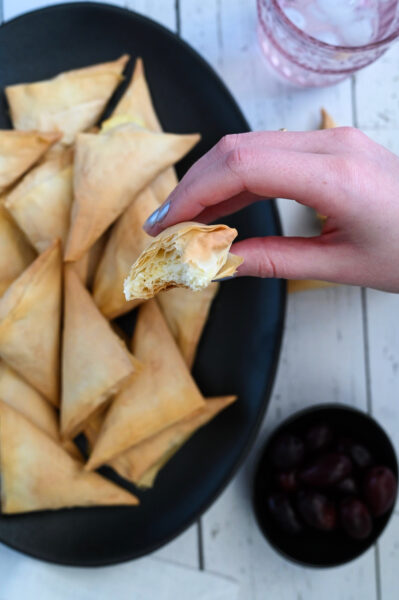
Of course, if you want spanakopita but don’t want to make your own phyllo, you can follow my recipe for spanakopitakia which are made with store bought phyllo. These are delicious too!
Finally, if you would rather forego the phyllo all together, then be sure to check out the Greek Spanakotiropitakia (Spinach and cheese pitas) without phyllo.
Serving size
This recipe makes a VERY large pita; the pan that I use for this particular recipe is 18 inches round. This is the way that my parents taught me to make this recipe and I contemplated cutting the recipe in half. I realize that many of you may not make a pita this large, but I decided against doing so, for a few reasons.
First, the pictures that I took when I made this pita with my parents and Helen showcase this enormous pan. Second, making phyllo and the spinach filling is not necessarily difficult…but it does take time. If you’re going to invest in making spanakopita, I say…go big, or go home (actually, I never say that…I don’t even know what that means. Can’t home be big?) Third, this recipe gives you options.
You can choose to follow the recipe below and make 2 or three smaller pitas. You can then decide to freeze what you don’t bake for a future time. Finally, you can divide or quarter the recipe yourselves. As this is not baking, the worry about making sure that your reduced amounts are exact is less important than if you were making a marble cake, for example (by the way, you really should make this marble cake).
Cooking tips
Amount of spinach used
The amount of fresh spinach that I list in the recipe is an approximation; essentially you want to end up with close to 8 cups of tightly packed cooked spinach. If you have a little bit more, or a little bit less, don’t worry about it too much. This represents a LOT of uncooked spinach, probably more spinach than you have ever purchased at any given time. Just think of how impressed the cashier at the market will be.
Blanch your greens
The spinach and herbs used in this recipe are quickly blanched prior to being mixed with the rest of the filling ingredients. It is important to allow the blanched greens to drain and to squeeze out as much water as possible. If your filling is too watery, your phyllo will get soggy.
Enjoy fresh vegetables year round
Using the freshest ingredients is always the right thing to do. Whenever my parents make pita in the summer, they use vegetables from their garden. When they make spanakotyropita they use lots and lots of spinach, along with the fresh onions and herbs. The wonderful thing about having such fresh vegetables is that you can freeze them so you can enjoy a taste of summer, even in the middle of winter.
In order to freeze the greens, simply blanch and drain them as described in the recipe and then freeze them in tightly packed freezer bags.
Tips on rolling phyllo
Rolling the phyllo dough is a bit of an art, and takes a bit of practice. I am lucky to have my parents guiding me, helping me and teaching me as I learned. Here are a few key tips that they taught me.
- It is important to have a large surface to work on, and it should be lightly dusted in flour. It is important is to dust your rolling pin with a bit of flour as well. Then, starting with a ball of dough, flatten it into a disc shape, and begin to roll it out using your rolling pin. Soon after it is rolled out a little bit, begin to roll the dough out only in one direction, meaning do not use a back and forth rolling motion. Instead, place your rolling pin at one end of the dough, roll the pin away from you, lift your rolling pin and return it to the starting place, and repeat. Do this type of motion in various directions until your phyllo begins to get thinner and to expand. See video here.
- Another trick that my parents have taught me is to roll the phyllo so that it wraps around the rolling pin. See video here. Using your hands, spread the phyllo so that you pull it gently towards either end of the rolling pin, and then carefully unroll the phyllo.
- When it comes time to place your phyllo onto your baking pan wrap the phyllo around the rolling pin and transfer it that way to the baking pan. You can also watch the IGTV video here, of the master at work. Unroll it when you are over the pan, and carefully lay it into place.
Related recipes
Spanakopita is certainly one of the most popular Greek pitas! Here are some other pitas that I think you will also love. I hope that you try them all!
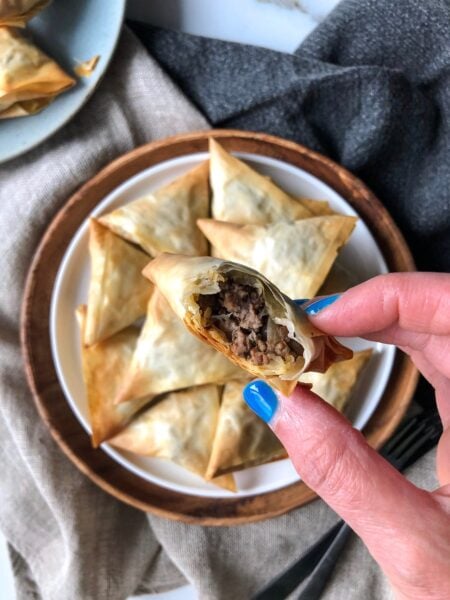
Mini meat pies with filo (Kreatopitakia) These are amazing! If you serve them at a party, I promise that these mini meat pies will disappear fast.
Greek zucchini pita with filo (Kolokithopita me filo) A vegetarian pita that is so good! I add cheese and lemon to the filling – you will love the fresh, bright taste.
Tyropitakia or Cheese Pies Filled with feta and ricotta, these tyropitakia are the best cheese pies ever! I love them so much!
Spanakopita
Equipment
Ingredients
NOTE: You can easily halve the recipe below for the filling and dough; using a 3 quart pyrex pan
Spinach filling
- 64 ounces fresh spinach, chopped
- 8 green onions, chopped
- 1/2 cup chopped parsley
- 1/4 cup chopped dill
- 1/4 cup chopped mint
- 4 large eggs
- 1 ½ cups grated feta, divided
- 1/2 teaspoon pepper
- 1 teaspoon salt
- 1/3 cup olive oil
- 1/2 cup bread crumbs
For the phyllo dough:
- 6 ½ cups all-purpose flour (plus another 1/4 cup if needed)
- 2 cups lukewarm water
- 1/3 cup olive oil
- 1 teaspoon red wine vinegar
- 2 eggs
- 1/3 cup milk
- olive oil for brushing on top of pita, and for greasing the bottom of your pan
Instructions
- Prepare the filling for the pita. Wash your greens well (spinach, green onions and herbs) and plunge them into a pot of boiling water for 30 seconds. Drain and set aside to cool. When the greens are cool enough to handle, squeeze out as much water as possible. It is often helpful to use a piece of cheesecloth or fine tulle to do this. Otherwise, you can simply use your hands. Removing as much water as possible is very important.
- Place your greens in a large bowl and add 1 cup of grated feta, 4 beaten eggs, the olive oil, bread crumbs, salt and pepper, and stir to combine. Set aside while you prepare your filo.
- In a large bowl sift the flour and add in the water, olive oil, red wine vinegar, beaten eggs, and milk. Knead well until your dough comes together; this will take several minutes. You may need to add a bit more flour so that your dough is malleable but not too stiff.
- Preheat your oven to 350 degrees Fahrenheit.
- Divide your dough in half and begin to roll out one of the halves with a rolling pin. (See detailed hints in the post.) Your phyllo should end up being thin enough that you can almost see through it, but not so thin that it tears.
- Grease the bottom of your pan and place your dough into your pan, being sure that it overlaps the sides. Pour the filling into your pan, on top of your phyllo. Crumble the remaining 1/2 cup of feta over the spinach filling.
- Take the remaining phyllo dough and roll it out so that it is large enough to cover the top of your pan. Press down gently so that the phyllo dough sits directly on the spinach, and crimp the edges so that the top and bottom layers of phyllo are pressed together.
- Cut off any excess phyllo around the edge of the pan.
- Using a sharp paring knife, score the top layer of phyllo in a diagonal pattern in order to mark the serving size pieces you will cut when your spanakopita is done. Brush the top of the phyllo dough with some olive oil.
- Place in the middle rack of your oven and bake for 60 minutes, or until your phyllo is a nice golden brown colour.
- Cool, and then cut into pieces using the scoring as a guide.
- Enjoy!
In love with this recipe and I can only imagine how amazing it tastes.
Thank you so much 😉 It is really so delicious…it’s easy to fall in love with 😉
question: can I use frozen spinach?
Great question. Purists would say no way…but the reality is when our parents have fresh garden spinach that they will not use right away, they do freeze it. So, you can use already frozen spinach as well. The key would be to buy the best quality frozen spinach you can and to defrost it and drain it REALLY well!! If your spinach is too wet, your phyllo will be soggy. The breadcrumbs in the mix help to absorb some of the water which may be left behind after draining, but not much. Hope that helps 🙂
Got it thank you so much !!!
traxana? ligo?
We don’t typically put trahana in our spanakopita…Sounds delish!
I love spanakopita! This will definitely feed a crowd!
Thanks Marisa! It does make a big batch indeed. You can easily half the recipe if you like however 🙂
I love spanakopita. 🙂
Us too 🙂 🙂
Wow ! This looks super delicious and nutritious !!
Thanks so much! It really is good for you and tastes amazing 🙂
Can I freeze the spanakopita pita pan? When I’m ready to cook do I defrost it or bake it frozen?
You sure can Christina. We usually defrost our pites for about 30 minutes before baking them. You will have to adjust your cooking time from the original recipe. Enjoy!
Many of your recipes taste exactly like my mother’s! My mom passed a few years ago, and her handwritten recipe book is hard to follow with her greek abbreviations and corrections in the margins through the years. I thought I would never be able to make the dishes the way she did. Now i can, because of this site!
And your childhood stories that you share bring back wonderful memories for me, especially the family road trips with aunts and uncles. For us, it was 15 packed into 2 station wagons for trips to the beach, grocery stores, or to relatives houses. The youngest ones riding in the station wagon part! Many of my relatives lived within walking distance from our house and to the church, so we grew up in a very greek community. My mom and aunts would always pack enough food to feed a village, even for the short, 20min trips!! Thank you for creating this site! Many blessings to you and your family!
Hi Stavroula! Thank you so much for taking the time to write. Your comment truly means so much to us; it has always been our goal that our site is more than just a place to find great recipes 🙂 We are thrilled and humbled that through our food and stories you are able to revisit and remember happy times – sounds like you too were blessed with a beautiful childhood, full of strong values and family closeness. Hope you continue to find much to love here with us, and may your mom’s memory always be a blessing. Wishing you a 2024 full of health, joy, peace…and good food! xoxo Helen & Billie