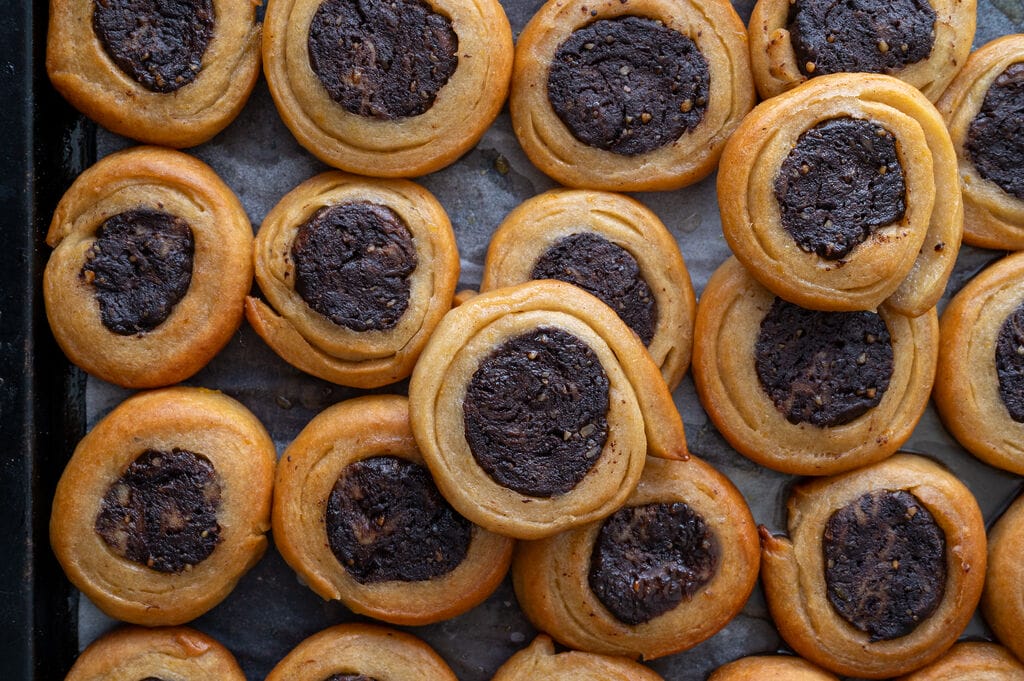
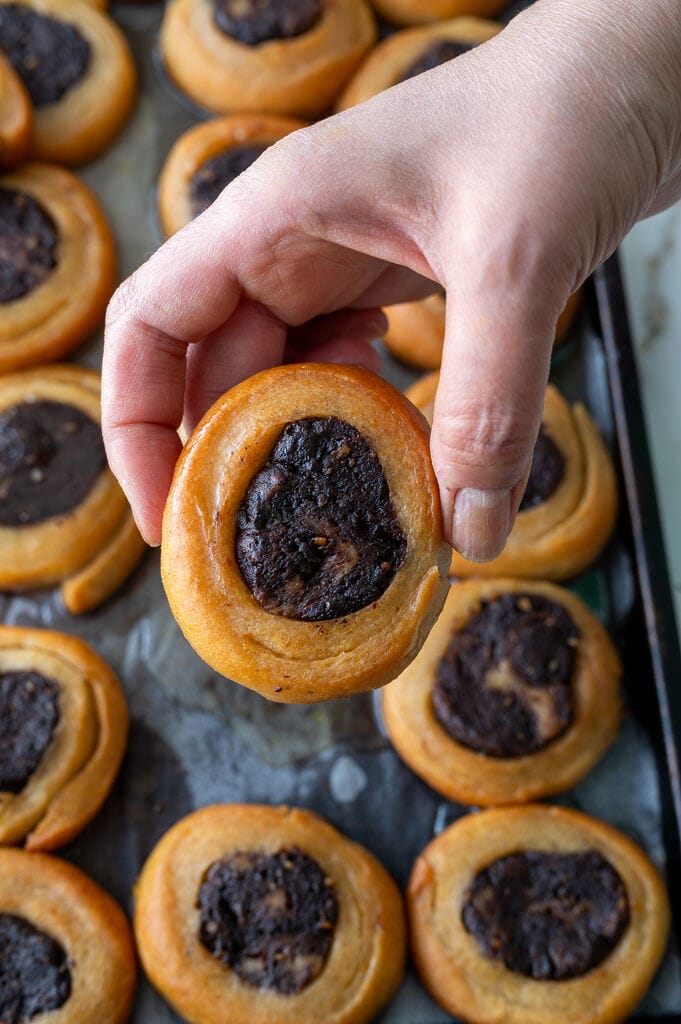
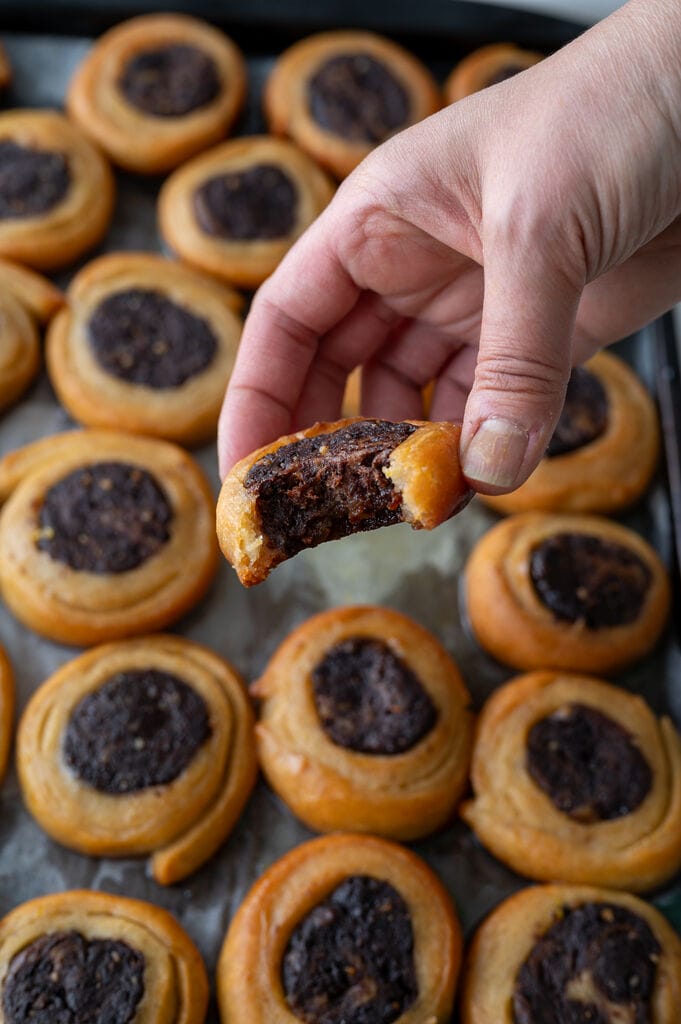
Roxakia, Traditional Greek vanilla and chocolate pastries soaked in syrup
Roxakia are Greek, syrupy sweet pastries. These vegan vanilla and chocolate centered pastries are flavoured with orange and spices like cinnamon and vanilla. Once baked they are soaked in an orange flavoured syrup which gives a great texture and sweetness to this siropiasta dessert.
Greek desserts are so delicious, and include everything from cakes, sweet pitas, cookies, custard filled desserts, spoon sweet fruits and so much more. There is also an entire repertoire of Greek sweets called siropiasta, which literally means syrup soaked. These are cookies, cakes and other desserts that are doused in a flavourful sweet syrup after baking. I love siropiasta and have put together a great collection of these well-loved syrup soaked desserts.
Roxakia are popular in the northern parts of Greece, like the city of Thessaloniki. They are pretty to look at and adorn the display cases of zaharoplastia (bakeries). Now, with my easy and fail-proof recipe you can make this delicious Greek dessert at home!
Why you will love this recipe
Making roxakia is really a lot of fun, and it is always a pleasure to introduce family and friends to a dessert that they may not be familiar with. Everyone knows other Greek desserts, like galaktoboureko or bougatsa or rizogalo (Greek rice pudding) but roxakia are more obscure. They are so pretty and uncommon that they are sure to elicit oohs and aahs by anyone who you serve them too.
I think that you will also enjoy making them. Although it does take some time because you have to allow the dough to rest, you will see that making the actual roxakia is easy. The dough is so smooth, and easy to handle.
This recipe does not use any complicated, hard to find, or expensive ingredients. Even the chocolate center is made inexpensively, with cocoa powder instead of chocolate (which tends to be pricier).
I love that my recipe for roxakia is vegan and therefore nistisima and perfect for Orthodox fasting periods.
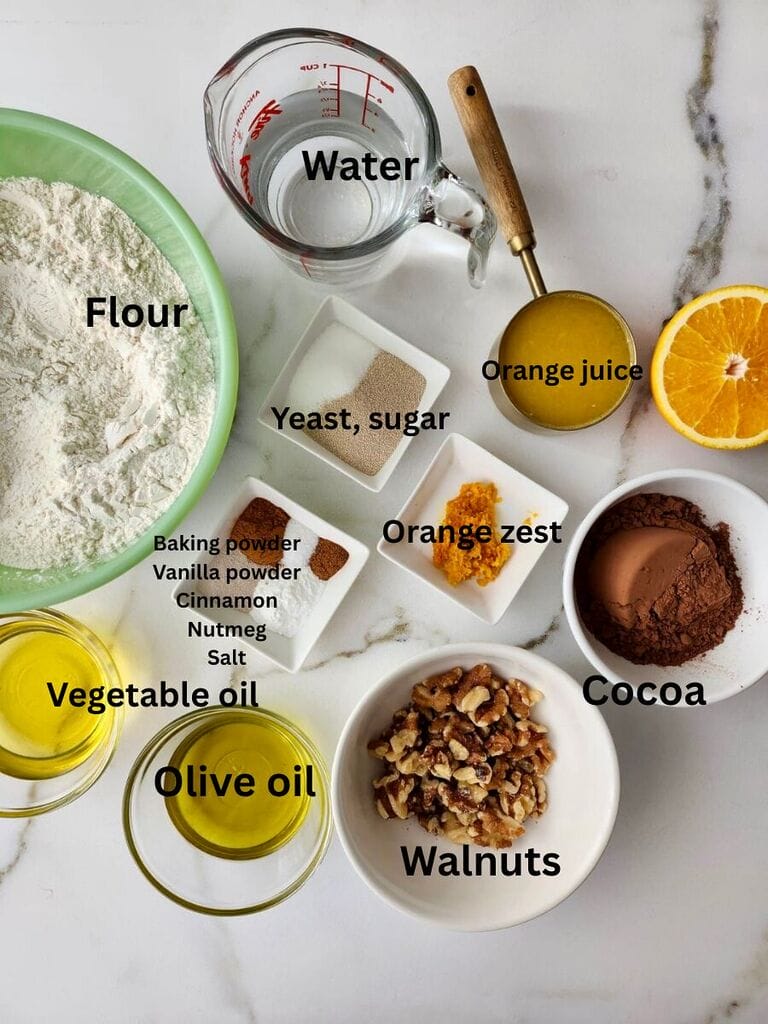
Key ingredients
Flour I use all purpose flour for this recipe. All purpose flour is also called plain, or regular flour. It is easy to find, and pretty inexpensive (especially when compared to other flours).
Orange I use all parts of the oranges in this recipe. I use the peel to make the syrup, I use the zest in the dough, and I use fresh orange juice in both the syrup and the dough (both vanilla and chocolate).
Vegetable oil I use some vegetable oil in these pastries because it is mild flavoured and light.
Olive oil I like to add some olive oil to the dough as well. I like the subtle flavour, and colour that pure extra virgin Greek olive oil gives.
Sugar I add sugar to the syrup and only a tiny bit to the dough – just enough to help activate the yeast.
Yeast I use dry active yeast to help the dough rise. I activate my yeast by combining it with lukewarm water and the sugar until I see the top of the mixture puff up.
Baking powder Even though I use yeast in my dough, I like to add some baking powder too. This ensure that my pastries have a light and soft texture.
Cocoa powder I use the best quality, unsweetened cocoa powder that I can find.
Walnuts I usually buy walnut halves and keep them in the refrigerator for maximum freshness.
Cinnamon Cinnamon stick is added to the syrup to give the cinnamon flavour without changing the colour of the syrup. I use ground cinnamon in the dough.
Vanilla I use vanilla powder in this recipe. If you cannot find vanilla powder, or want to use extract, use half the amount and add it in with the wet ingredients.
Nutmeg A pinch of nutmeg gives an earthy and delicious flavour to the roxakia.
Cardamom pods This is optional, but I like to add a few cardamom pods to the syrup for the herbal, citrusy flavour.
How to make
Do not be worried about the long list of directions; making roxakia is actually really easy. You just need to set aside some time for your dough to rise. Get your ingredients ready, and the rest comes together easily.
Preparation
It is always easier to have your ingredients measured and ready. As well, for this recipe there is some prep work that needs to be done:
- Peel your orange for the syrup; be careful not to include any of the white pith since it can be bitter.
- Break open your cardamom pods by pressing on them with the side of a knife blade.
- Zest your orange for the dough.
- Juice your oranges (for the syrup and the dough).
- Measure out your walnuts and then use a food processor or blender to finely chop them. Alternatively you can do this with a knife.
Instructions
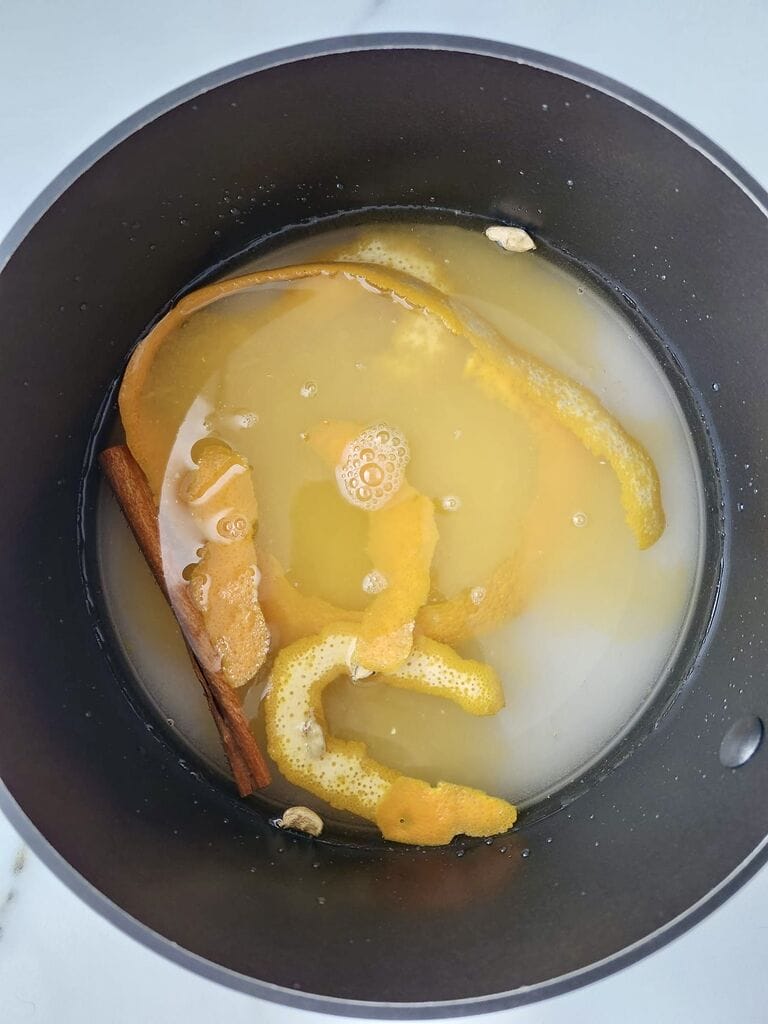
Step 1 – Prepare the syrup
Add all of the syrup ingredients to a pot and bring to a boil. Stir and allow sugar to dissolve. Then reduce heat to medium and continue to cook for 5 minutes. Remove from heat and allow to cool.
Step 2 – Activate your yeast
In the bowl of your stand mixer combine the water, yeast and sugar. Stir and wait about 10 minutes for the yeast to activate.
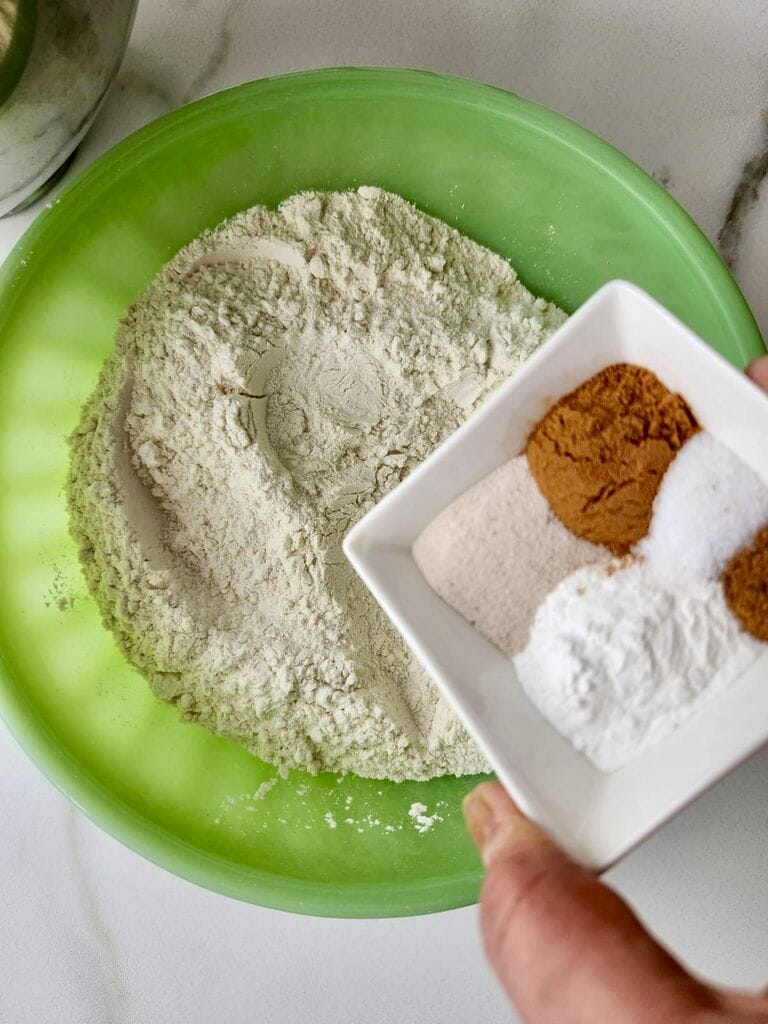
Step 3 – Combine dry ingredients
While you are waiting for the yeast to activate, combine all the dry ingredients in a bowl and whisk to combine.
Step 4 – Prepare dough
Once the yeast is ready, add the wet ingredients to the bowl and mix to combine. Then, add the dry ingredients. Use the dough hook attachment of your mixer to knead the dough for a few minutes, until it pulls away from the sides. The dough will be soft and somewhat sticky.
Step 5 – Divide the dough
Divide your dough into 1/3 and 2/3 parts. If you have a kitchen scale, use that to be exact. Otherwise, divide the dough by eye. Set aside the larger portion of dough in a bowl and cover with a clean kitchen towel to rise until double in size, or two hours.
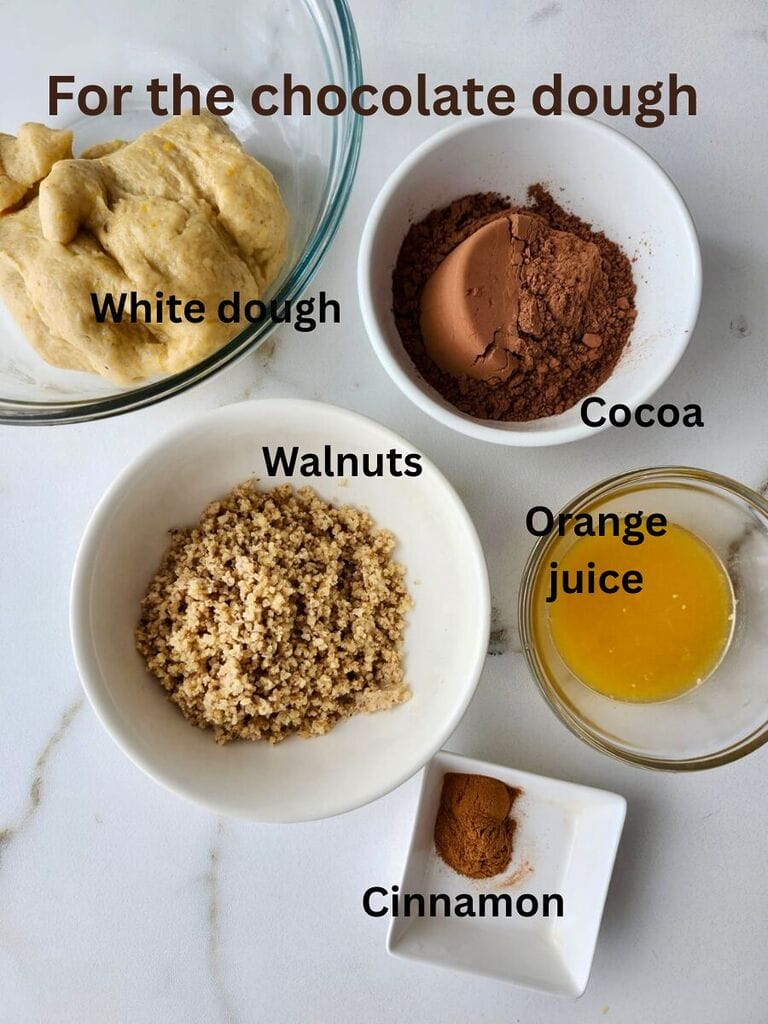
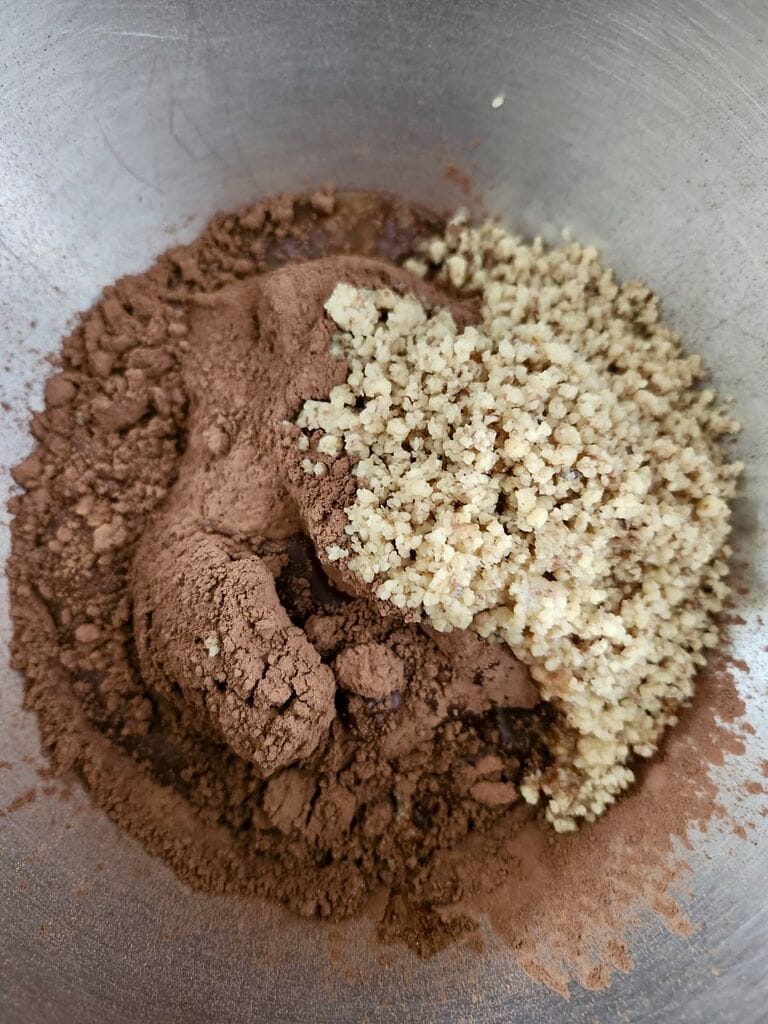
Step 6 – Make chocolate dough
To the smaller portion of dough add the sifted cocoa and cinnamon, walnuts, orange juice and olive oil if needed. Knead the dough with the dough hook attachment of your mixer until well combined. Set aside, covered with a clean kitchen towel to rise until double in size, or two hours.
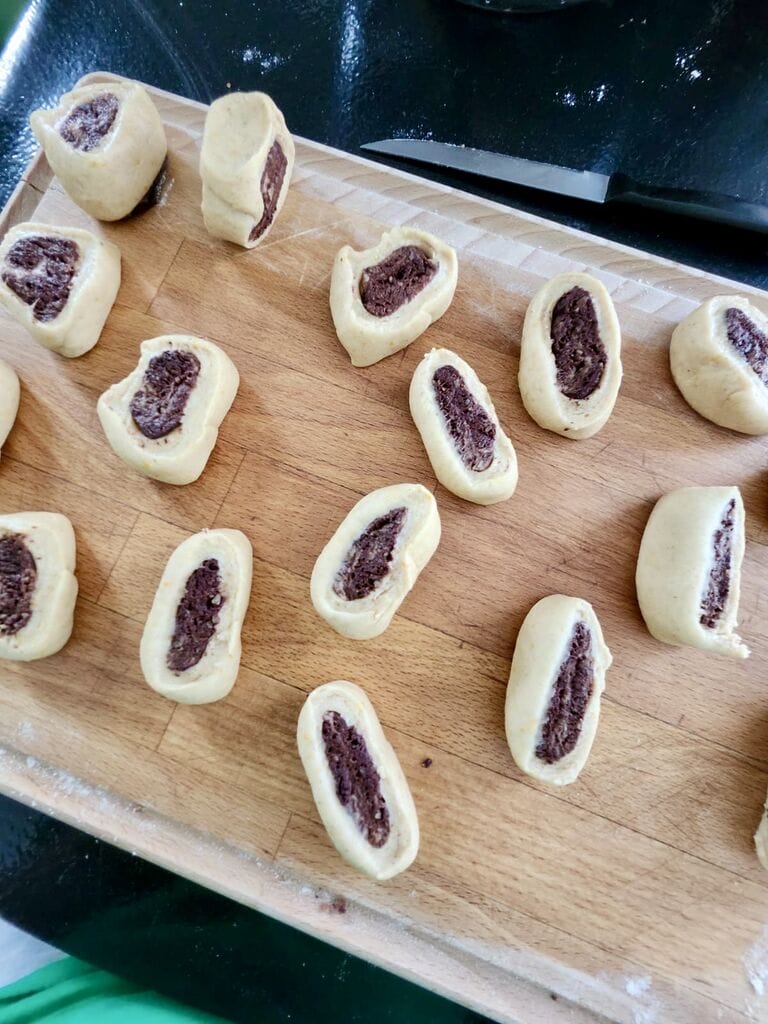
Step 7 – Shape the roxakia
Preheat oven to 350 degrees Fahrenheit
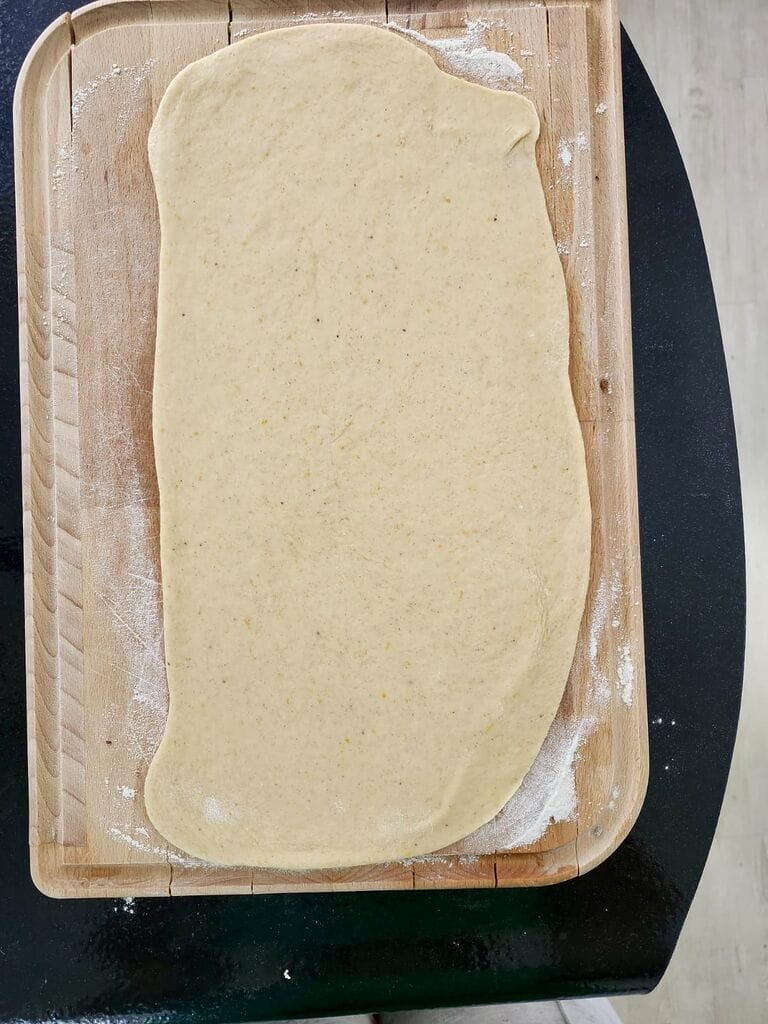
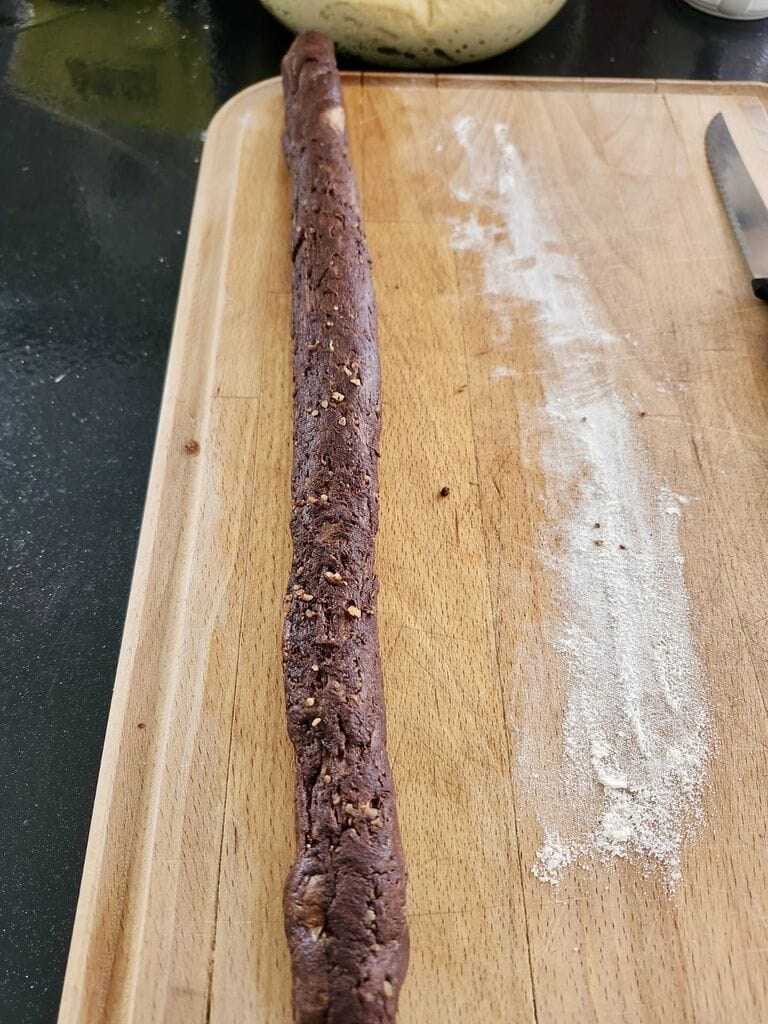
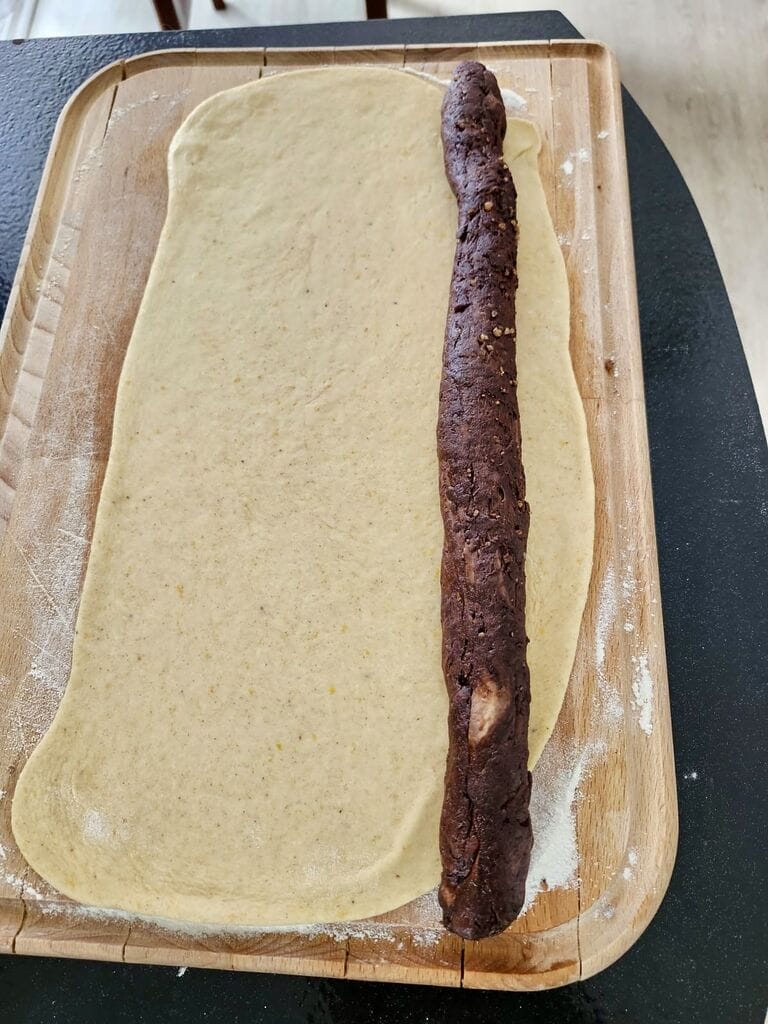
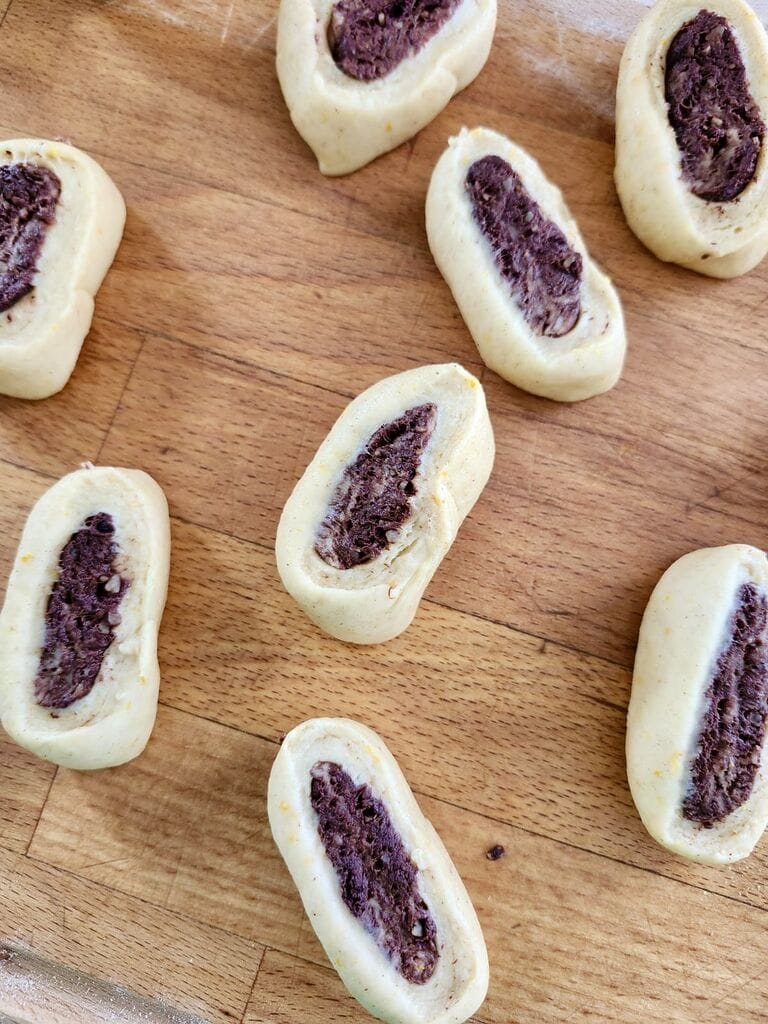
Divide the vanilla dough and chocolate dough in half. Take one half of the chocolate dough and form a log, about 12 inches long and 1 inch thick. Use a rolling pin to roll out one half of the vanilla dough into a rectangle; approximately 12 inches x 8 inches. Place the chocolate dough on one long end of the vanilla dough and roll tightly. Use a sharp knife to cut the log into 1 inch thick slices. Use your hands to shape the roxakia; flatten them to 1/2 inch thick and shape them into rounds. Use your fingers to press together the seam. Transfer the roxakia to a parchment lined baking sheet, and repeat with remaining dough.
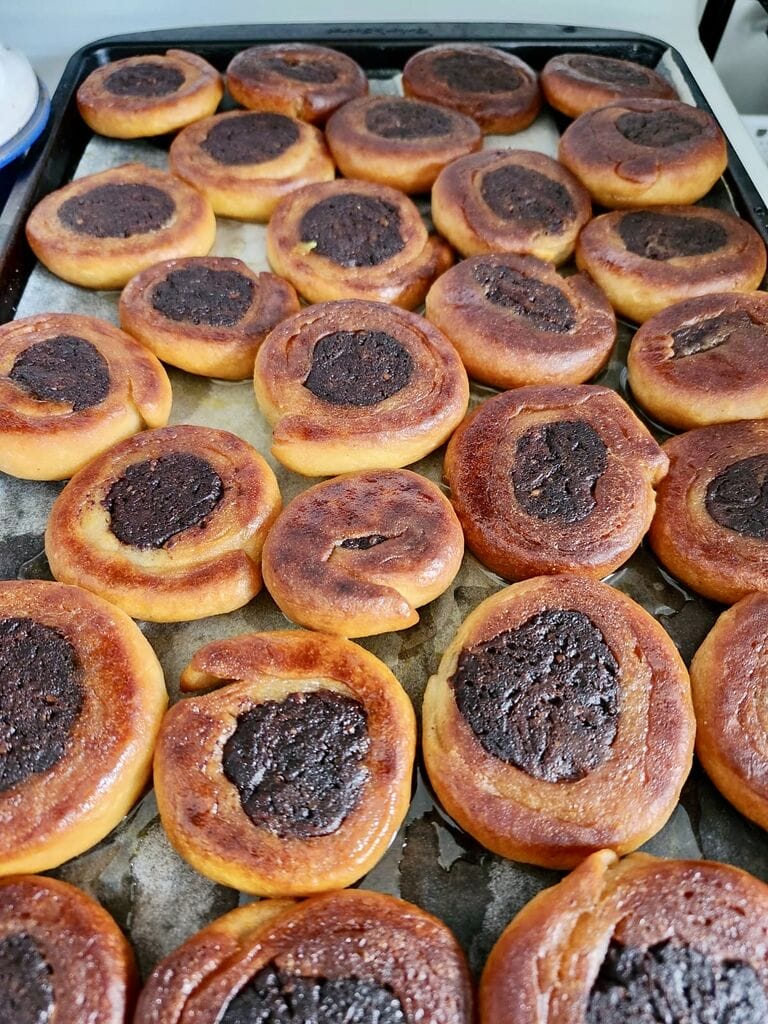
Step 8 – Bake the roxakia
Bake on the middle rack of your oven for 22 – 25 minutes, or until golden.
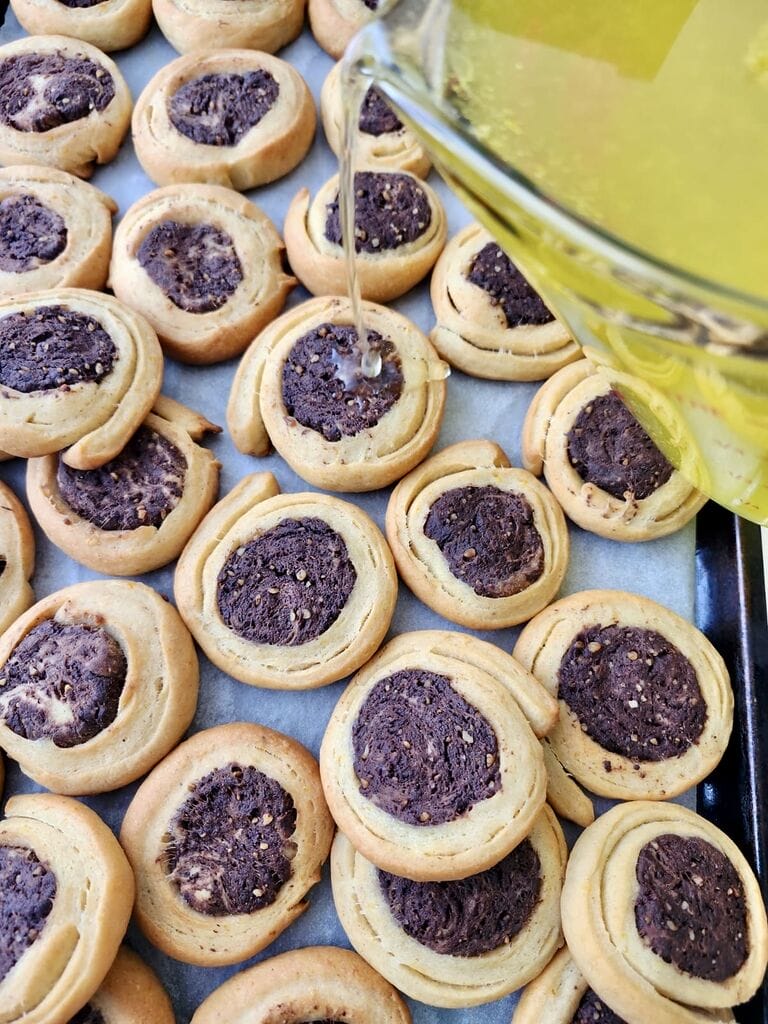
Step 9 – Soak your pastries
Once all of your roxakia are baked place them all together on a baking sheet or other pan which has an edge which is at least 1/2 inch high. Remove the cinnamon stick, orange peel and cardamom seeds from the syrup and then pour the syrup all over the roxakia. Allow to soak for about 15 minutes and then carefully flip them over and allow to soak for an additional 5 minutes.
Recipe substitutions
Swap the orange for lemon
Instead of orange juice, and peel and zest, you can use lemon juice, peel and zest. This will change the flavour of your roxakia; I do prefer the orange flavour to be honest, but lemon could work well too – especially if you like lemon flavoured desserts!
About the oil
I use a combination of olive oil and vegetable oil to make my roxakia. You can use only vegetable oil, only olive oil, or another oil – something like grapeseed oil would work well. Just remember that the oil you choose will potentially change the flavour and the colour of your roxakia.
Change, or omit, the nuts
I enjoy the flavour and texture that comes from the crushed walnuts in the chocolate center; if you prefer to omit them you can. That will make the roxakia even more economical and will make them perfect for anyone with a nut allergy. Otherwise, you can exchange the walnuts for crushed pecans or hazelnuts.

Baking tips
Adding the cocoa
I like to sift both the cocoa and the cinnamon before adding it to the dough, in order to avoid any clumps. It may take a bit of kneading to incorporate the cocoa into the vanilla dough fully, and you may still end up with a few vanilla streaks; this is fine. It will hardly be noticeable when you bake your roxakia.
Shaping the pastries
I use my thumb as a guide when slicing the log of dough, to ensure they are all pretty much the same size. When I use the sharp knife to make the cuts, the dough flattens. I then use my hands to shape the roxakia into rounds, and to flatten them to about 1/2 inch thick. I also press together the dough along the edge (from the rolling) so that it does not unfurl while baking.
Adding the syrup
When soaking the roxakia you want to have cool syrup and hot pastries. You will likely have to bake your roxakia in batches, which means that when they are all baked, some will have cooled down already. I have found that this is fine. I usually transfer my cooled (first baked) pastries onto the baking tray that has just come out of the oven, positioning the roxakia close to one another, and then I pour the syrup over that. Sometimes I add the syrup in parts, waiting for some of the syrup to be absorbed before adding more.
Make ahead!
You can make your roxakia and store them in the refrigerator for several days before adding the syrup. Bring your roxakia to room temperature and then prepare your syrup. Once the syrup is ready, pour the hot syrup over your room temperature roxakia, and serve once the syrup has been soaked into the pastries.
Recipe variations
Make a chocolate and vanilla swirl
I have seen some people create roxakia with a swirl pattern. What they likely do is roll out both the chocolate and the vanilla dough. They then lay the chocolate dough over the vanilla dough and roll it all up together. I think that this is pretty, but not traditional. I prefer making them with the chocolate center as I think this likely gives a more intense chocolate flavour with every bite.
Make larger roxakia
I like to divide my vanilla and chocolate dough in half in order to make about 32 – 35 roxakia which are about the size of a cookie (3 – 5 bites – depending on your bite!). If you prefer to make larger roxakia, about the size of a small cinnamon roll, do not halve your dough. Create one large chocolate log, about 2 inches thick and roll out your vanilla dough so that it is as long (or almost as long) as your chocolate.
Syrup dip versus syrup soak
Once the roxakia are baked, and still warm from the oven, I pour the cooled syrup all over them. I then turn the roxakia over to make sure that the tops get fully soaked with syrup too. If you prefer to have your roxakia less syrupy then you can dip them, a few at a time, into a bowl or pot of syrup. Allow them to sit in the syrup for about 30 seconds and then remove with a slotted spoon. Keep in mind that the dough has barely any sugar in it, and any sweetness will come primarily from the syrup.
Frequently asked questions
What are roxakia?
Roxakia are Greek pastries from the Northern part of Greece, and are very popular in Thessaloniki. Although recipes vary, they are vanilla pastries with a chocolate center which are soaked in a sugar syrup after baking. The spices used may vary from recipe to recipe. I like to include finely crushed walnuts in my chocolate center and I flavour my syrup and dough with orange and other aromatics. I also like to make my version vegan (nistisima) although there are many recipes which use both dairy and eggs.
Are roxakia lenten or vegan?
My recipe is! It is actually unclear to me how these pastries are traditionally made. I have seen recipes which include both dairy and eggs, and I have even seen some people making them with puff pastry! My roxakia are made without eggs or dairy and so they are perfectly lenten or nistisima, and suitable for Orthodox fasting periods. My recipe does not even contain honey, so these delicious pastries are vegan as well (I realize that some vegans eat honey, but some do not – with this recipe, this is not an issue!).
How to serve
Roxakia would make a gorgeous addition to a dessert table alongside other Greek delicacies like Kourabiethes, Baklava and Koulourakia.
I also like to make them early on a Saturday morning; while the dough is rising, I run some errands. Then, I bake them up and display them in my glass cake dome on the counter. They look so pretty, and it is so nice to have something sweet to offer anyone who may pop by for a Greek coffee or cup of Greek mountain tea.
Storing
You can keep roxakia at room temperature, in a well sealed container, for up to a week. They will become less sticky as they sit, but will still be delicious.
Related recipes
If you love these vegan Greek syrup pastries, I think you will also love these traditional Greek recipes:
Isli – Greek Christmas cookies stuffed with walnuts Traditional Greek Christmas cookies that are stuffed with crushed walnuts and then soaked in a honey syrup.
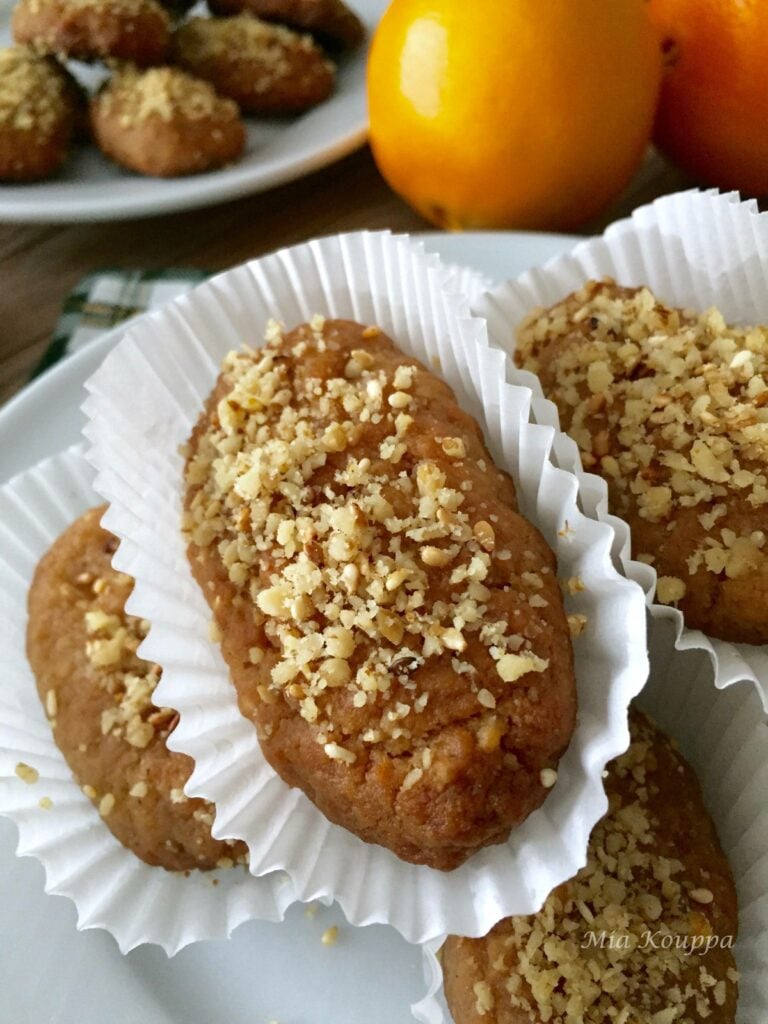
Melomakarona (Greek honey and walnut cookies) A classic cookie made with honey, orange flavour and spices dipped in a honey syrup.
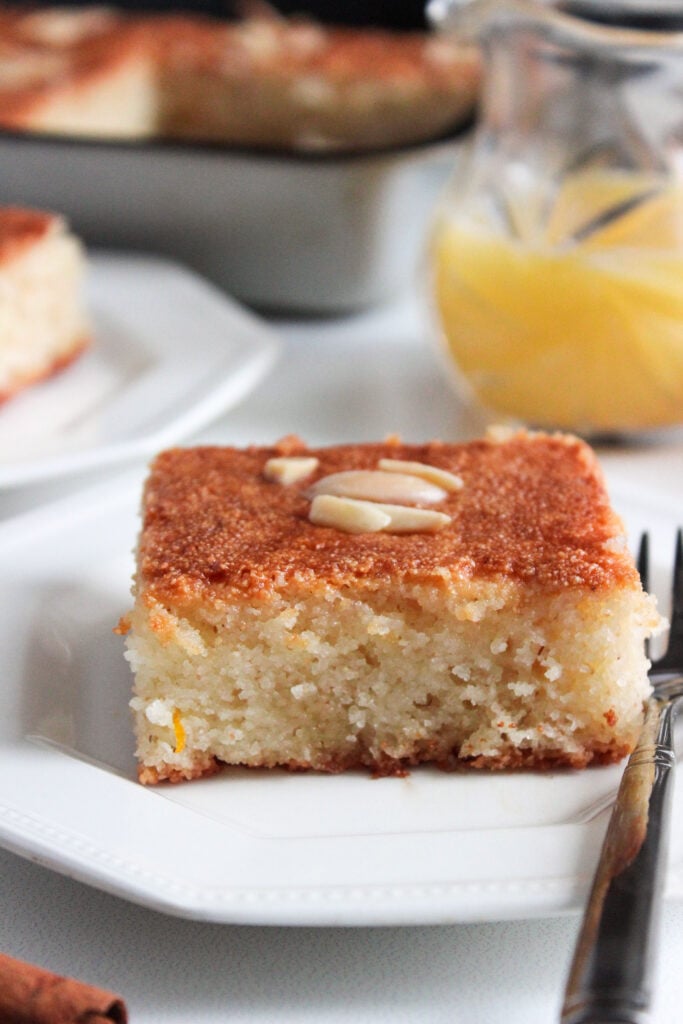
Samali A Greek cake made with semolina, Greek yogourt, orange juice, sugar, flavoured with masticha (mastic) and infused with an orange syrup.
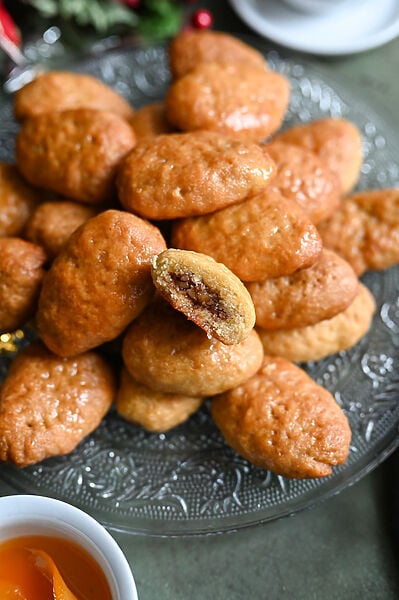
Pear-shaped cookies (Ahladakia) Delicate and delicious! These pear shaped cookies are soaked in syrup and are flavoured with orange.

Sign up for our newsletter!
We love to hear from you! Please leave a comment to let us know how you enjoy our recipes, and don’t forget to leave a star rating!
Recipe

Roxakia, Traditional Greek vanilla and chocolate pastries soaked in syrup
Equipment
- 1 Mixer with dough hook attachment
- 1 kitchen scale optional but recommended
Ingredients
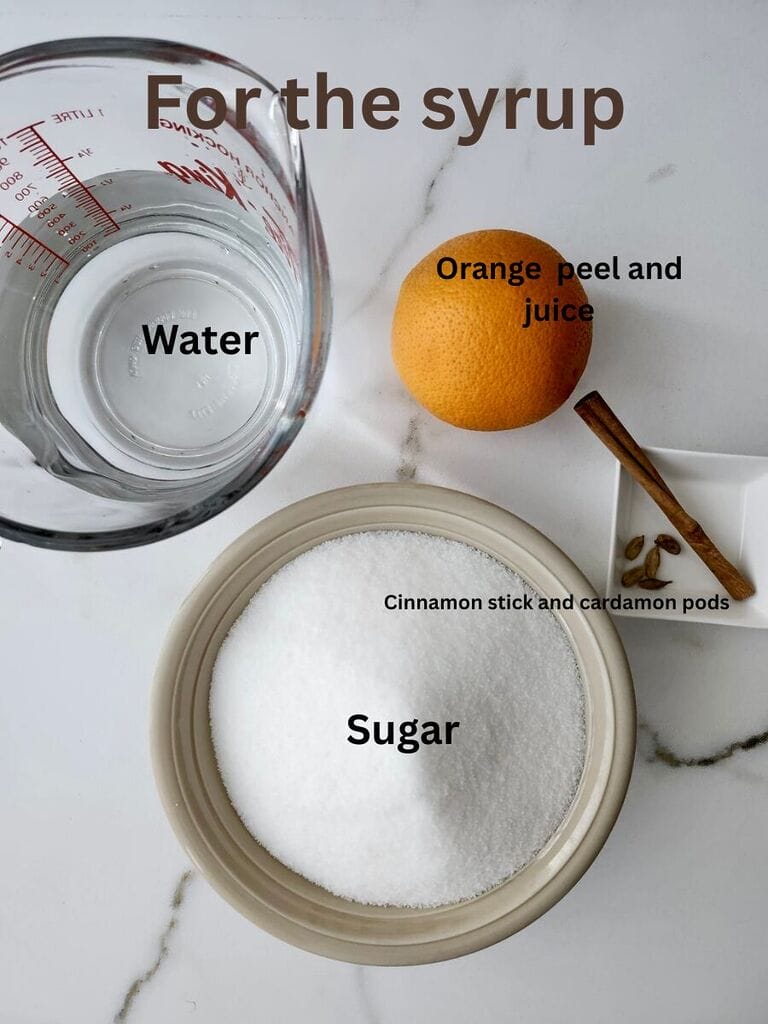
For the syrup
- 2½ cups water
- 3 cups sugar
- 1 orange peel
- 1 orange, juiced
- 1 cinnamon stick
- 3 cardamom pods optional
For the dough
- ¾ cup lukewarm water
- 2 tbsp sugar
- 1 tbsp active dry yeast
- 3½ cups all purpose flour
- 1 tbsp orange zest
- 1 tsp baking powder
- 1 tsp vanilla powder
- 1 tsp cinnamon
- ¼ tsp nutmeg
- ¼ tsp salt
- ½ cup orange juice
- ½ cup vegetable oil
- ¼ cup olive oil
For the chocolate dough
- ½ cup cocoa
- ½ cup walnuts
- 4 tbsp orange juice
- 1 tsp cinnamon
- 1 tbsp olive oil optional, only if dough appears too dry
Instructions
For the syrup
- Squeeze the juice out of your orange after removing the peel. Crush the cardamom pods with the back of a knife. Combine all the ingredients for the syrup into a small pot and bring to a boil over medium heat. Stir and cook until sugar dissolves, and then for an additional 5 minutes over medium heat. Remove the pot from the heat and allow to cool in the pot. Leave the orange peel, cinnamon stick and cardamom pods in the syrup as it cools.2½ cups water, 3 cups sugar, 1 orange peel, 1 orange, juiced, 1 cinnamon stick, 3 cardamom pods
Prepare the dough
- In the bowl of your stand mixer combine the water, sugar and yeast. Whisk together until combined and allow to sit at room temperature for approximately 10 minutes. You should see the surface of your mixture puff up and bubble slightly.¾ cup lukewarm water, 2 tbsp sugar, 1 tbsp active dry yeast
- Meanwhile, combine the dry ingredients together and whisk to combine. Set aside.3½ cups all purpose flour, 1 tsp baking powder, 1 tsp vanilla powder, 1 tsp cinnamon, ¼ tsp nutmeg, ¼ tsp salt
- Once your yeast has proofed, add the orange zest and the liquid ingredients to the bowl. Mix to combine using the dough hook attachment of your mixer. Next, add the dry ingredients and knead the dough for a few minutes until a soft ball is formed and it pulls from the side of the bowl.1 tbsp orange zest, ½ cup orange juice, ½ cup vegetable oil, ¼ cup olive oil
- Measure your dough if you have a kitchen scale and separate it into 1/3 and 2/3 portions; my dough usually totals around 990 grams, so I reserve about 330 grams to make the chocolate dough. Transfer the larger portion of dough to a bowl, cover, and set aside to rise until doubled in size, or about 2 hours.
- Return the smaller portion of dough to the bowl of the stand mixer. Sift the cocoa powder and cinnamon over the dough. Use a food processor or a blender to finely chop the walnuts. Add the finely crushed walnuts and the orange juice to the bowl. Knead with the dough hook attachment on medium speed until everything is well combined. if your dough appears too dry, add some additional olive oil. Set the dough aside, covered, to rise until doubled in size, or about 2 hours.½ cup cocoa, ½ cup walnuts, 4 tbsp orange juice, 1 tsp cinnamon, 1 tbsp olive oil
- Once your dough has risen separate both the vanilla and the chocolate dough into two halves. On a lightly floured surface roll one half of the chocolate dough into a log, about an inch thick and about 12 inches long – set aside. Then, on the same lightly floured surface, use a rolling pin to roll out half the vanilla dough into a rectangle – about 12 inches long and 8 inches high; the dough will be thin.
- Place the chocolate dough along one of the long edges of the vanilla dough and roll the dough tightly so that the vanilla dough wraps around the chocolate dough. Using a sharp knife, slice the log into approximately 15 pieces, each about 1 inch thick; I use my thumb as a guide. Do not worry if you squish the dough as you are slicing through it. Repeat the entire process with the second half of the vanilla and chocolate dough.
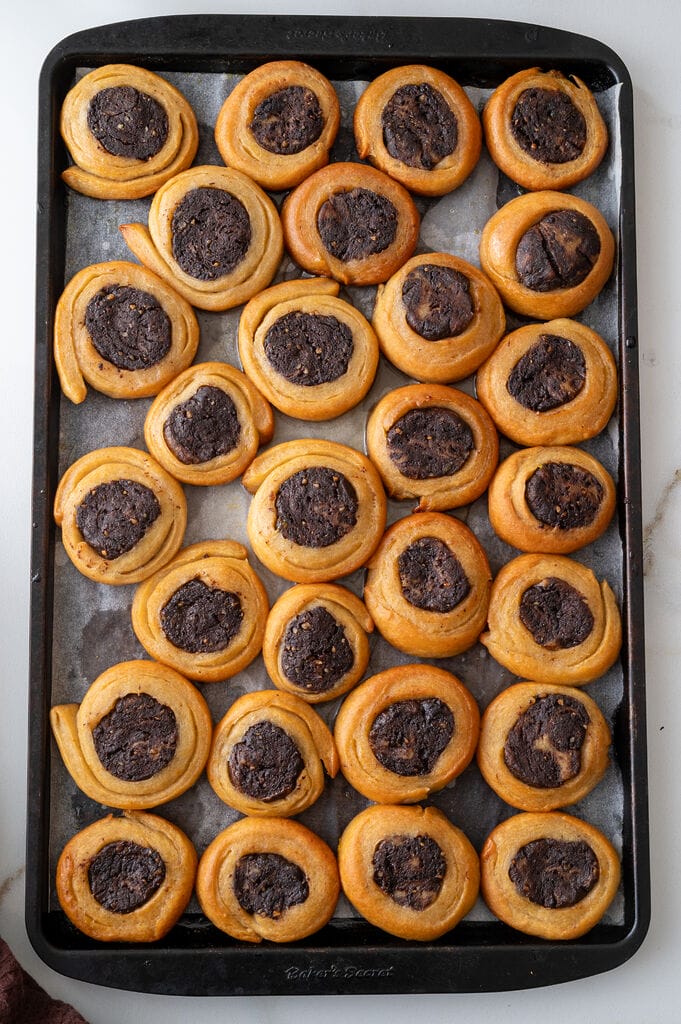
- Once all your slices are made, use your hands to shape the pastries into rounds and to flatten them until they are about 1/2 inch thick. Transfer them to a parchment lined cookie sheet and bake in the middle rack of your oven for between 22 – 25 minutes; you will likely need to do this in batches.
- Once all of your roxakia are baked, transfer them all to the same baking sheet or other container and pour the cooled syrup over them. Allow them to soak in the syrup for about 15 minutes and then carefully turn them over so that the top of the roxakia soak in the syrup as well. Turn them over again after about 5 minutes; at this point most of the syrup should have been absorbed.