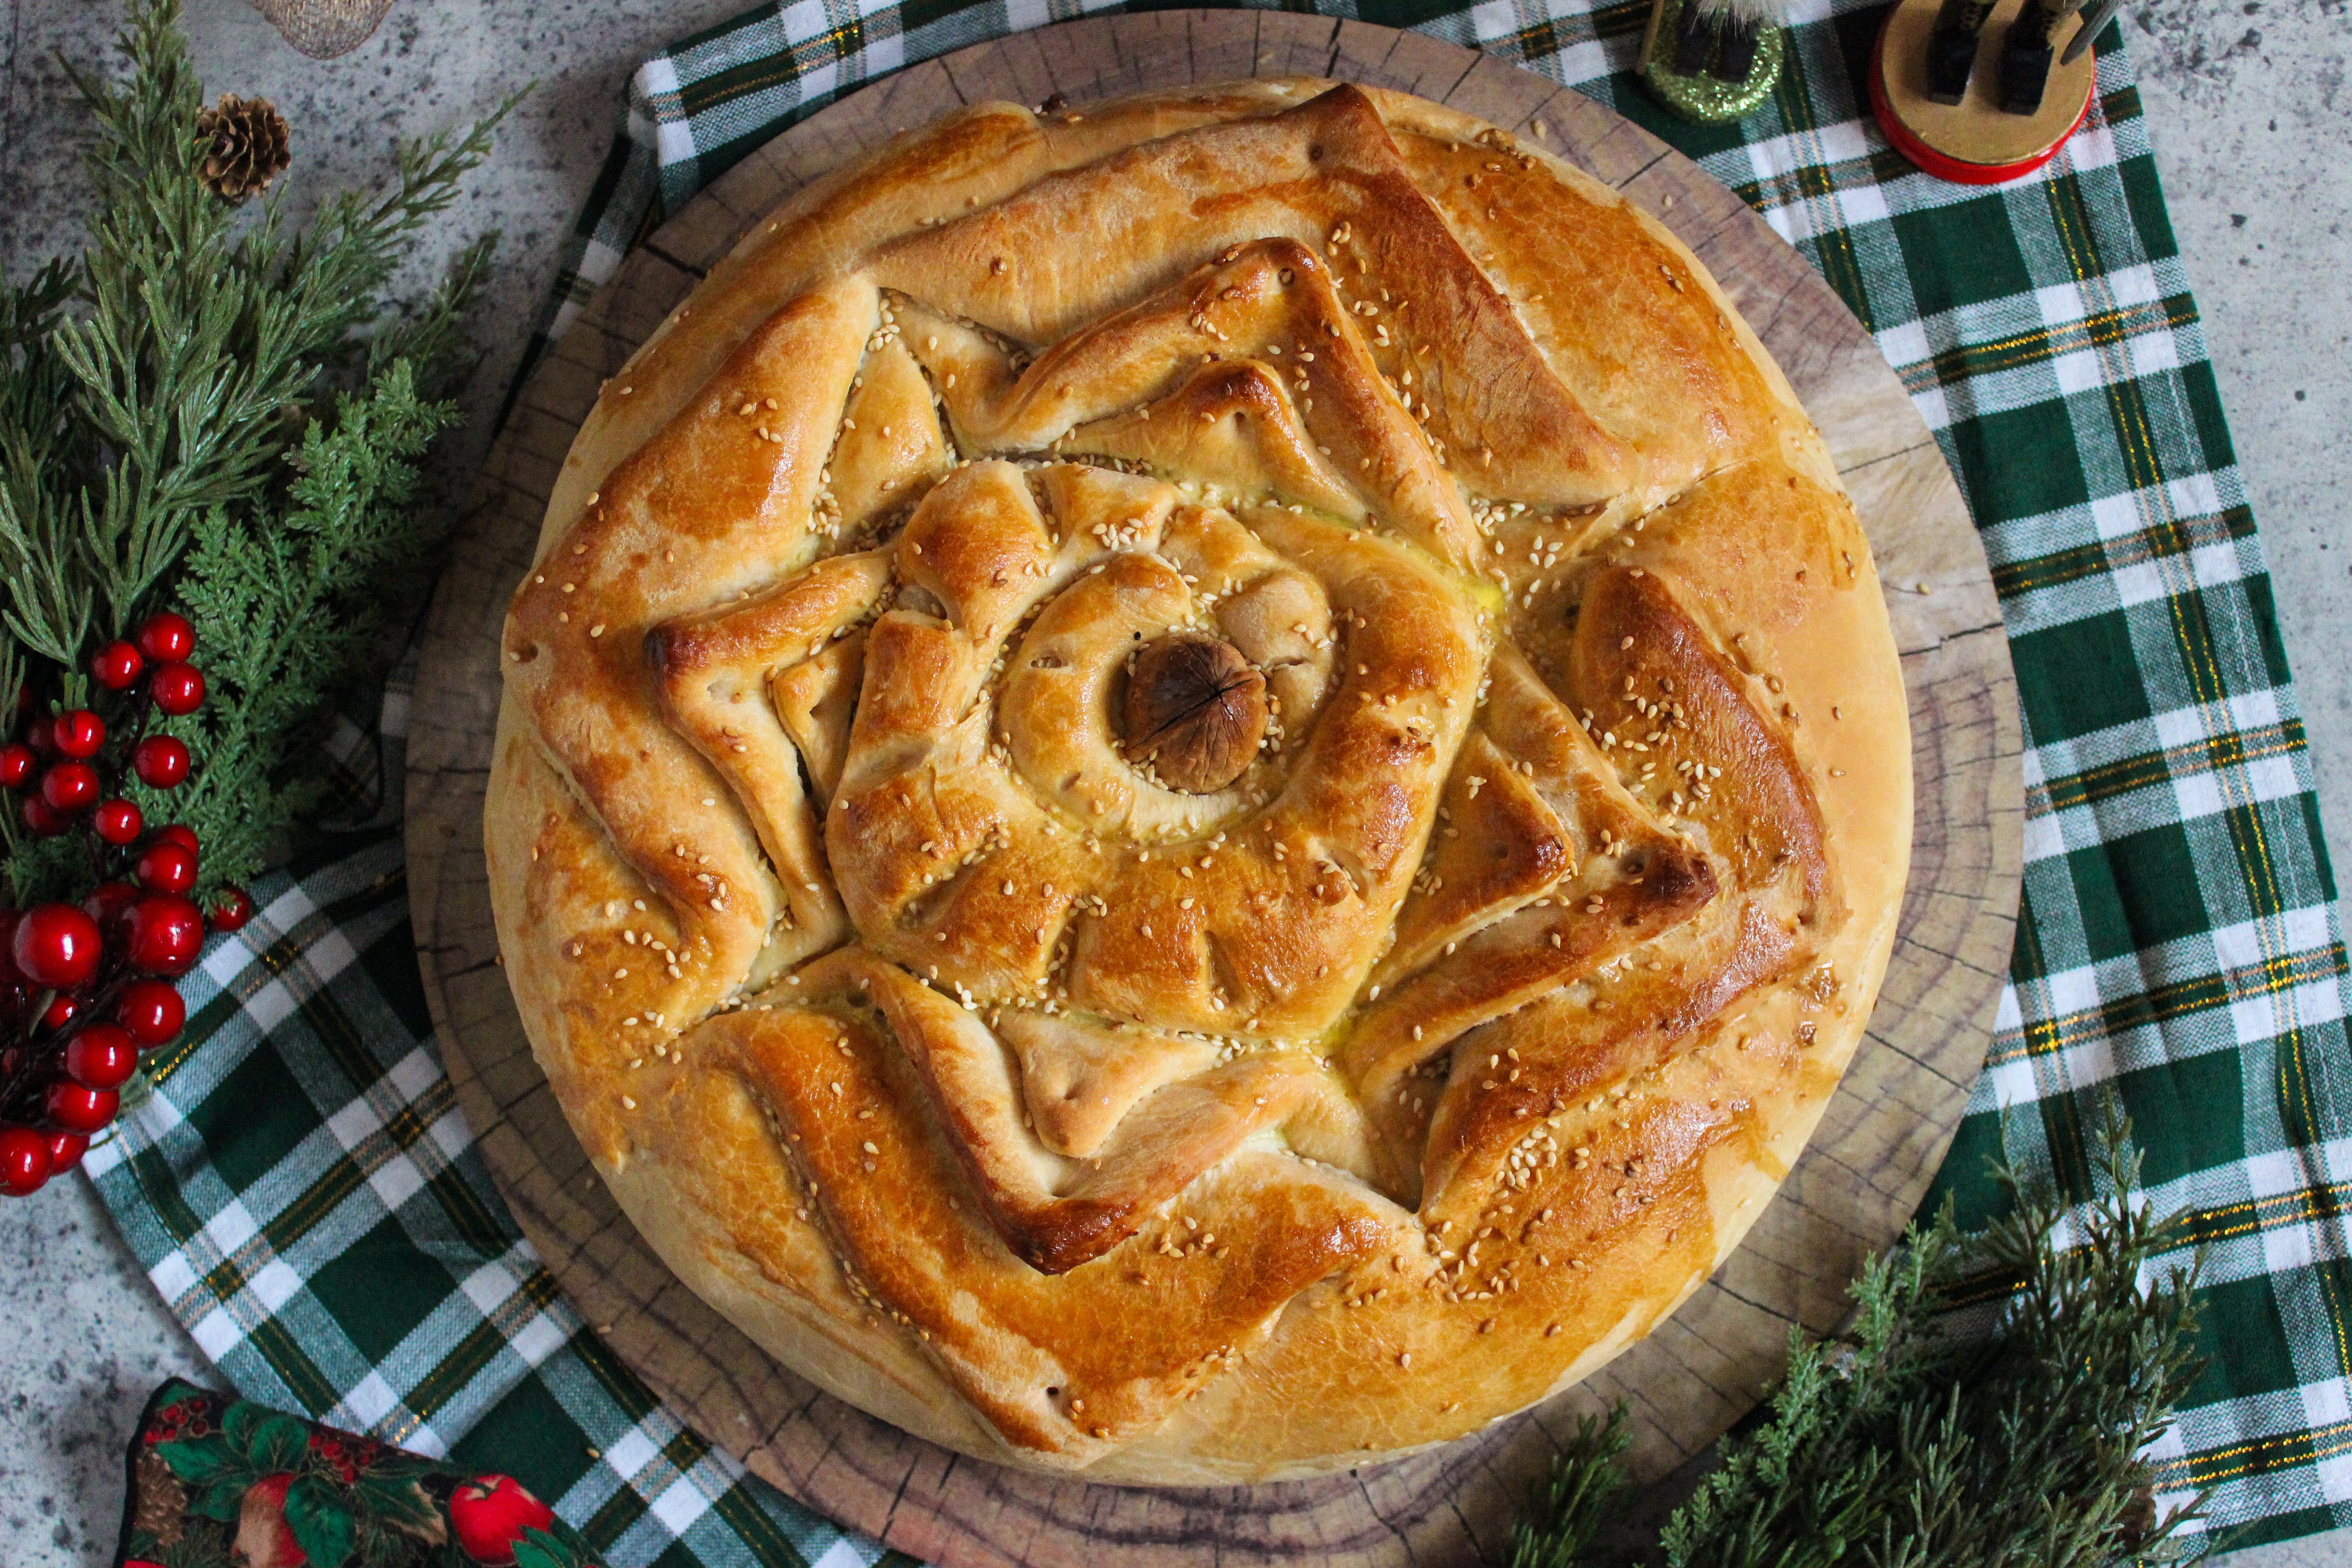
Christopsomo, Greek Christmas Bread (Χριστόψωμο)
Christopsomo is a layered Greek Christmas bread that is served traditionally on Christmas Eve or Christmas Day. This recipe is not only beautiful, but it is also delicious and full of meaning. Learn how to make it and enjoy this Greek custom.
Christmas rituals certainly vary across cultures, regions and families. Some are embedded within religious traditions while others are developed through years of “that’s just the way we do things”. One tradition which our family shares with many other Orthodox families is the baking of the traditional christopsomo, which literally translates to Christ’s bread. This bread is typically baked on Christmas Eve and eaten on Christmas Day and is replete with symbolism and meaning.
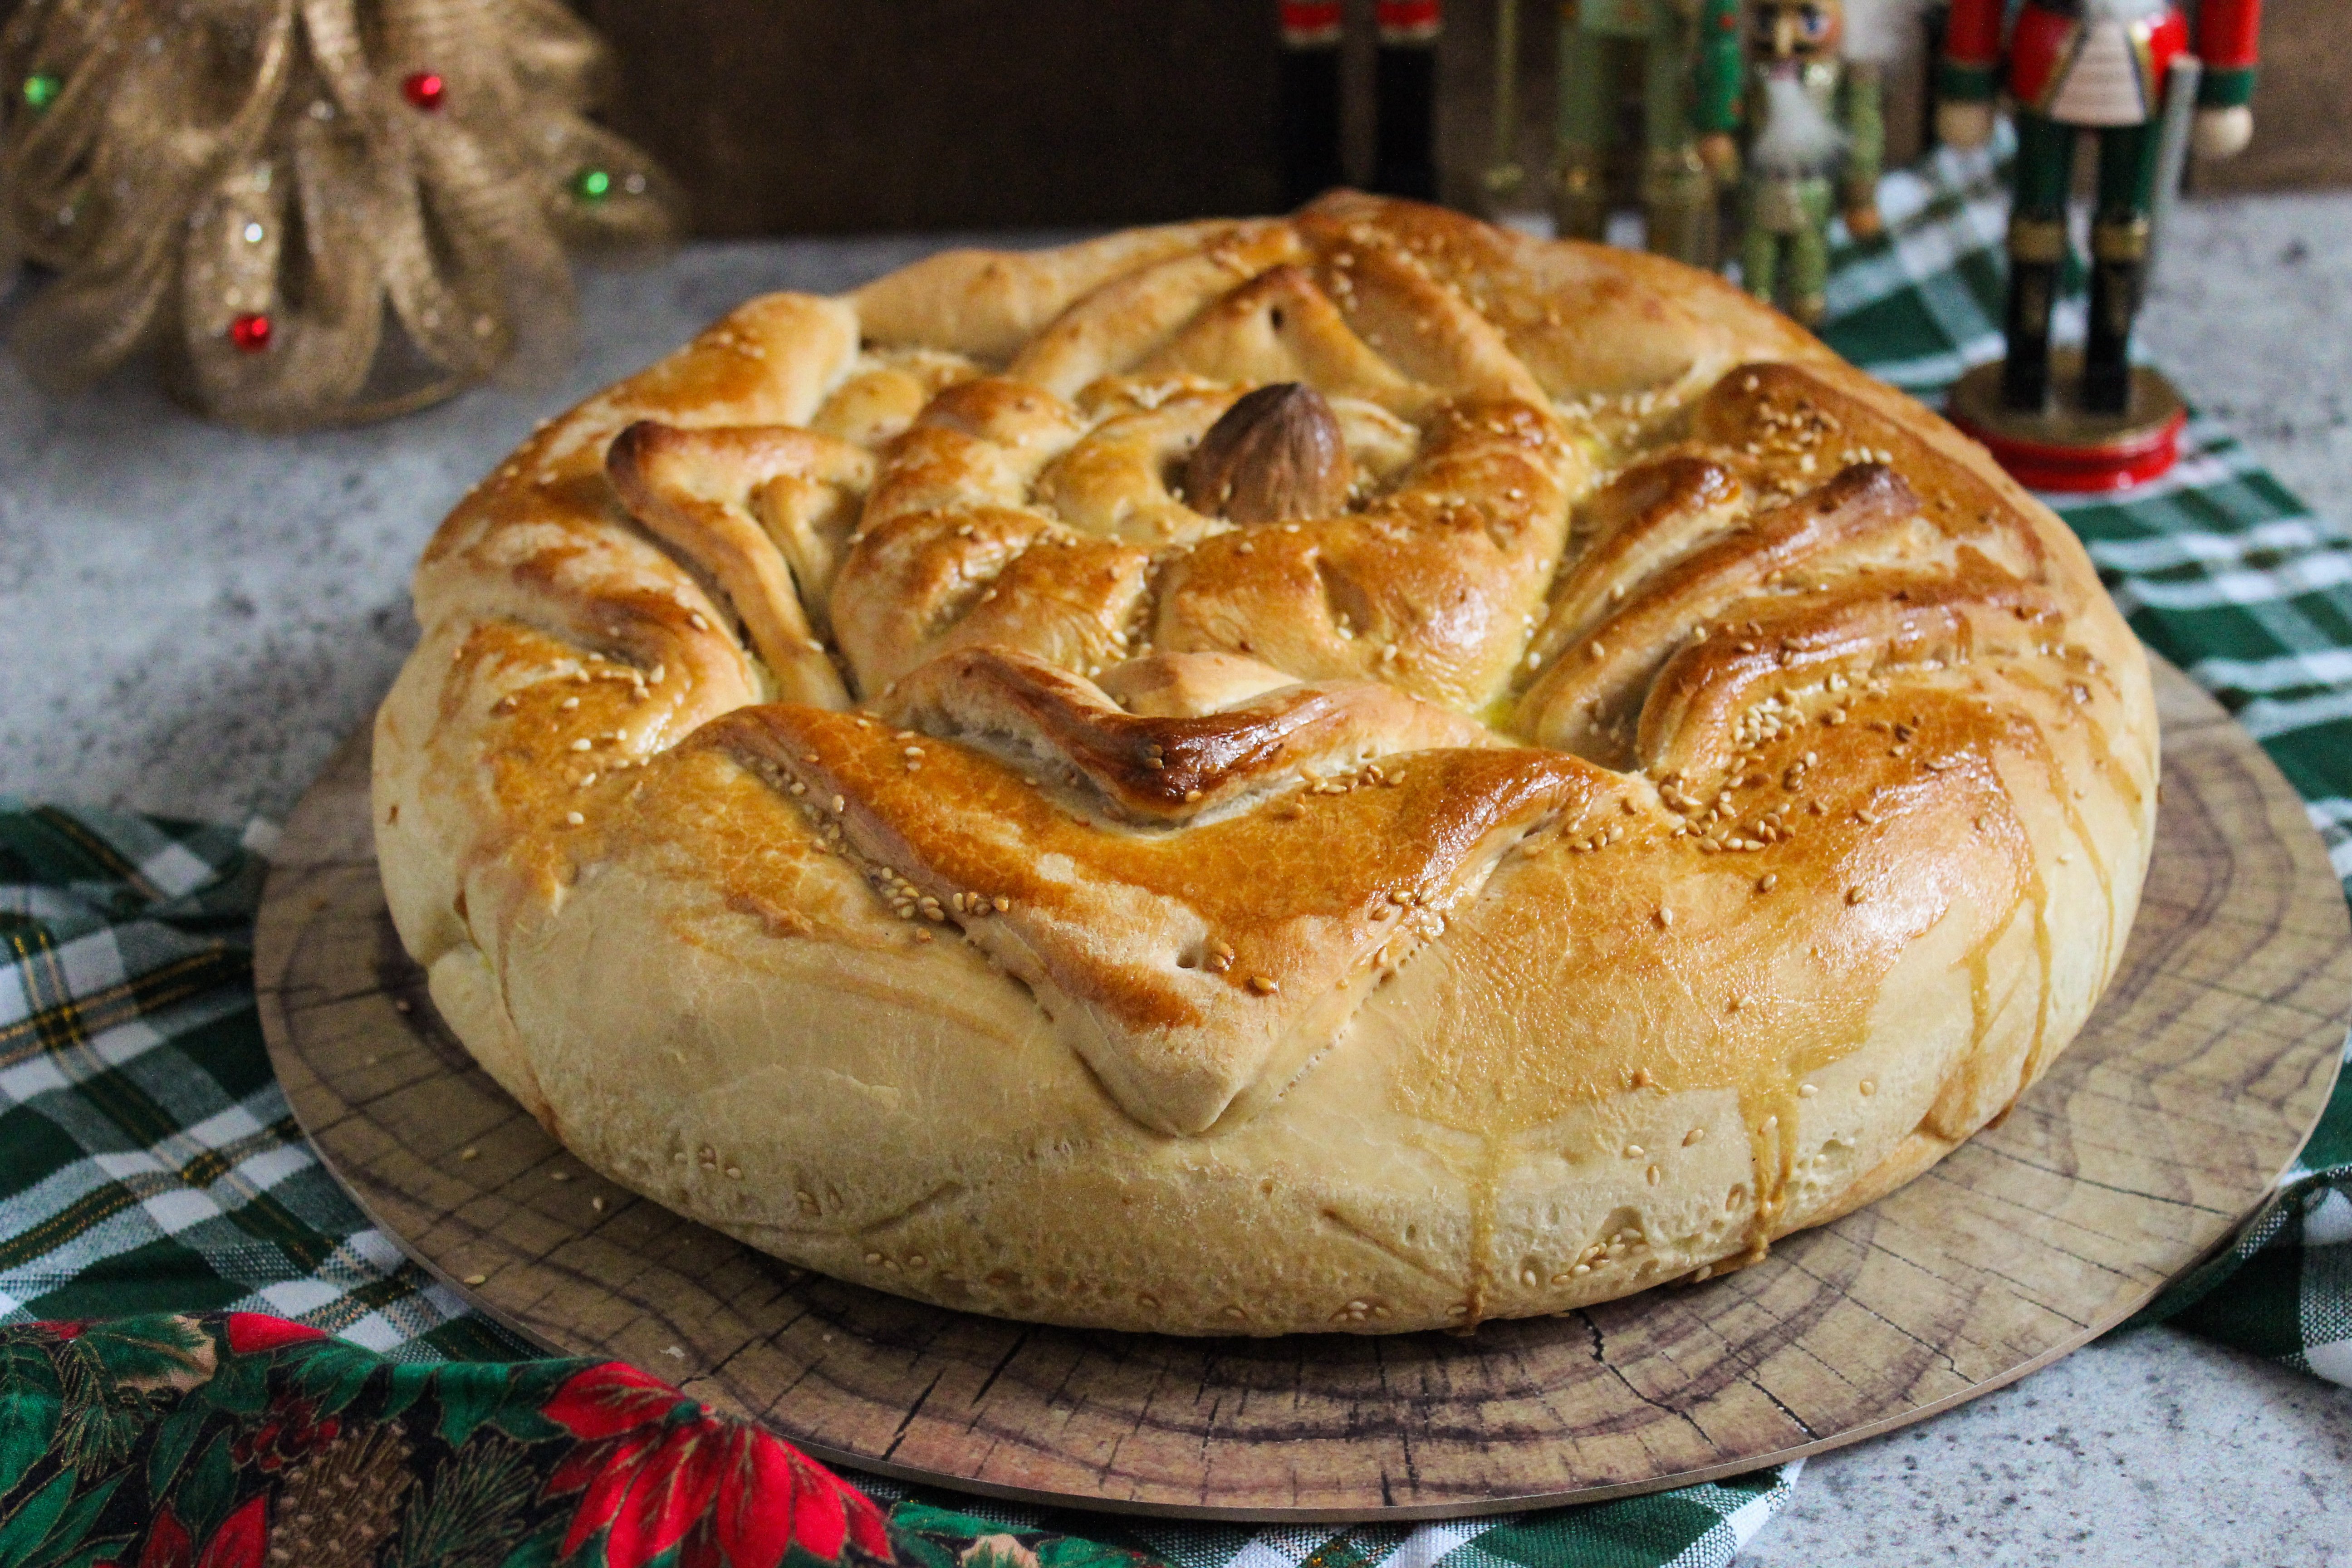
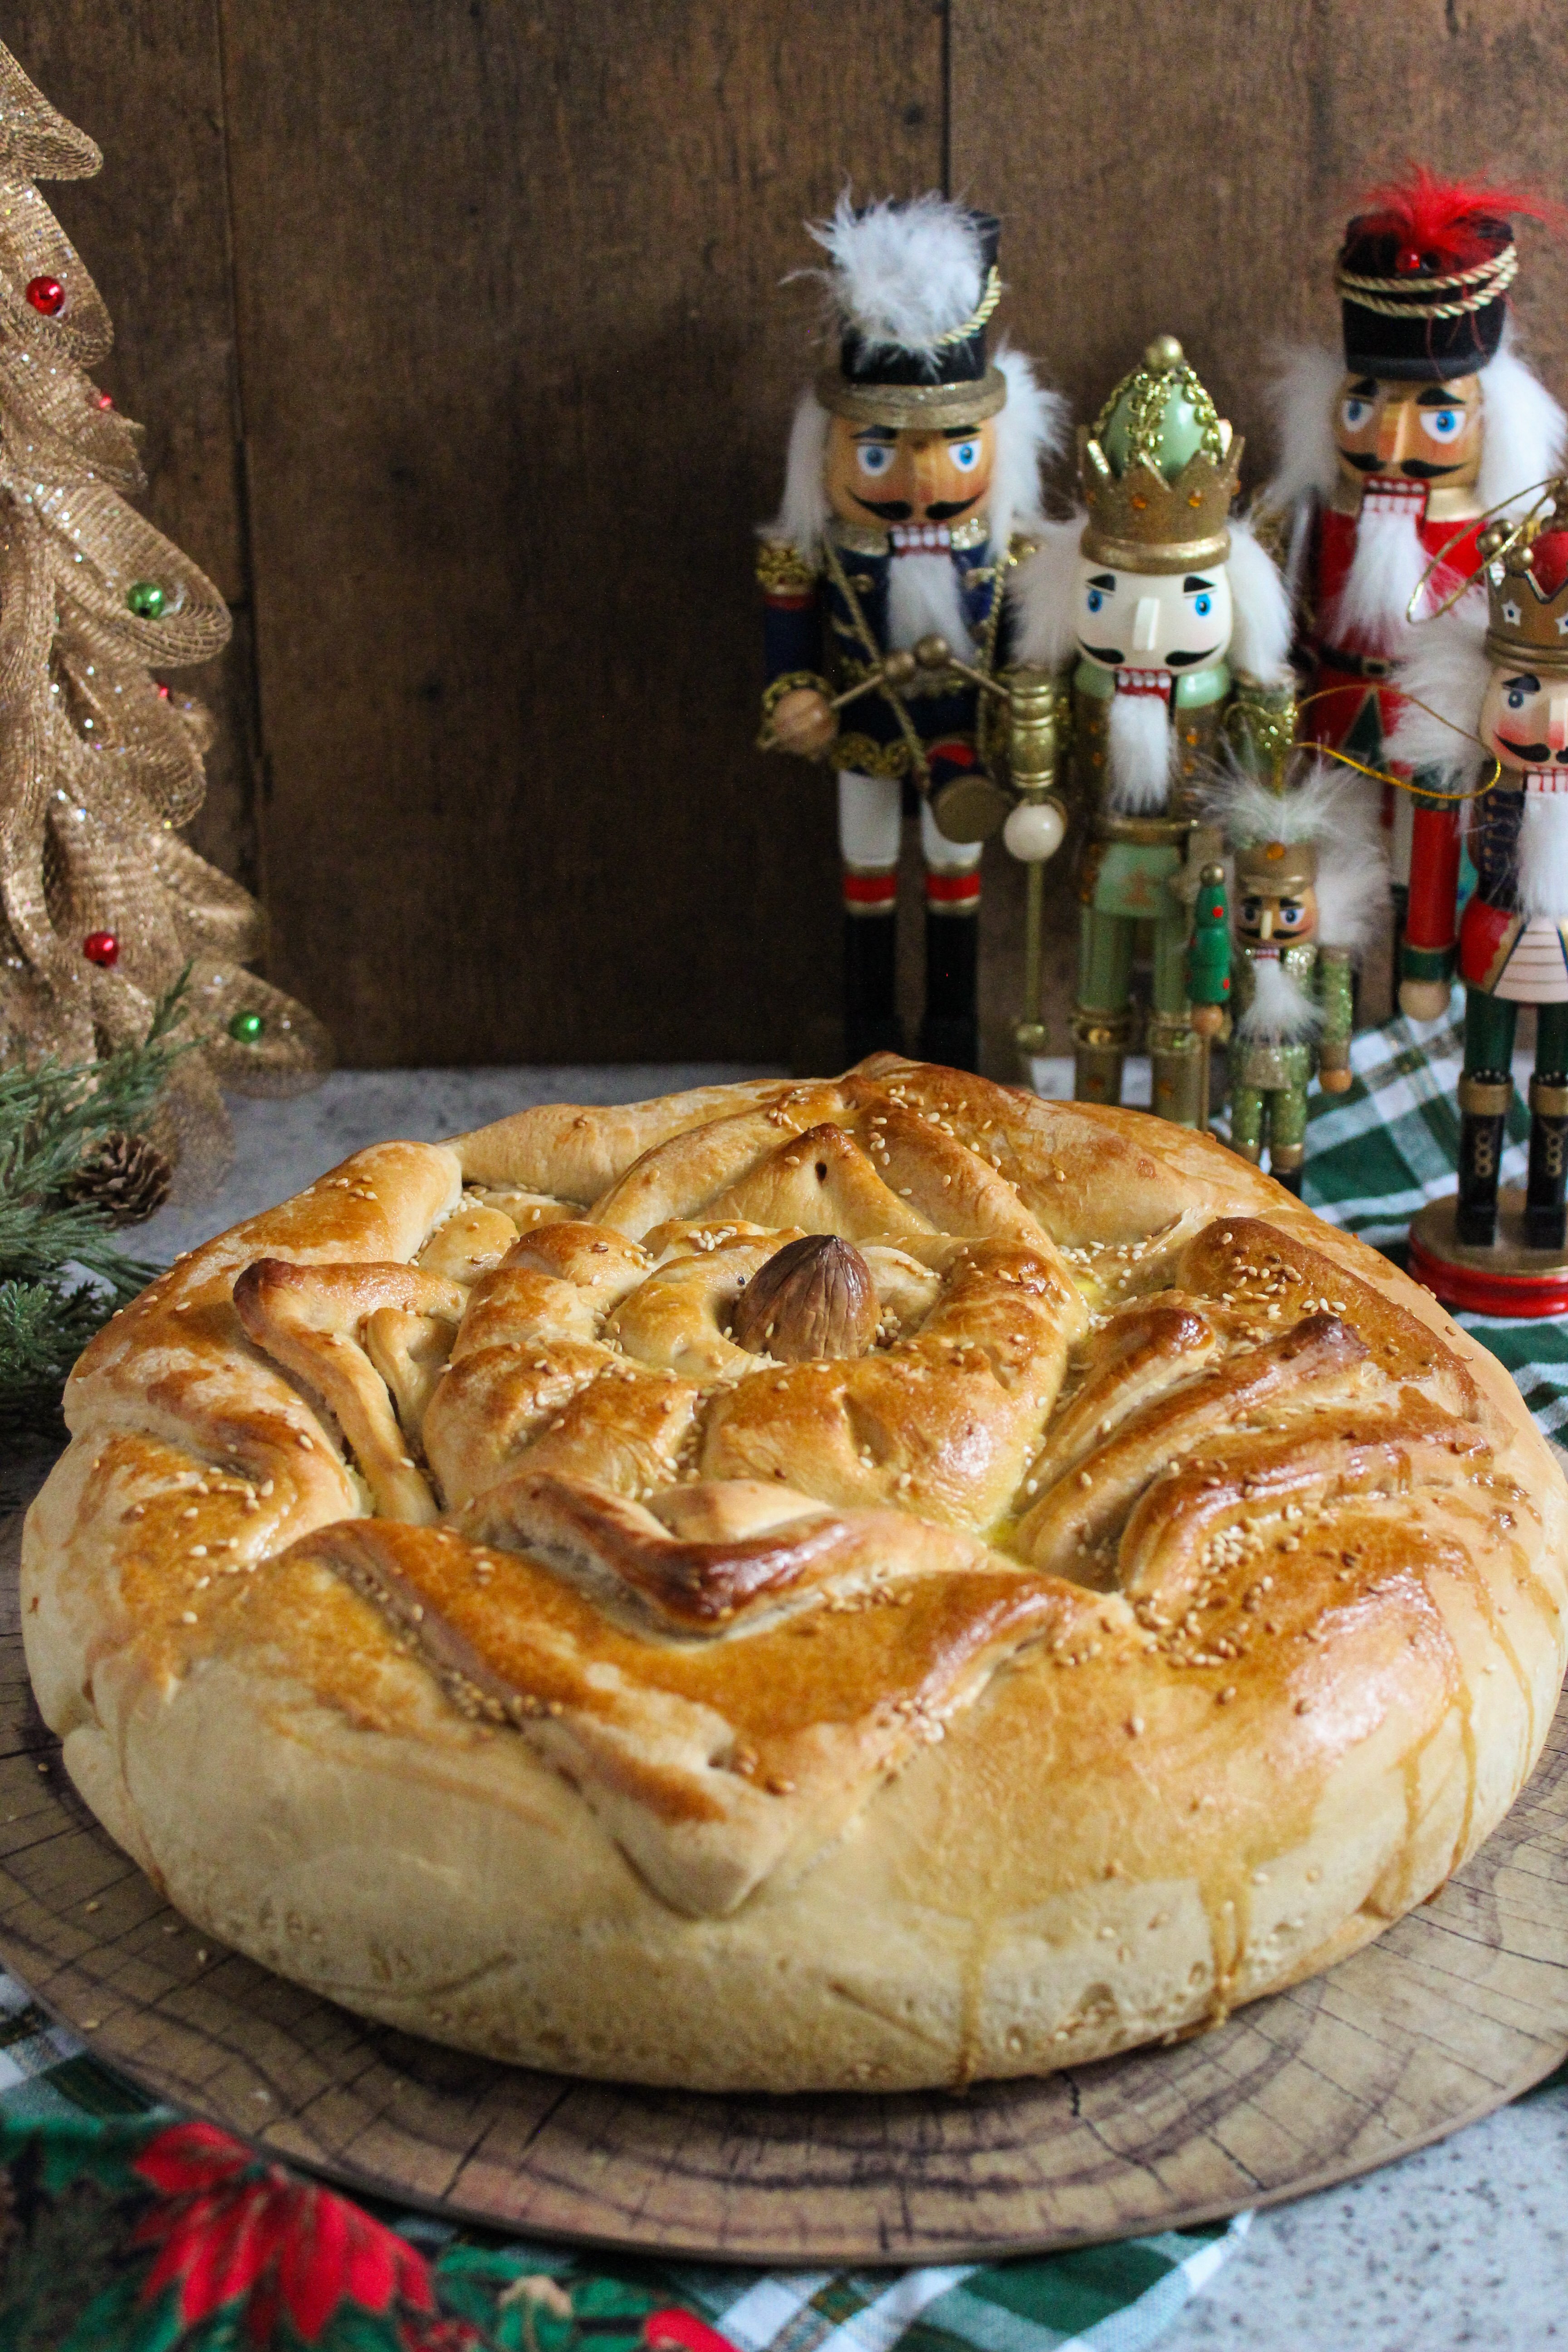
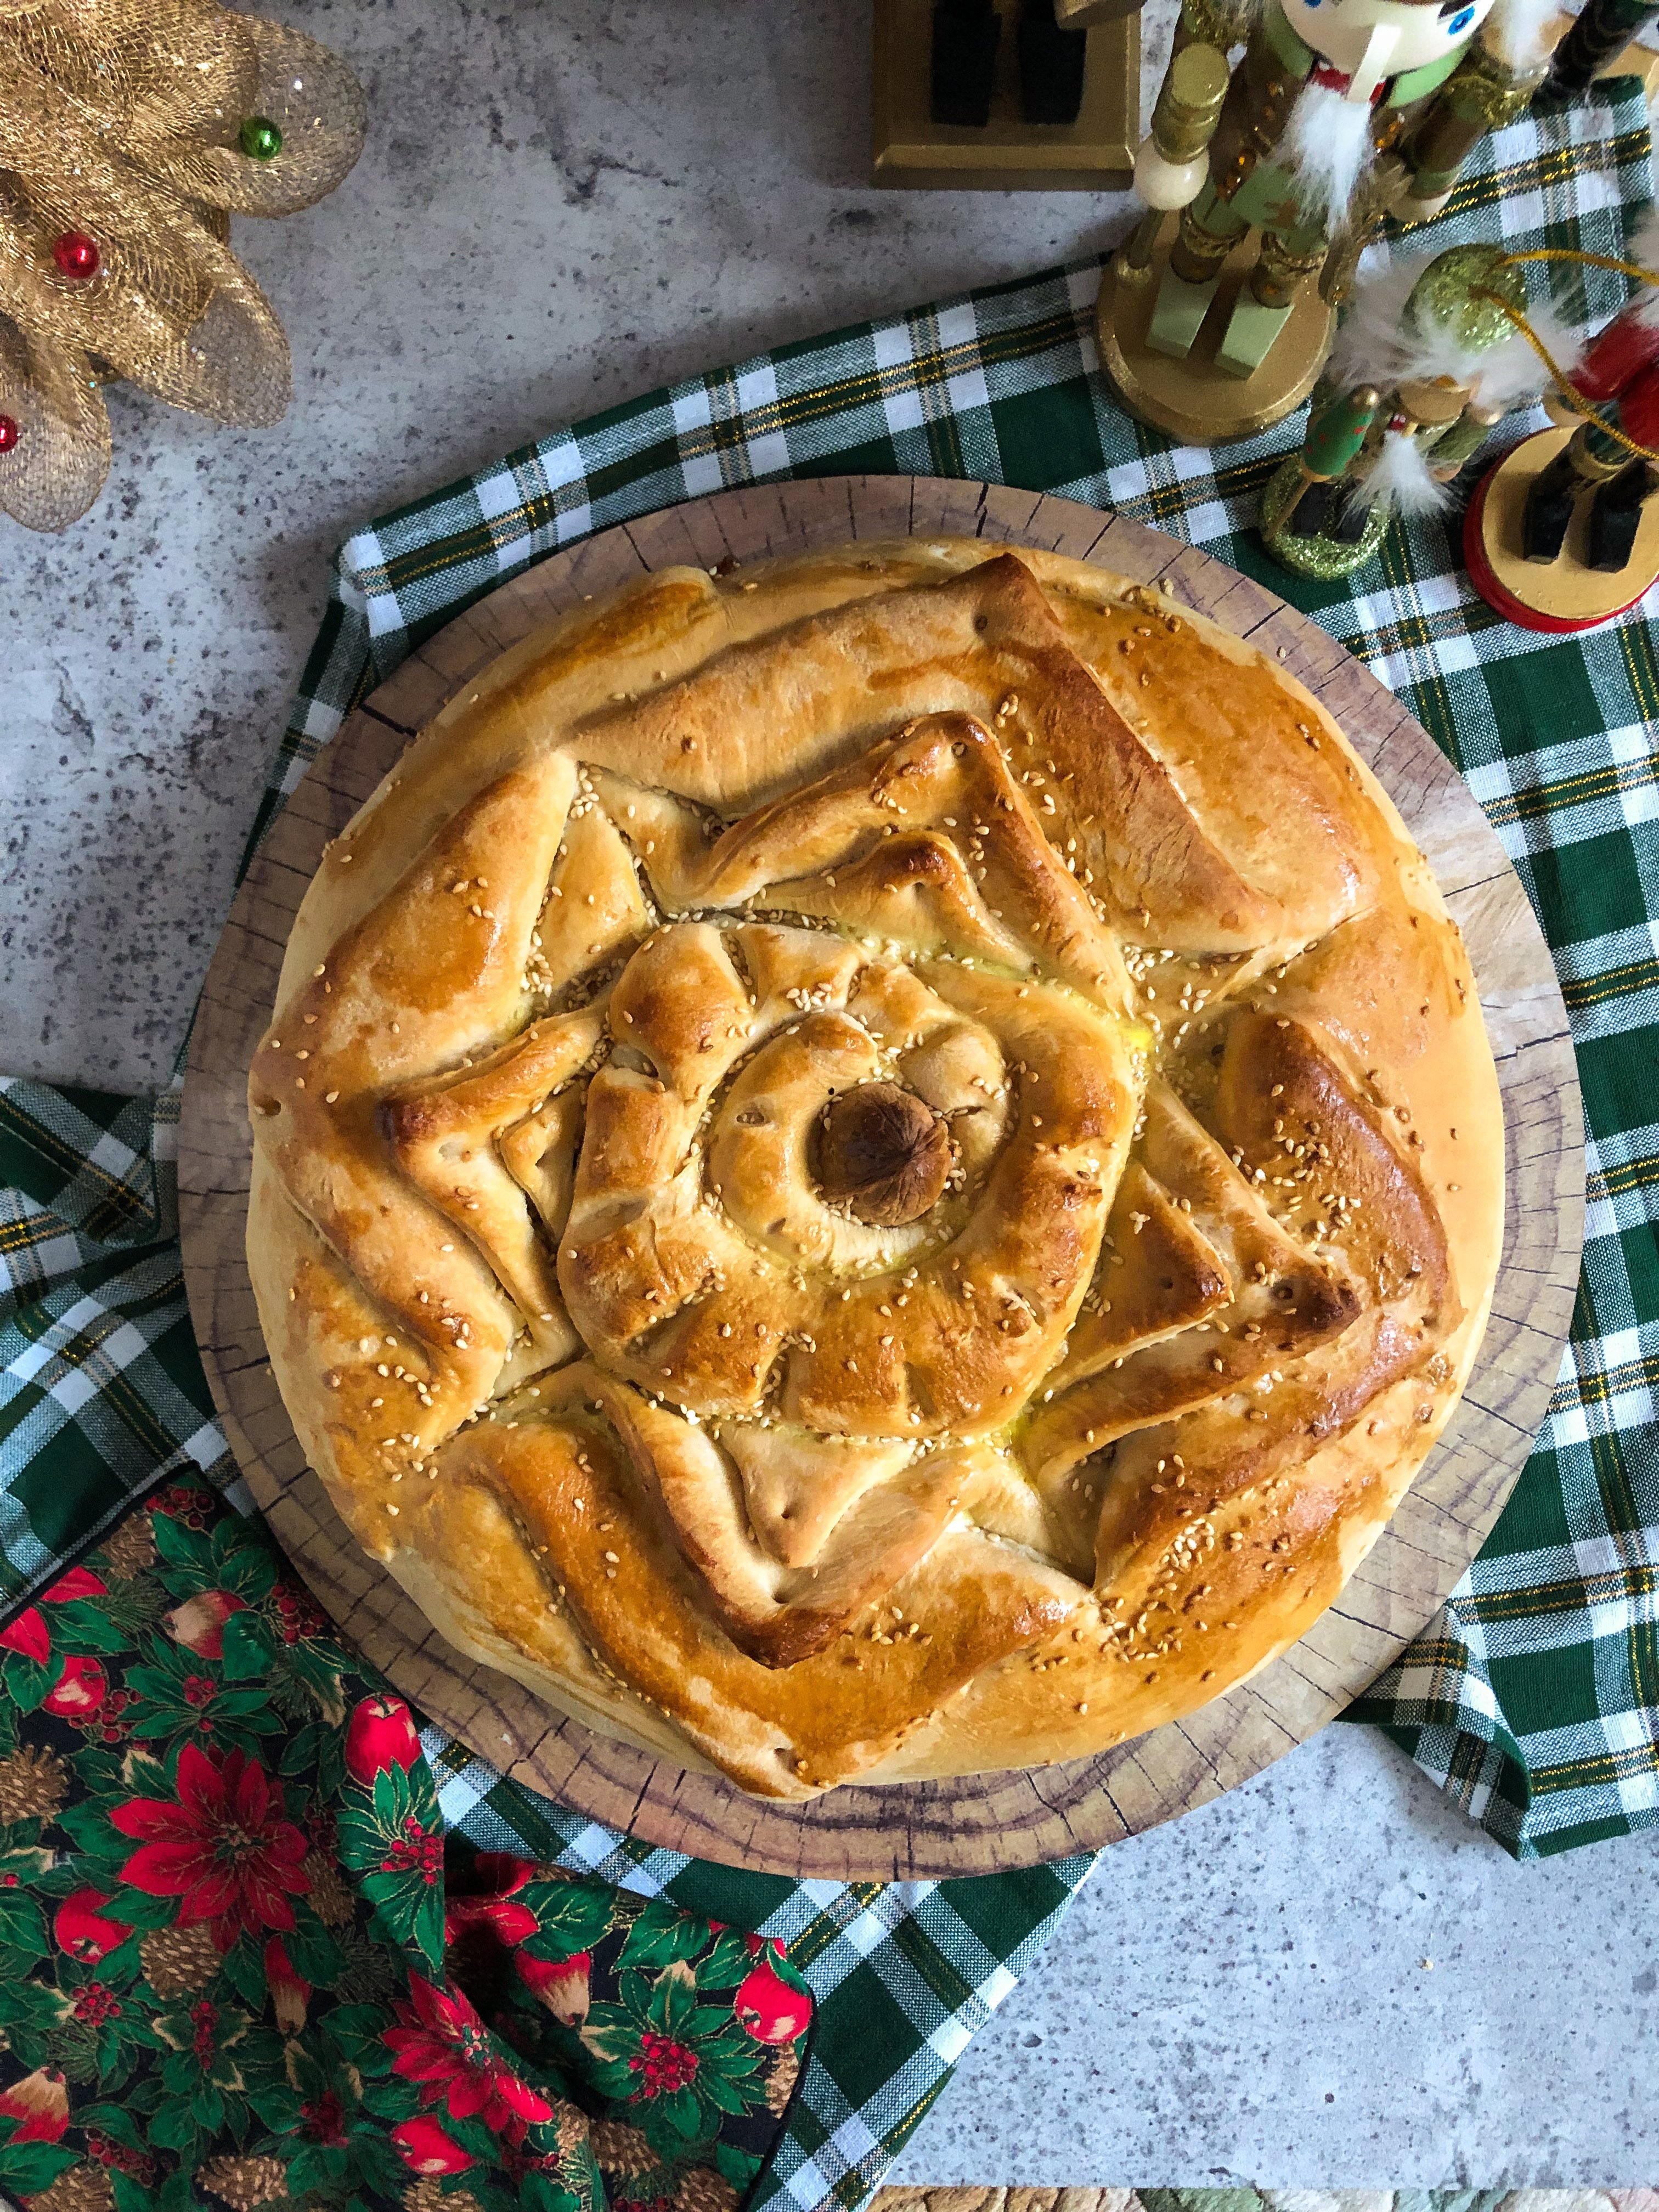
There are probably as many versions of christopsomo as there are families who eat it. Some flavour their bread with nuts and dried fruit, others with spices and dried herbs. And, just as the flavours can vary, so too can the design. Traditionally, christopsomo is adorned with either a cross or the letter “X”, both meant to represent Christ. In fact, the “X” is not an “X” at all, but the Greek letter chi which in Greek is written as “X”. Another common design feature is the inclusion of a walnut into the center of the typically round loaf. Explanations given for the inclusion of the walnut vary, but it is often considered to symbolize life and fertility. Further, the shell of the walnut has been described as representing the womb of the Virgin Mary or the cave in which many Christians believe Christ was born.
Why I love this recipe
In our family, christopsomo is prepared as a relatively plain bread; no nuts, no spices, no dried fruit. There are some unique features however, both in the way the dough is prepared, and how the bread is constructed, making our christopsomo more than just a regular loaf of bread.
The inspiration for this technique and design came to my parents many years ago, while visiting family out of town. During that visit, they were served christopsomo prepared by another guest, who happened to be of Yugoslavian descent. Our parents were intrigued by her beautiful bread design, and the wonderful texture and flavour of her christopsomo. They therefore adapted their own recipe to replicate this bread and have since referred to it as “Yugoslavian christopsomo”. Whether or not similar bread is found throughout the countries which used to collectively be Yugoslavia, or whether this was the result of one woman playing with dough, is anybody’s guess. What is certain however is that this is a bread you will want to make over and over again.
Key ingredients
Flour For this recipe you will need all-purpose (also called regular or plain) white flour. This is an easily available flour that is perfect for making bread.
Olive oil A small amount of olive oil is added to the dough to help with the texture.
Warm water In order to proof the yeast you need to have warm water. Not too hot, not too cold. Basically you should be able to insert a finger into the water, feel it warm, but not burn yourself!
Salt Added to most recipes, salt helps to heighten all other flavours, including in this christopsomo.
Sugar A bit of regular sugar helps to activate the yeast; it is like food for the bacteria!
Active dry yeast I like to keep my yeast in the refrigerator to keep it fresh as long as possible.
Olive oil spread This ingredient is part of what makes this bread unique, and give it a great texture.
Walnuts You actually only need one walnut, in the shell. You will add this as a meaningful decorative item to the center of your loaf.
Sesame seeds Before baking the top of the bread is sprinkled with sesame seeds.
Egg yolks An egg yolk wash, made with egg yolk and water, is brushed onto the bread mid-way through baking. This gives the top of your bread a beautiful golden top.
How to make it
Do not be intimidated by the many steps – we have broken the instructions down into details so that it is easier for you to follow! The photos are also meant to visualize what to do! You can do it!
Step 1
Prepare your dough by sifting 5 1/3 cups (800 grams) of all purpose flour into a large mixing bowl. Mix in the salt.
Step 2
In a small bowl or mug, combine 1/2 cup of warm water, the 1/4 teaspoon sugar, and the 1 tablespoon active dry yeast. Stir well and allow to sit for approximately 3 – 5 minutes. You should see some bubbling on the surface, which indicates that your yeast is working.
Step 3
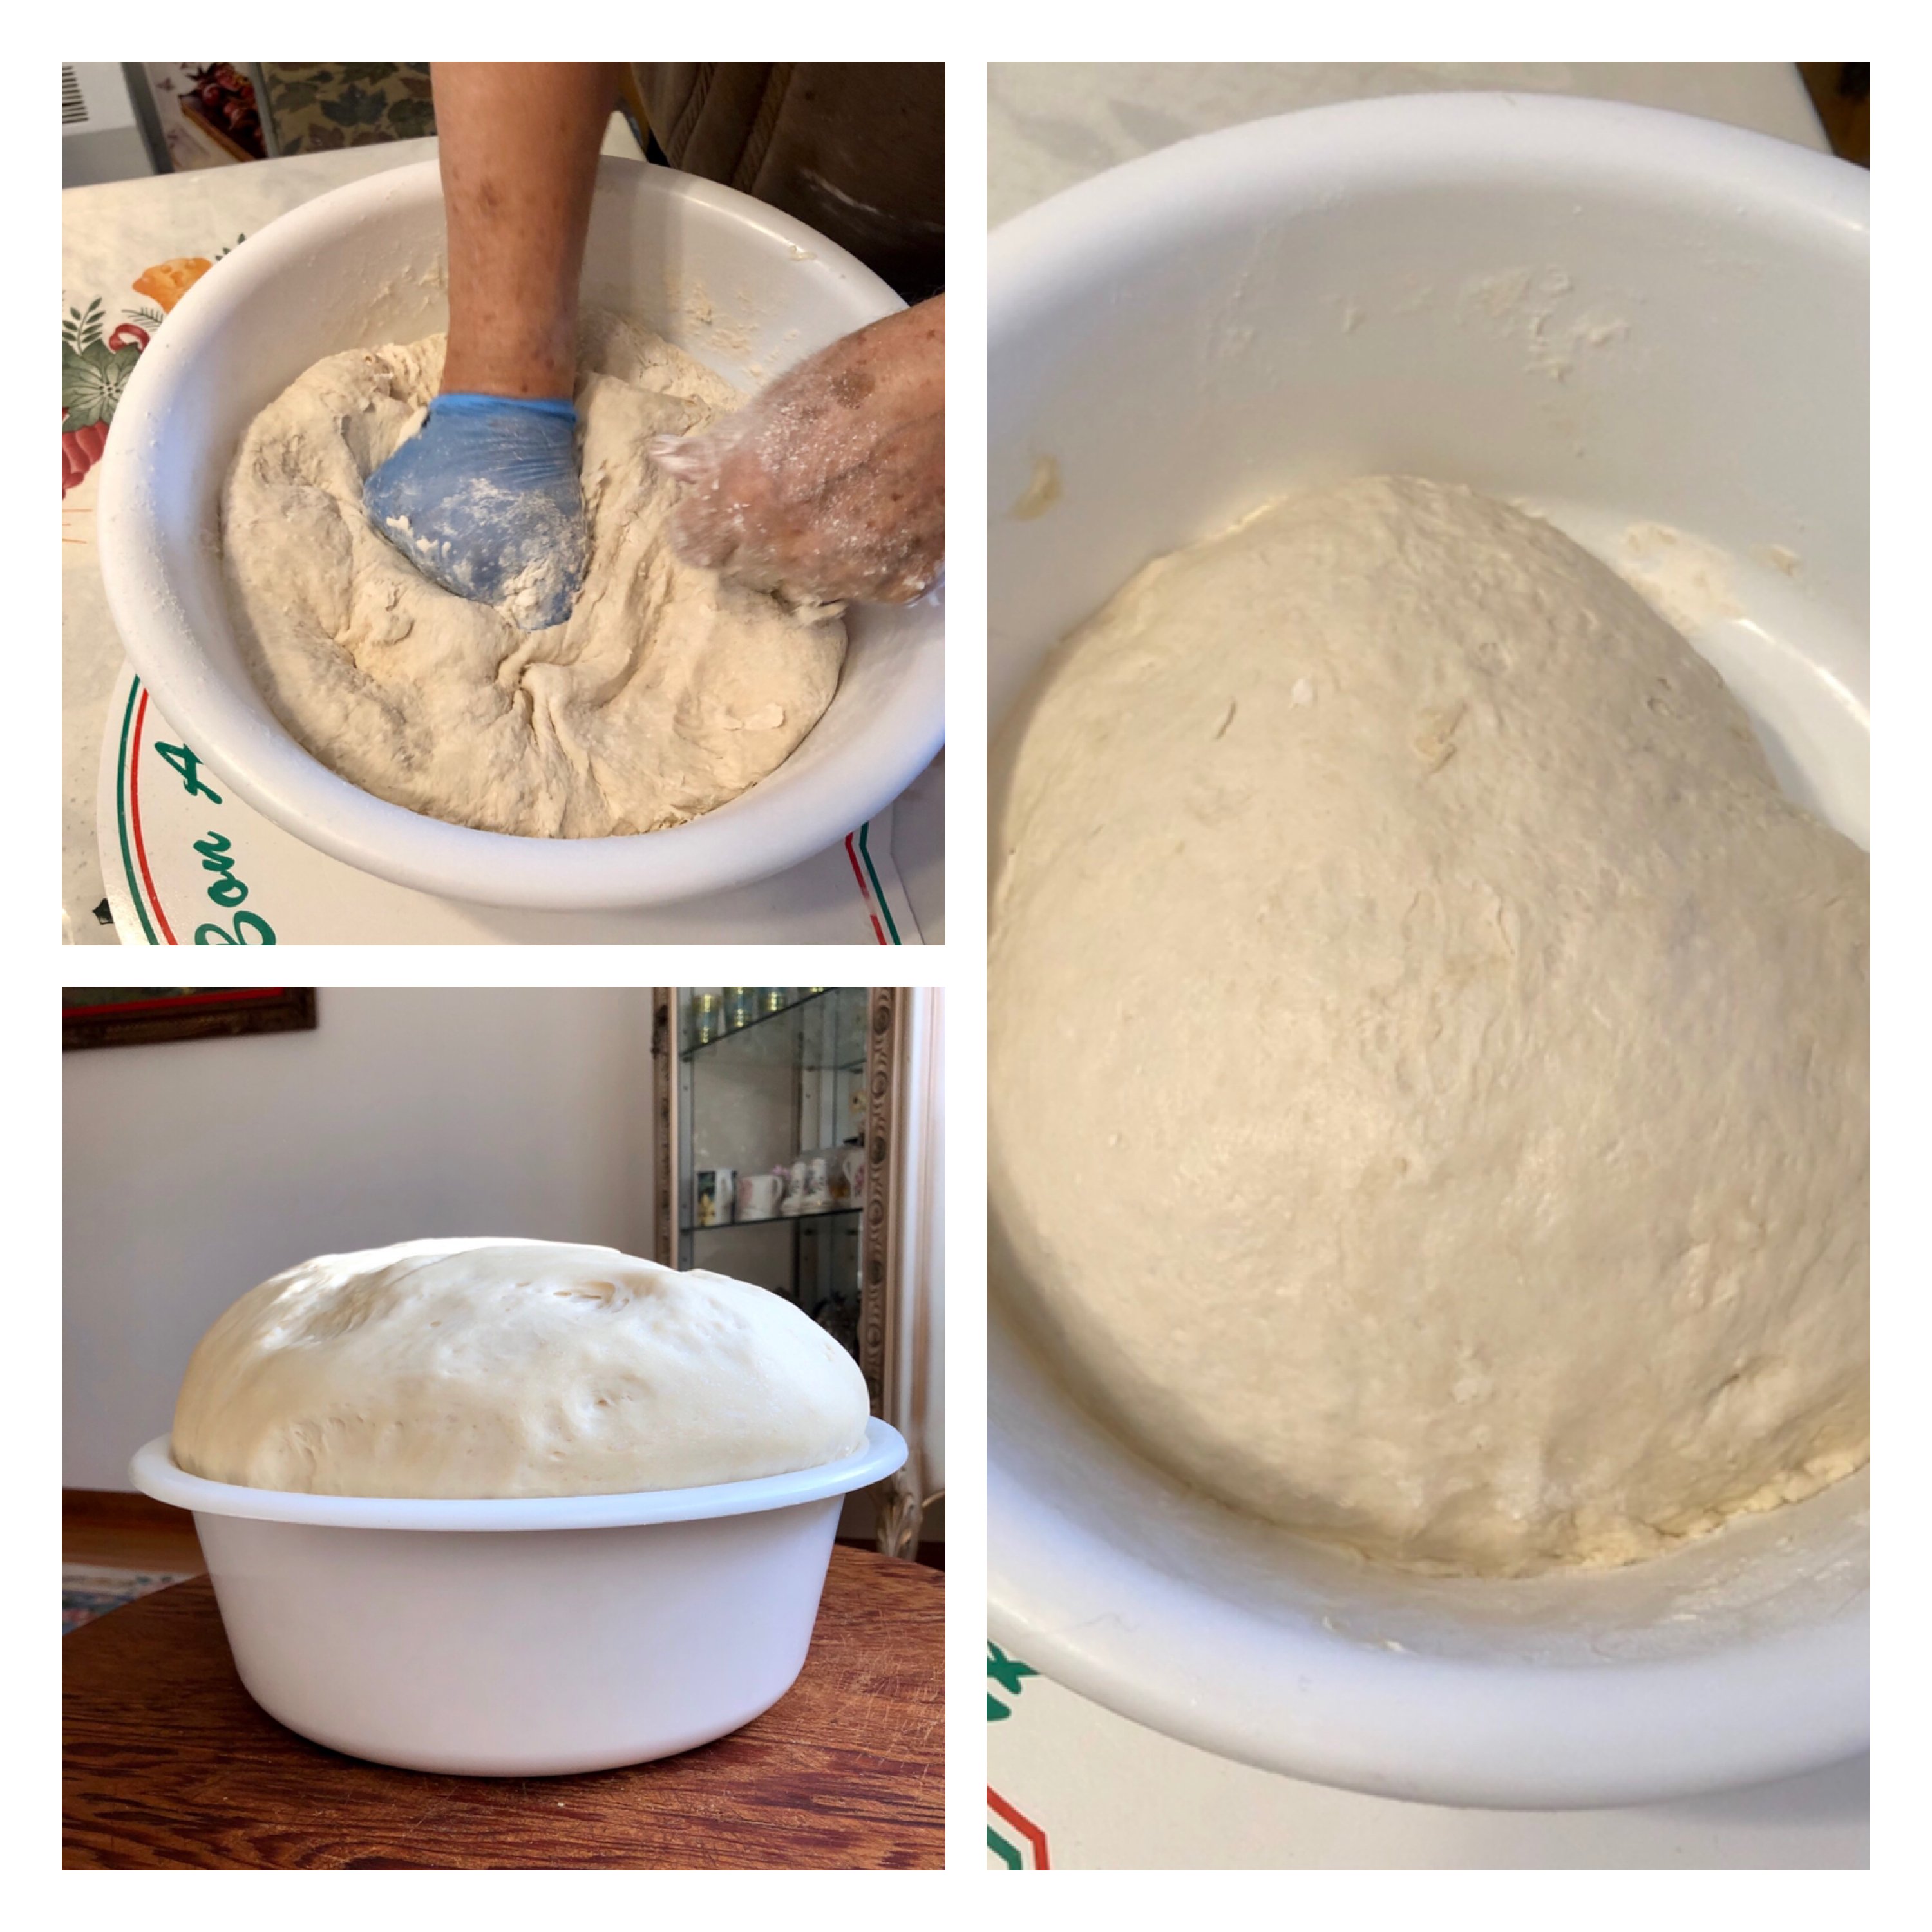
Pour this yeast mixture into the large bowl which contains your flour, and add the additional 4 3/4 cups of warm water and 2 1/2 tablespoons of vegetable oil. Mix well with your hands and begin to knead your dough. You may find that you need to add additional flour; add 1/4 cup flour at a time (sifted before you add it to your dough) until you have a dough which is soft and not sticking onto your hands (we added a total of about 1 1/4 cups or 185 grams more flour at this point). You should end up with a dough which is soft, not too stiff and not sticking to your hands.
Step 4
Form the dough into a ball in your bowl and lift one side of it so that you can add 1/2 tablespoon of vegetable oil to the bottom of the bowl. Cover your dough with a clean kitchen towel and let rise for at least 2 – 3 hours in a warm, draft free place
Step 5
After this first rising you should notice that your dough has almost doubled in size. Begin to knead the dough again for an additional 5 minutes or so. Reshape into a ball and cover once again with your clean kitchen towel. Allow the dough to rise for another 2 hours, or until doubled in size.
Step 6
Now it is time to shape your christopsomo. Note that this amount of dough will make two loaves of christopsomo. If you will be making two loaves, place some vegetable oil on the bottom of your round baking pans (we used 13 inch diameter pans) and set aside.
Step 7
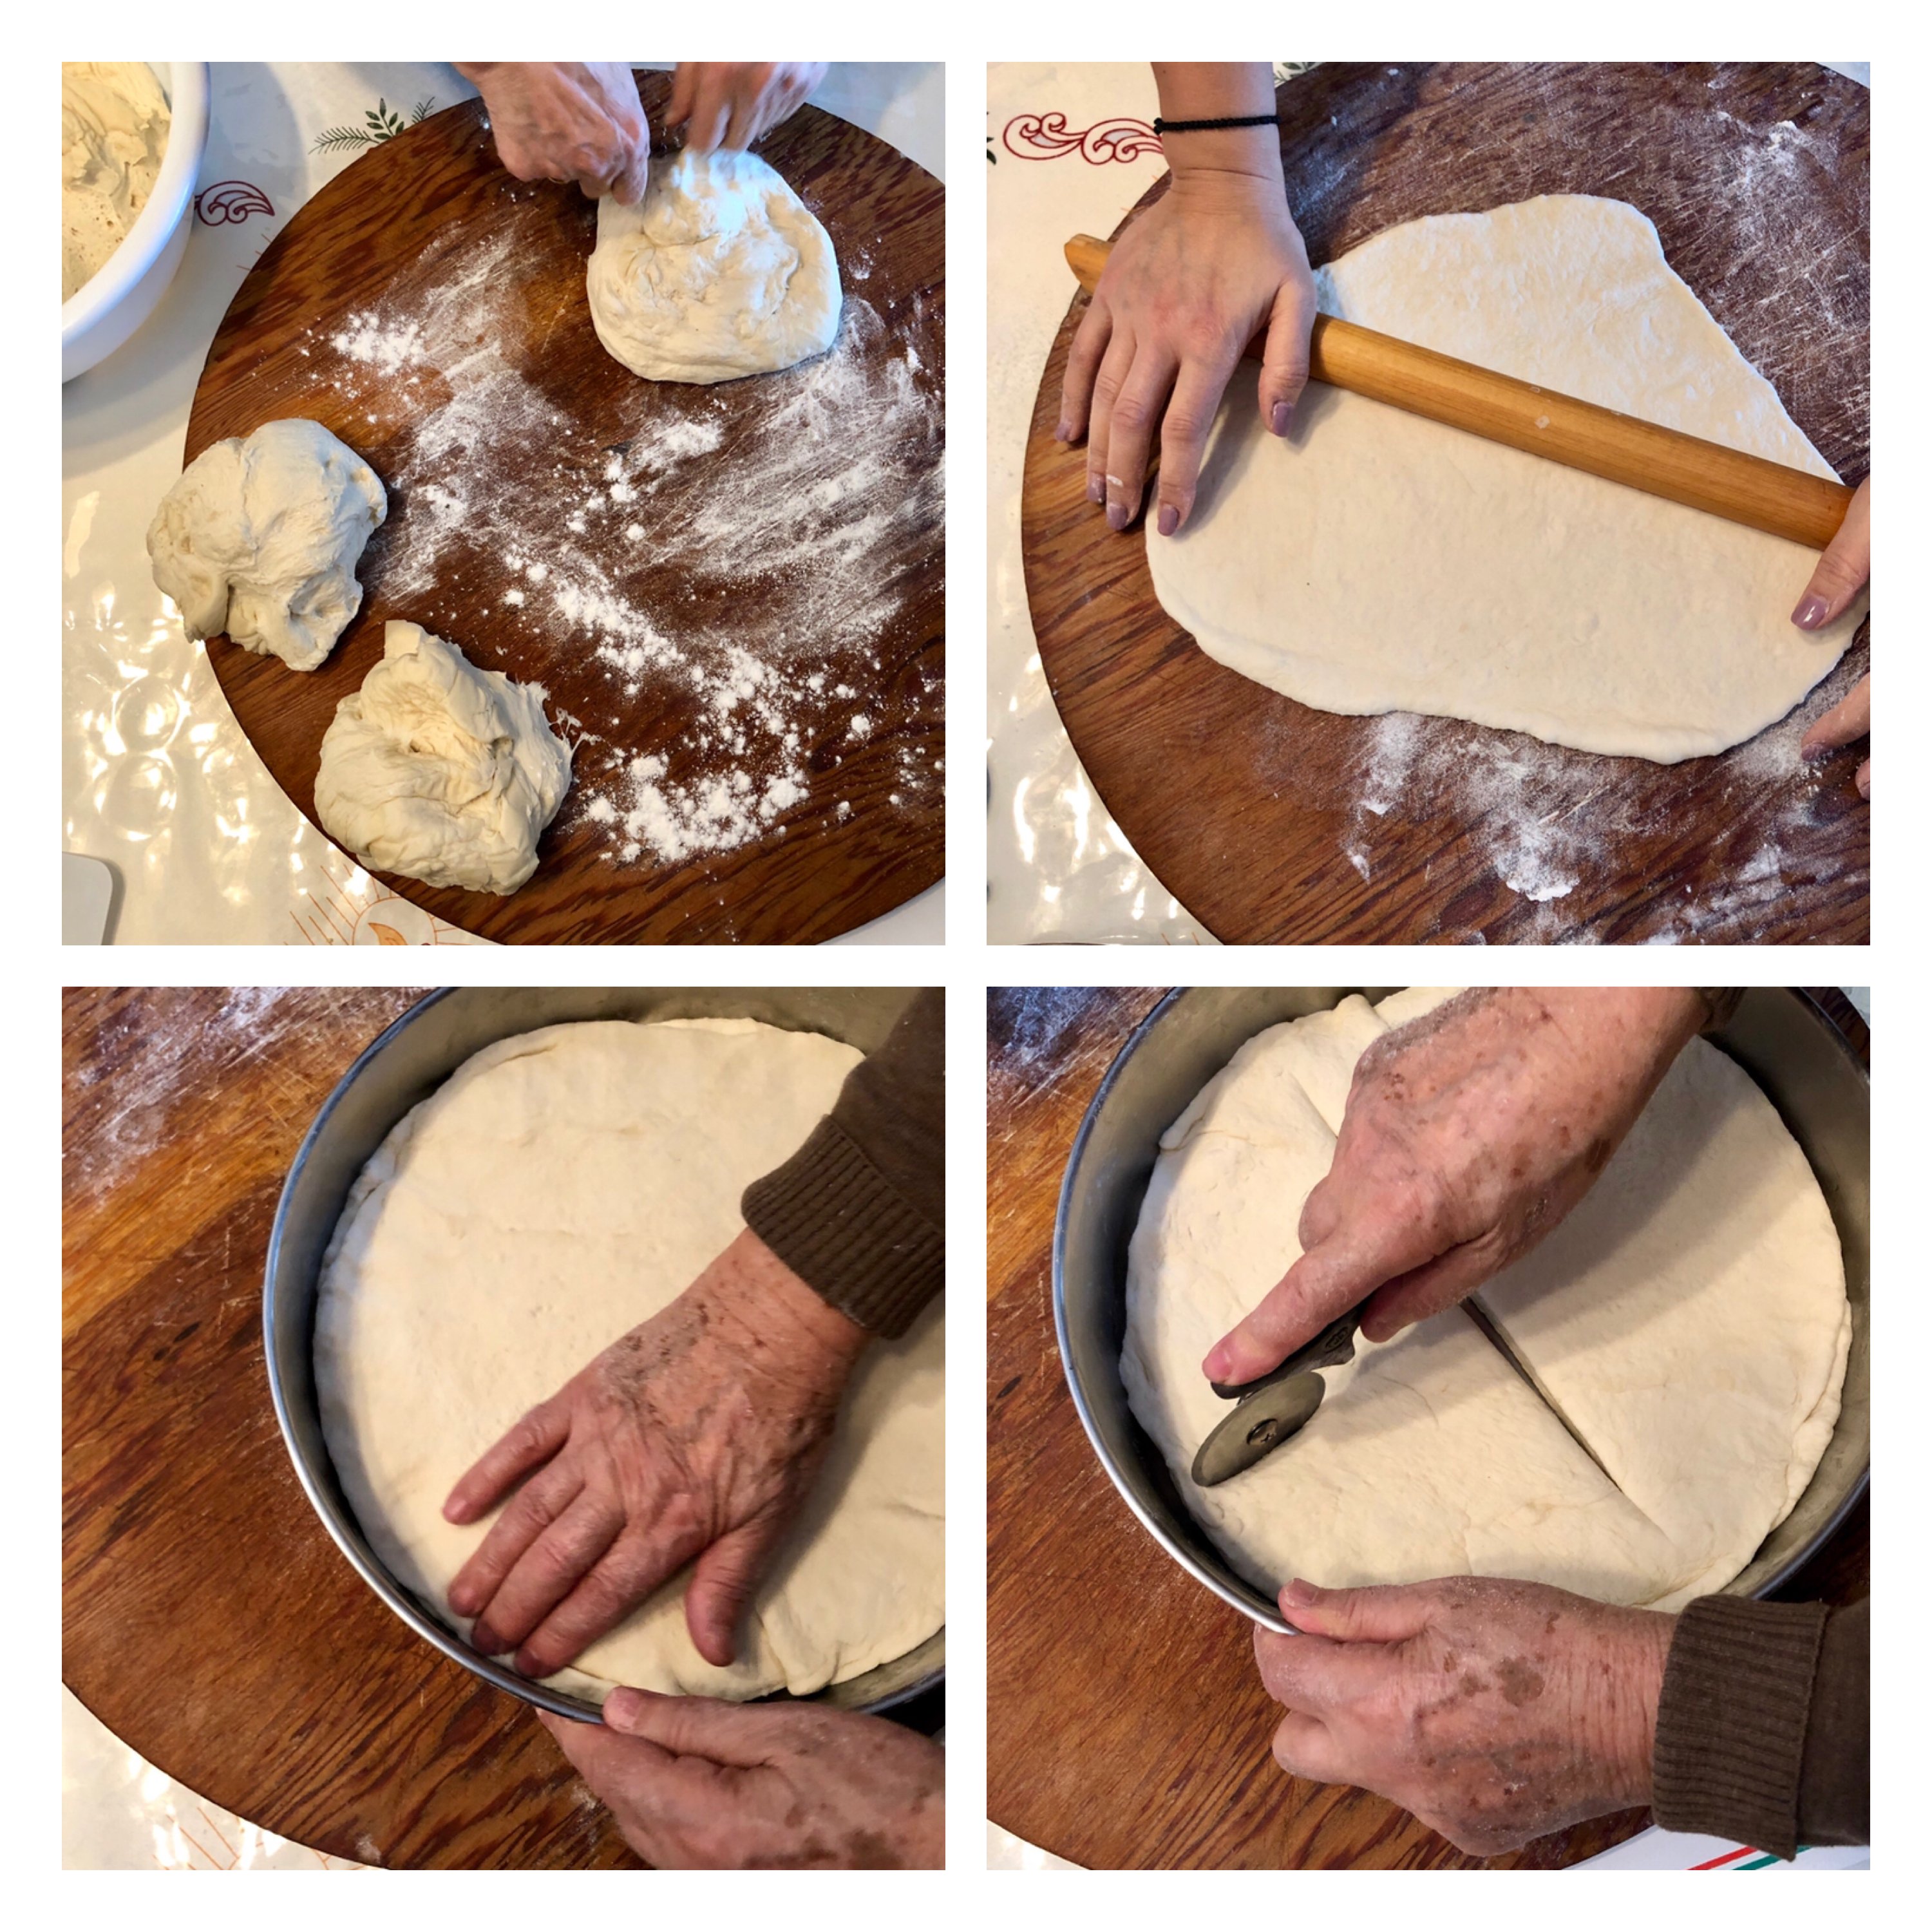
Divide your dough into equal halves. Put aside one of the halves, and continue the following steps with one of the halves. (Note: if you only want to make one christopsomo, use half your dough and freeze the rest to make a plain loaf of bread at a later date.)
Step 8
Divide the dough into 4 equal parts. Take one of the pieces and roll it out to about one inch thickness and a diameter which is the size of your pan. Place the dough into your baking pan and brush the top with the melted olive oil spread. Repeat this process two more times, so that you end up having 3 layers of dough with olive oil spread brushed on top of each layer, including the top one.
Step 9
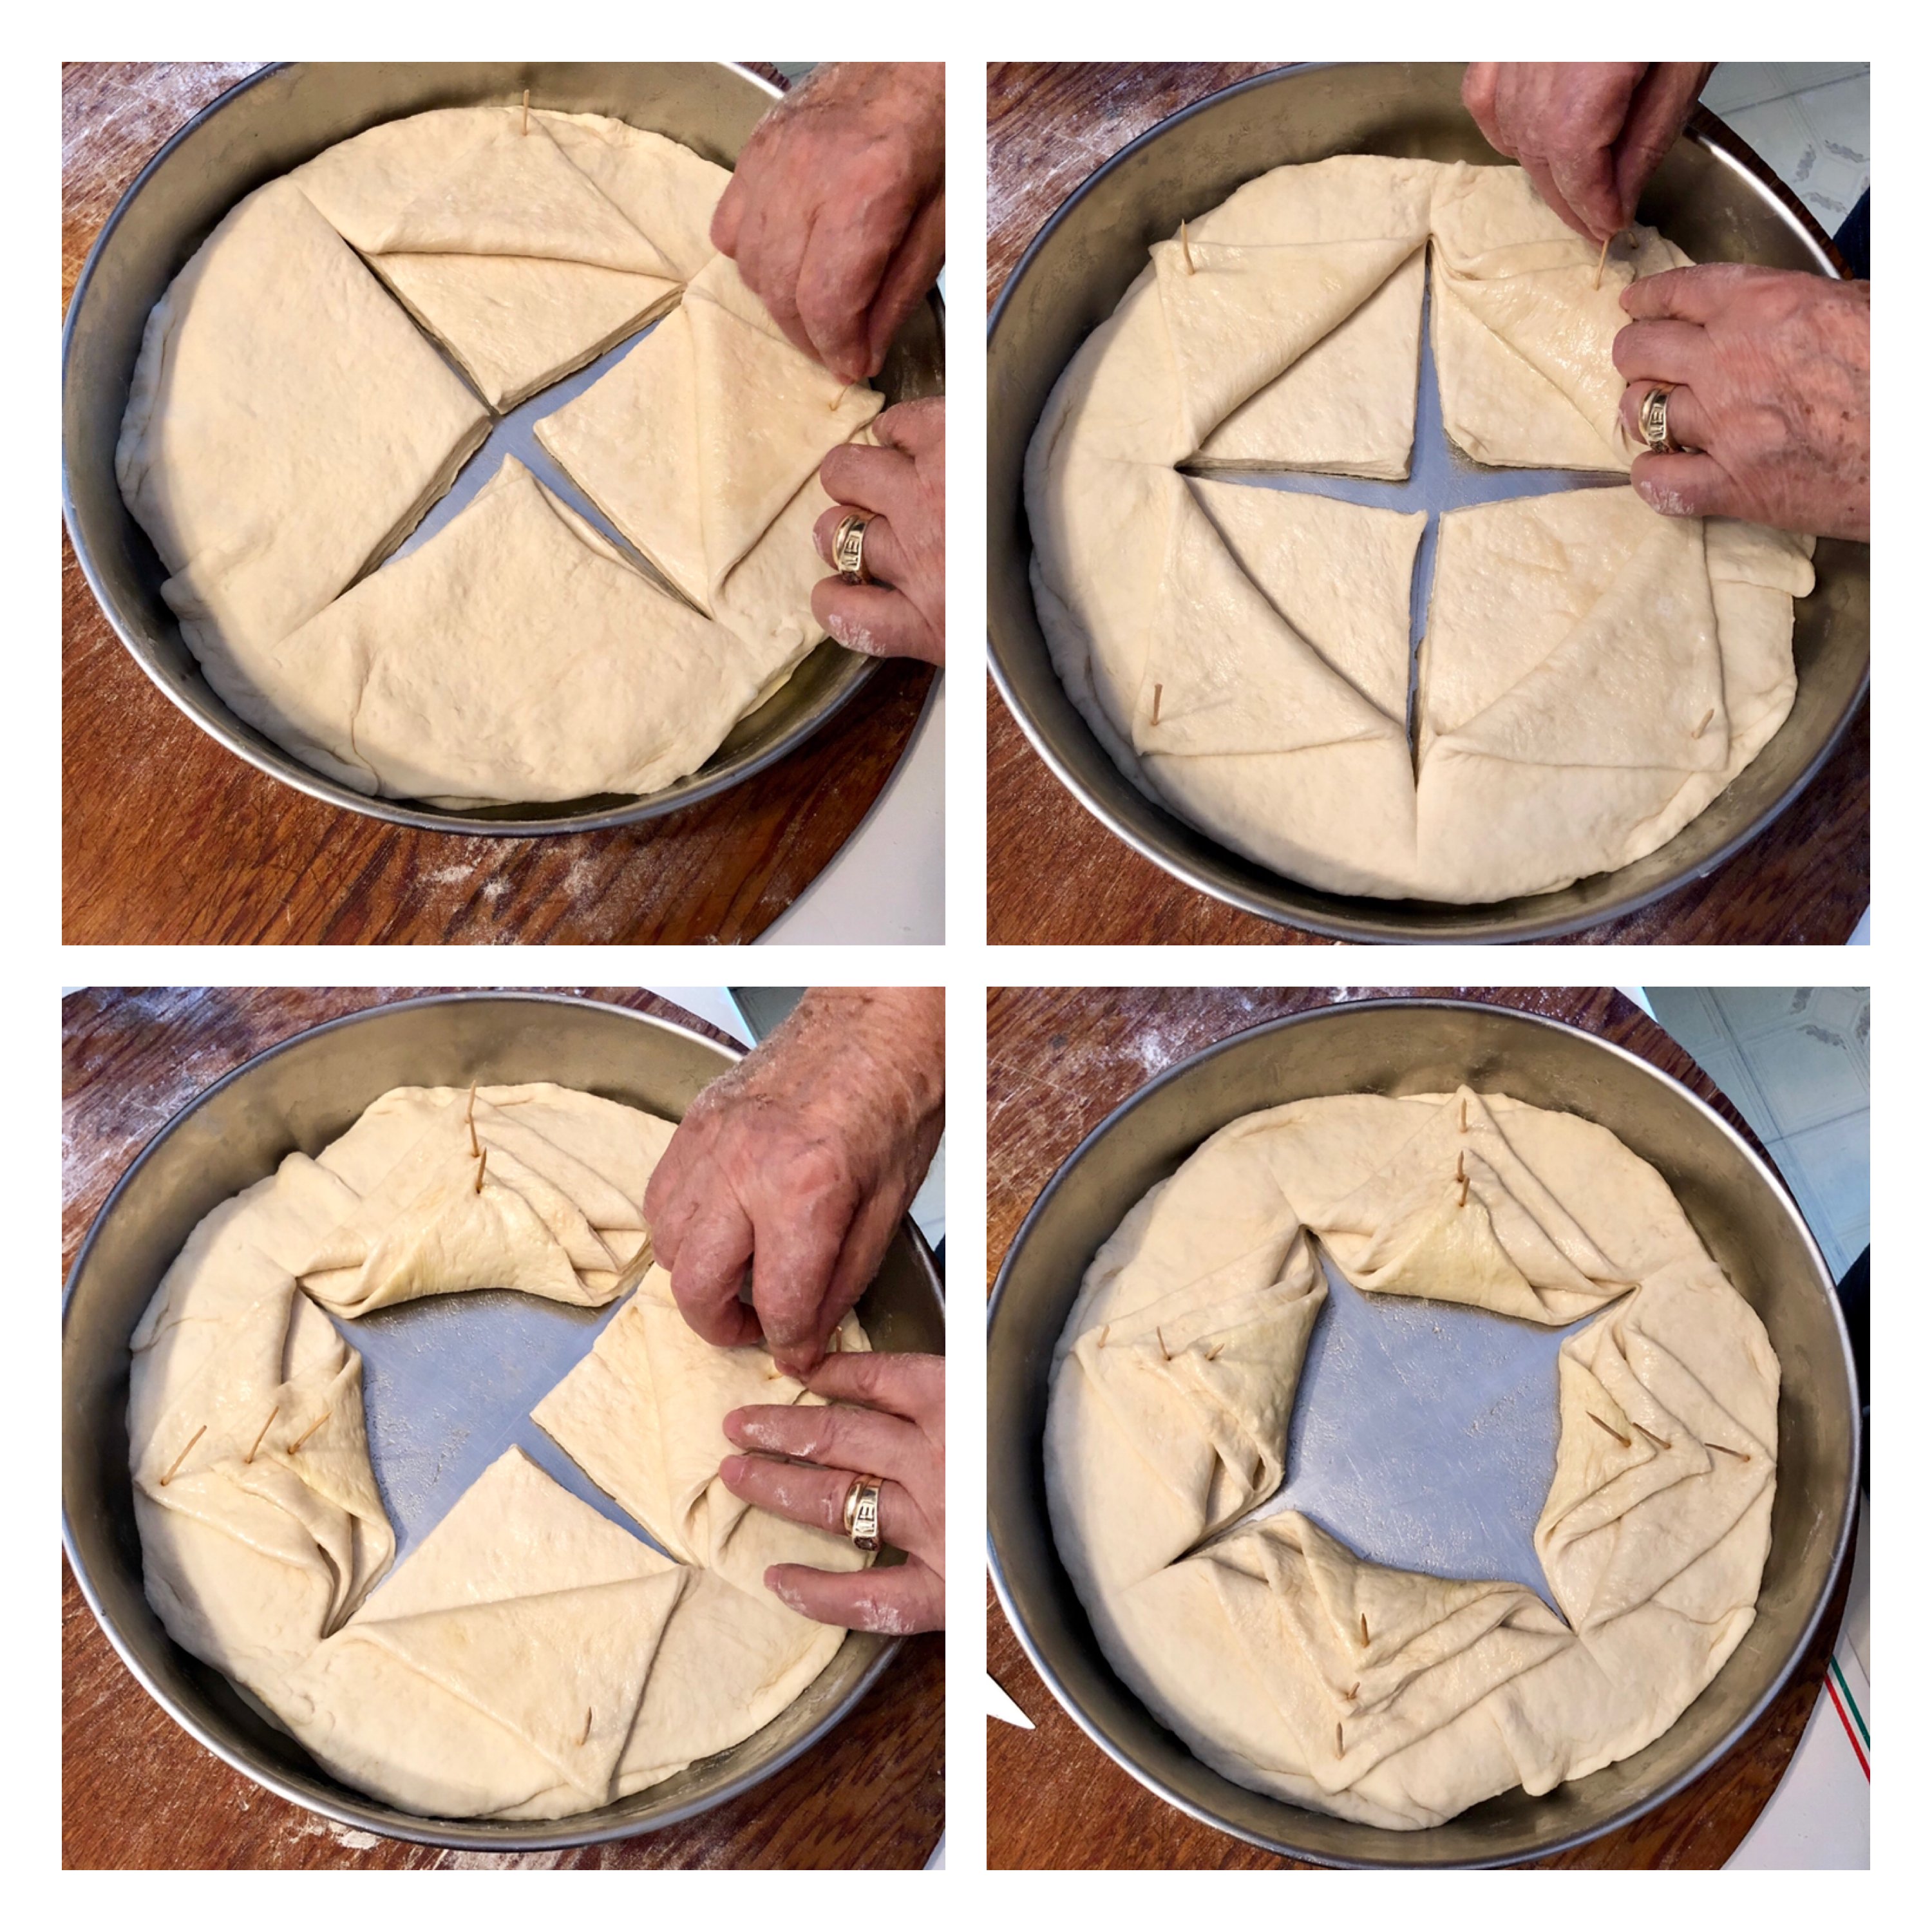
Using a sharp knife, (or a pizza slicer as we have pictured!) make a large cross in the dough, cutting through all 3 layers of dough, but beginning approximately one inch from the edges
Step 10
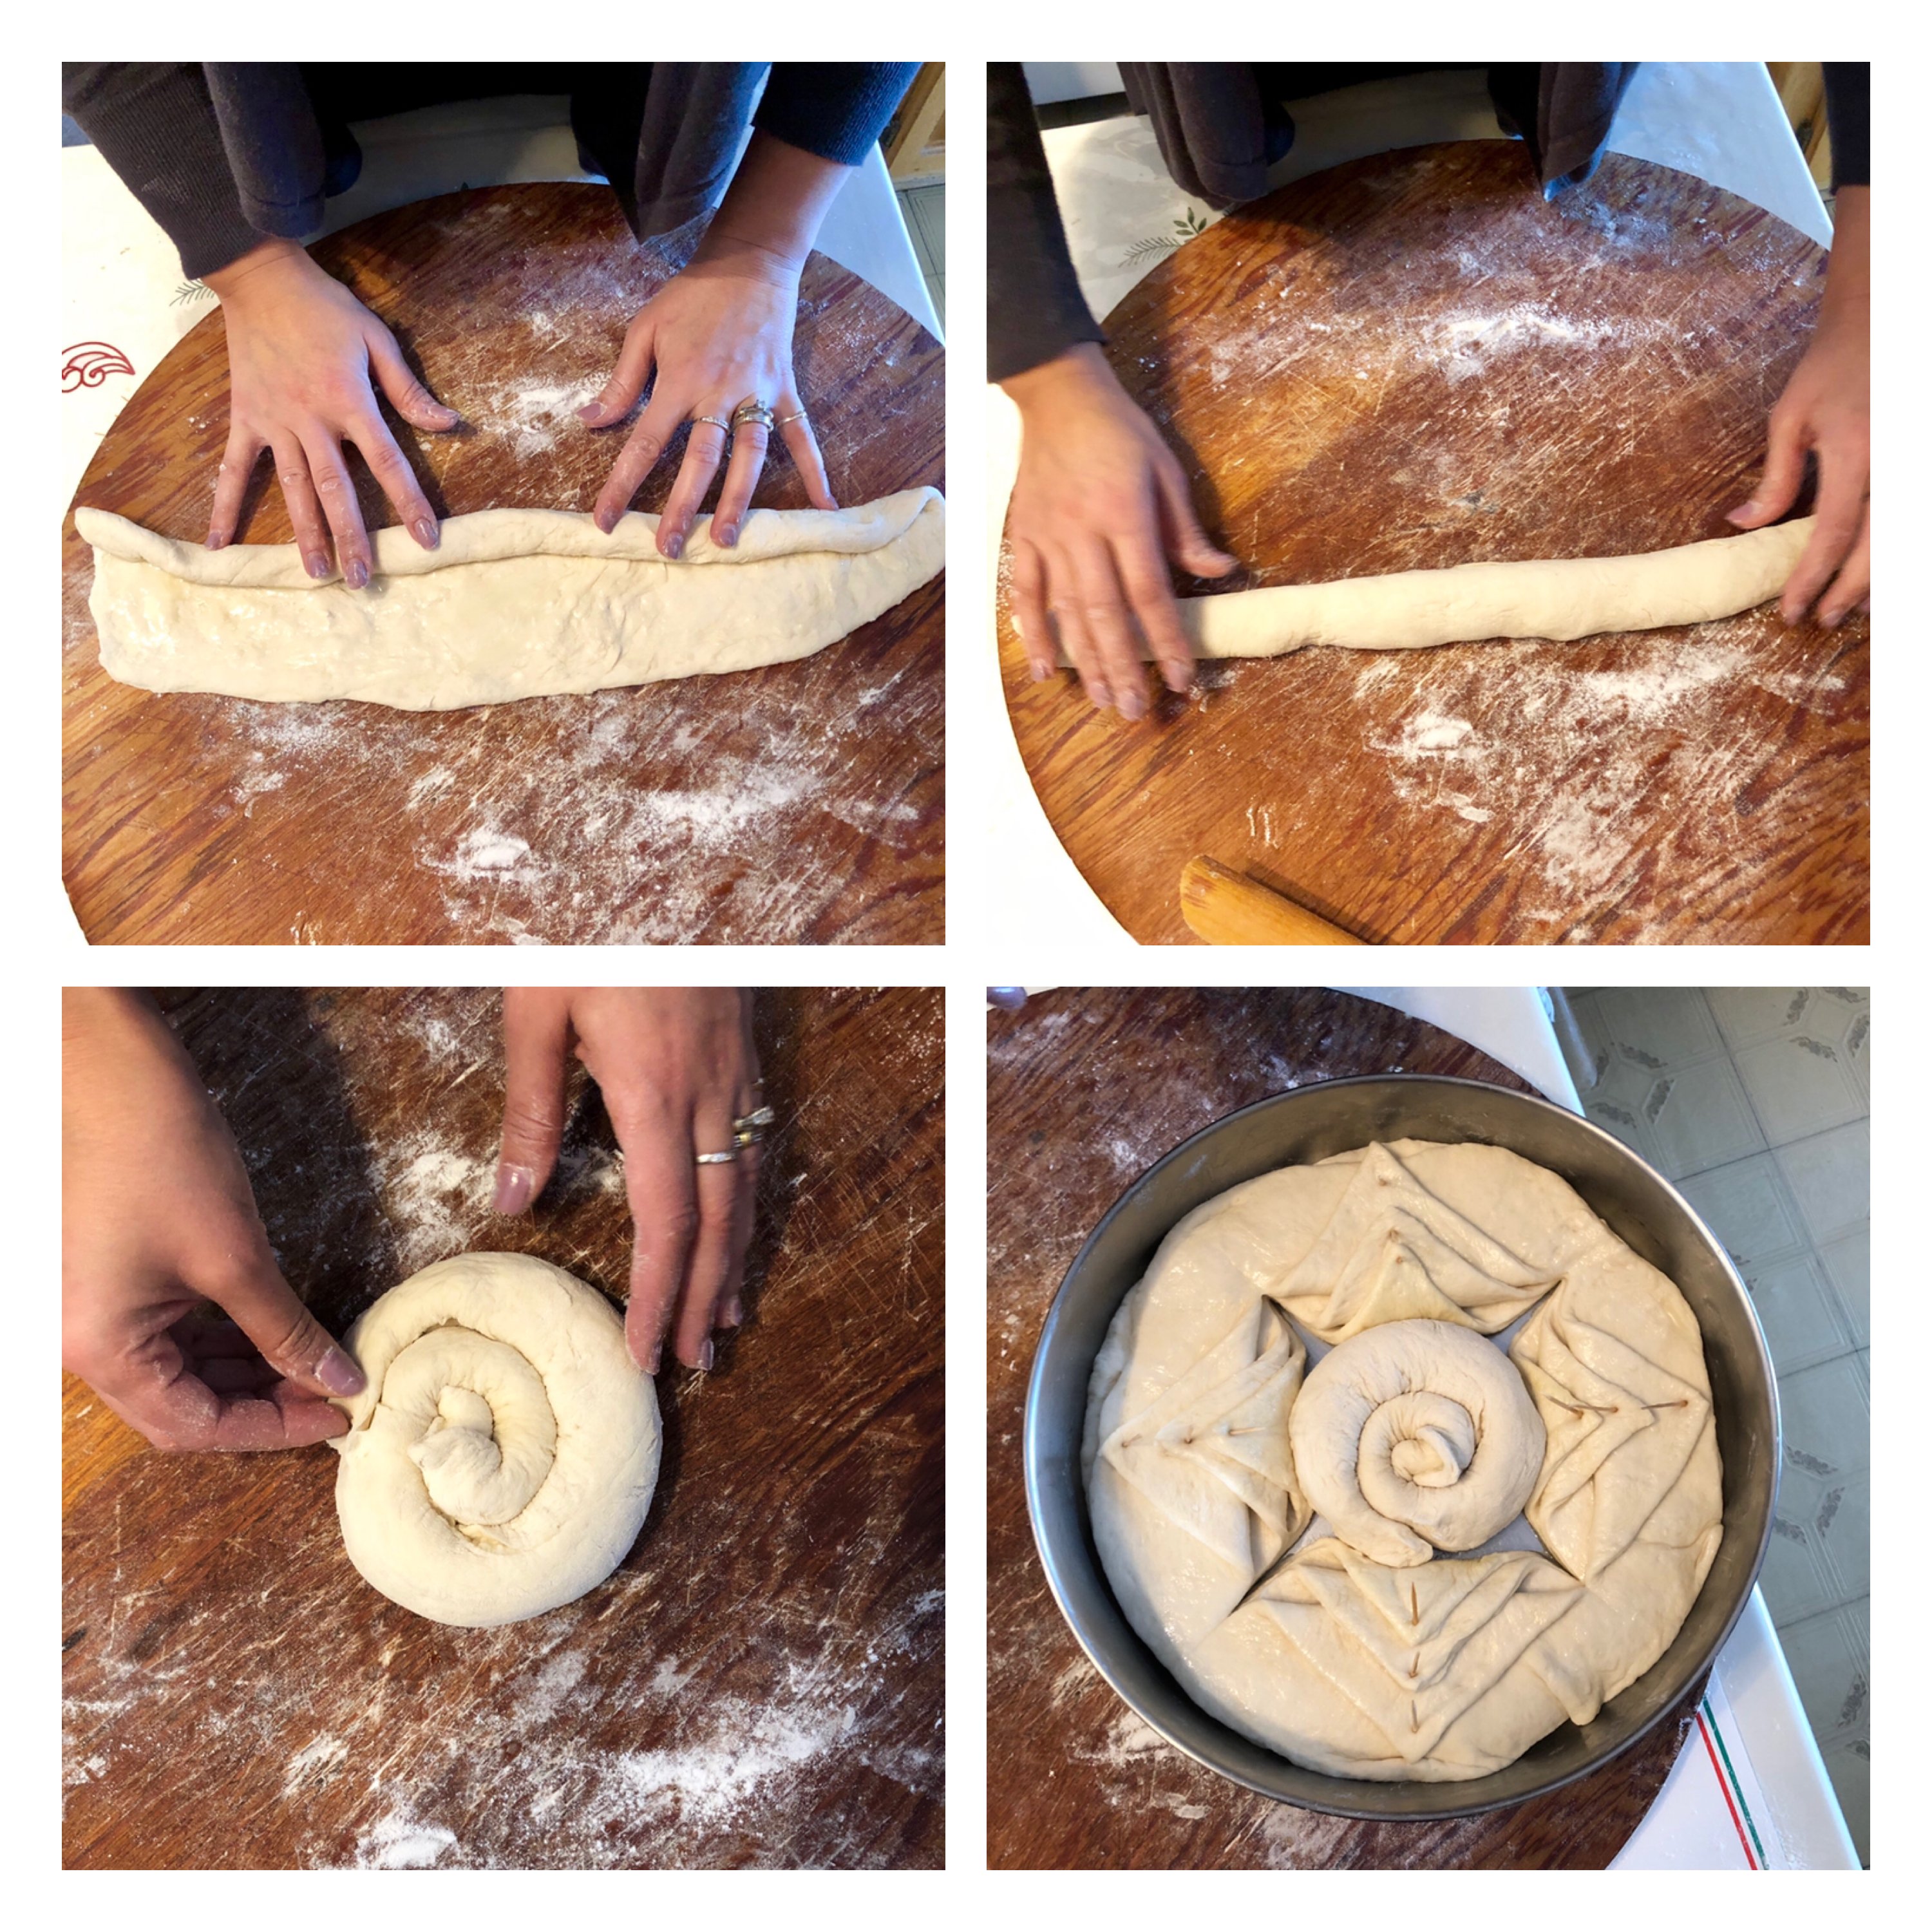
Beginning at the center of the cross, begin to pull back the layers of dough, one at a time, securing the folded back pieces with toothpicks. Each layer will have 4 points pulled back, and this will be done with all 3 layers (see photos above). You will end up with an empty space at the bottom of your pan, right in the middle.
Step 11
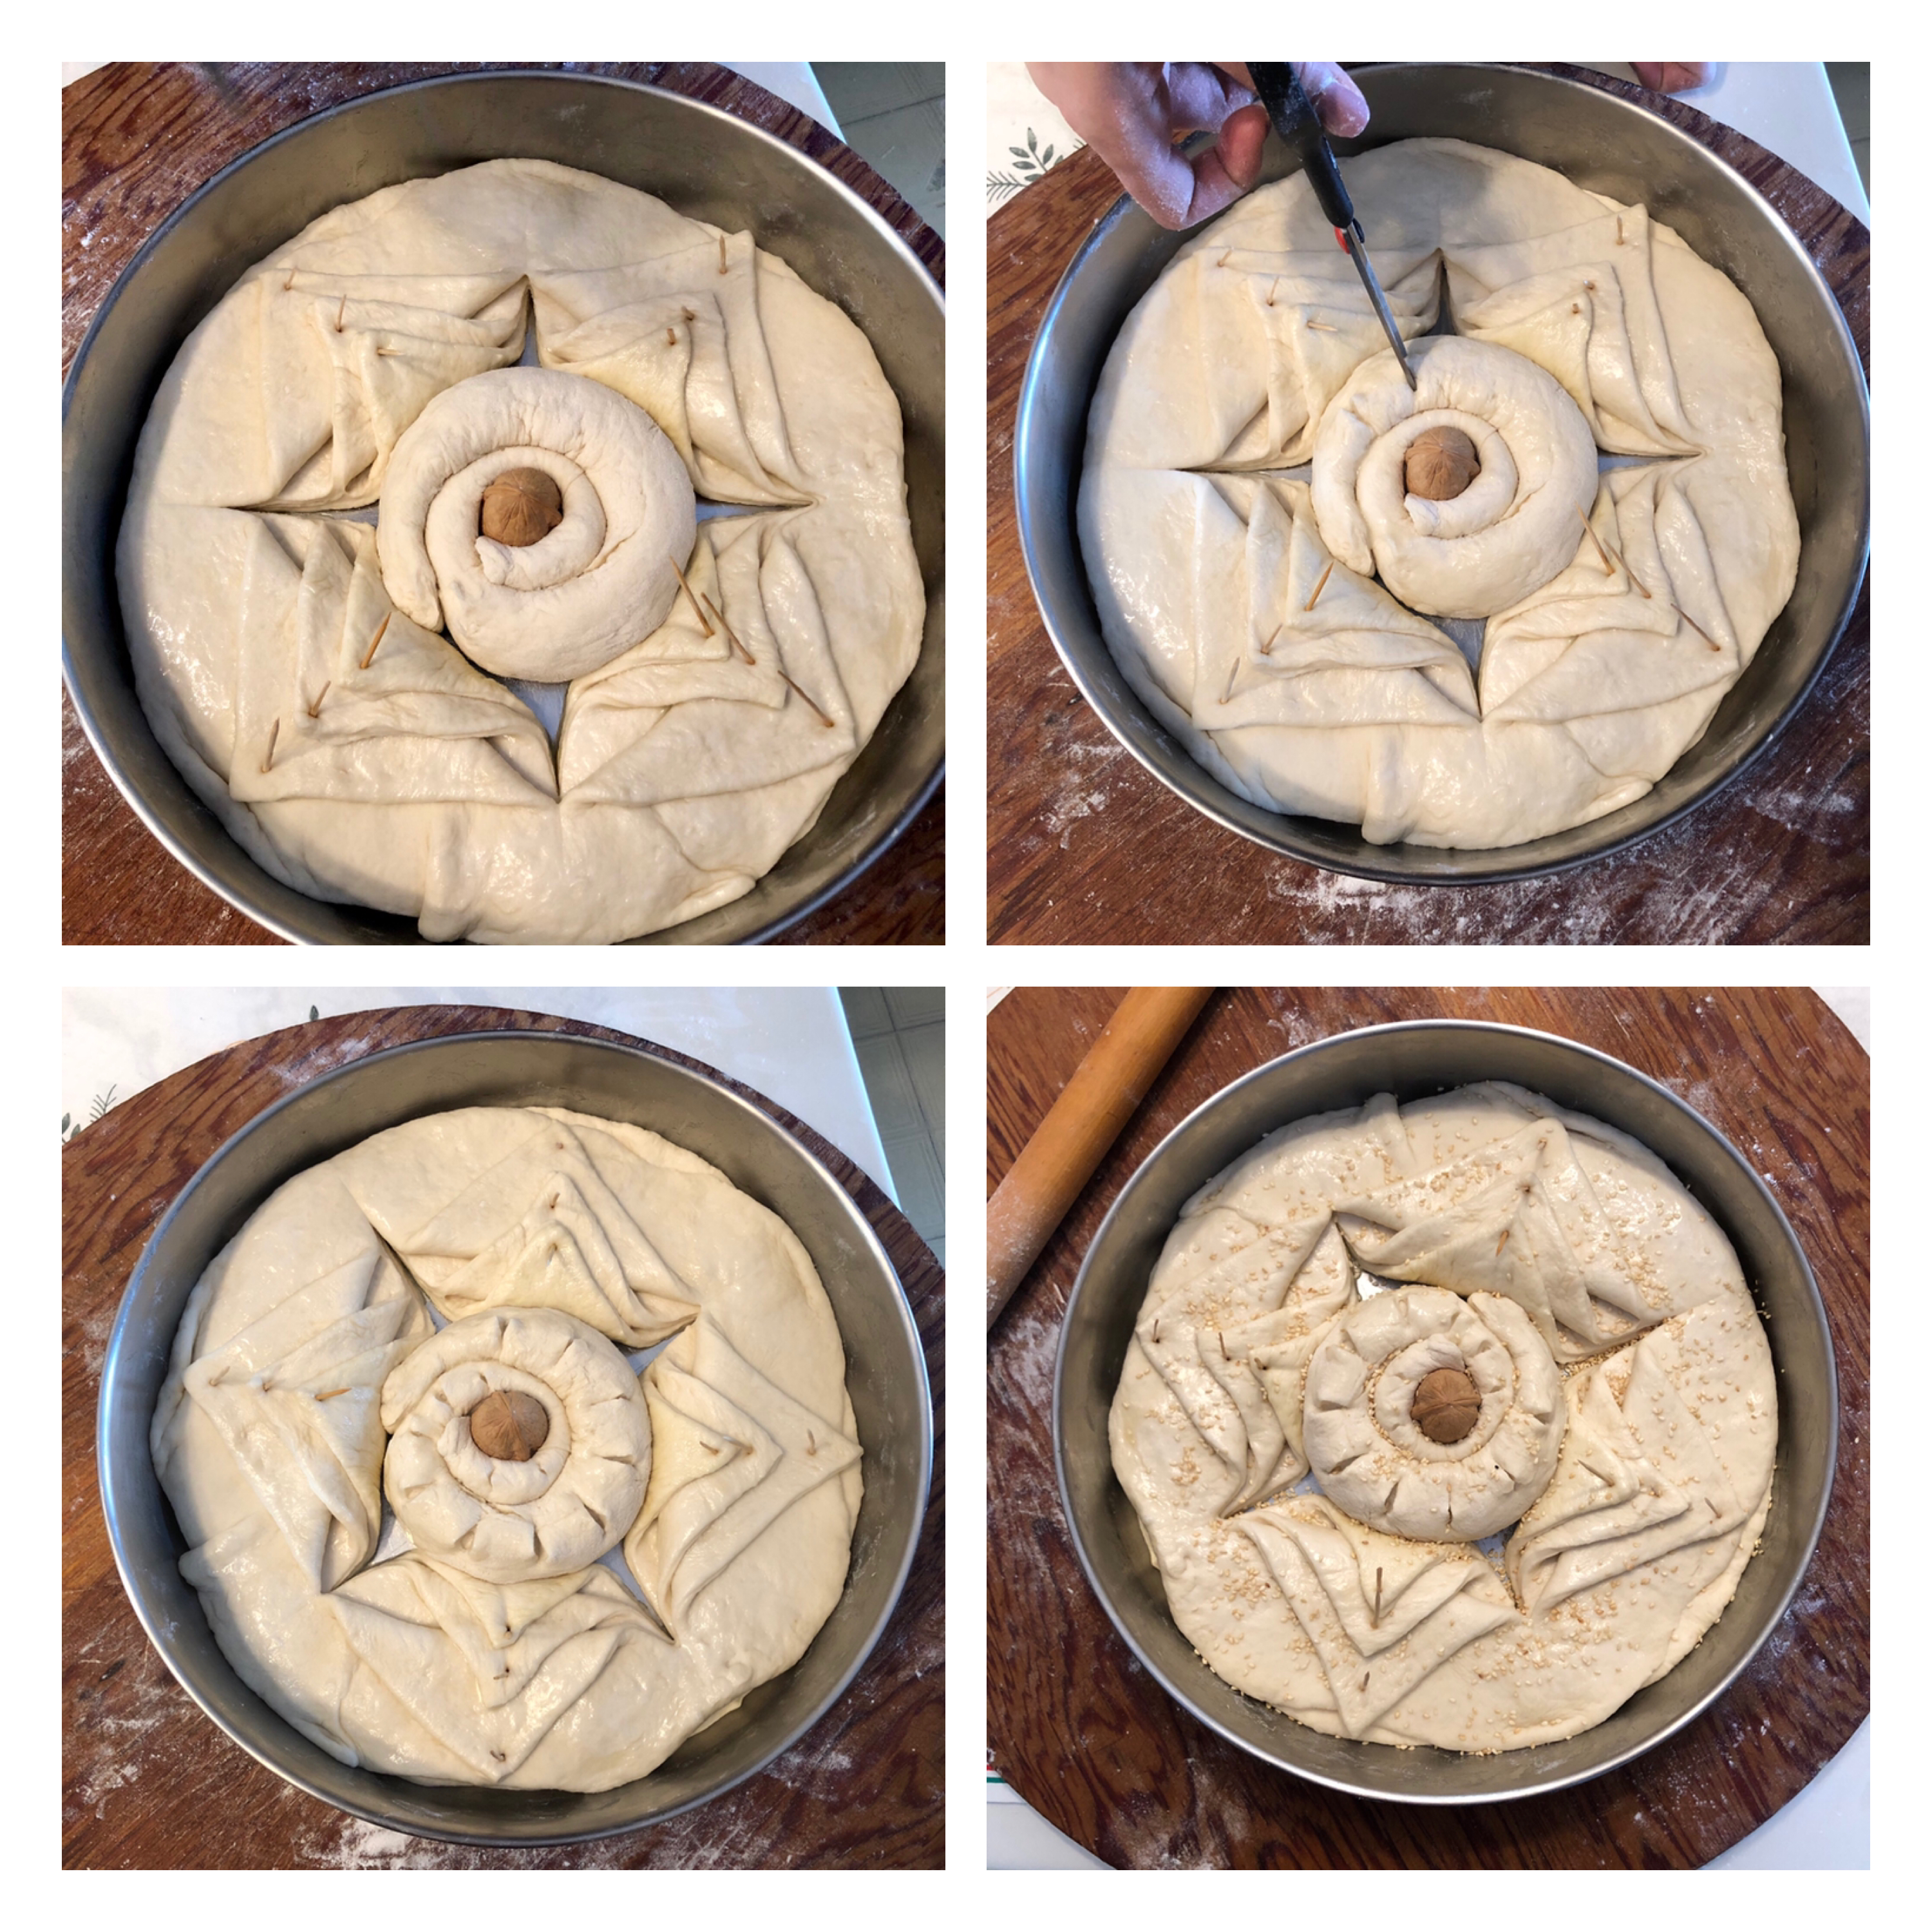
Use your fourth piece of dough to roll it out into a long strip and roll it around itself to make a coil. Place this coil into the empty center area of your pan. Do not worry if you still have some areas of the bottom of your pan visible; as the dough rises again these empty spaces will be filled in. Using a pair of kitchen shears snip pieces of dough from the center coil to make points of dough. Place your walnut into the center of your coil. Brush the entire top of your dough with additional melted olive oil spread and sprinkle your christopsomo with sesame seeds. Cover with a clean cloth and set aside to rise for approximately 30 minutes.
Step 12
(Repeat with the rest of your dough if you will be baking 2 loaves of christopsomo).
During this last rising, preheat your oven to 350 degrees Fahrenheit.
Step 13
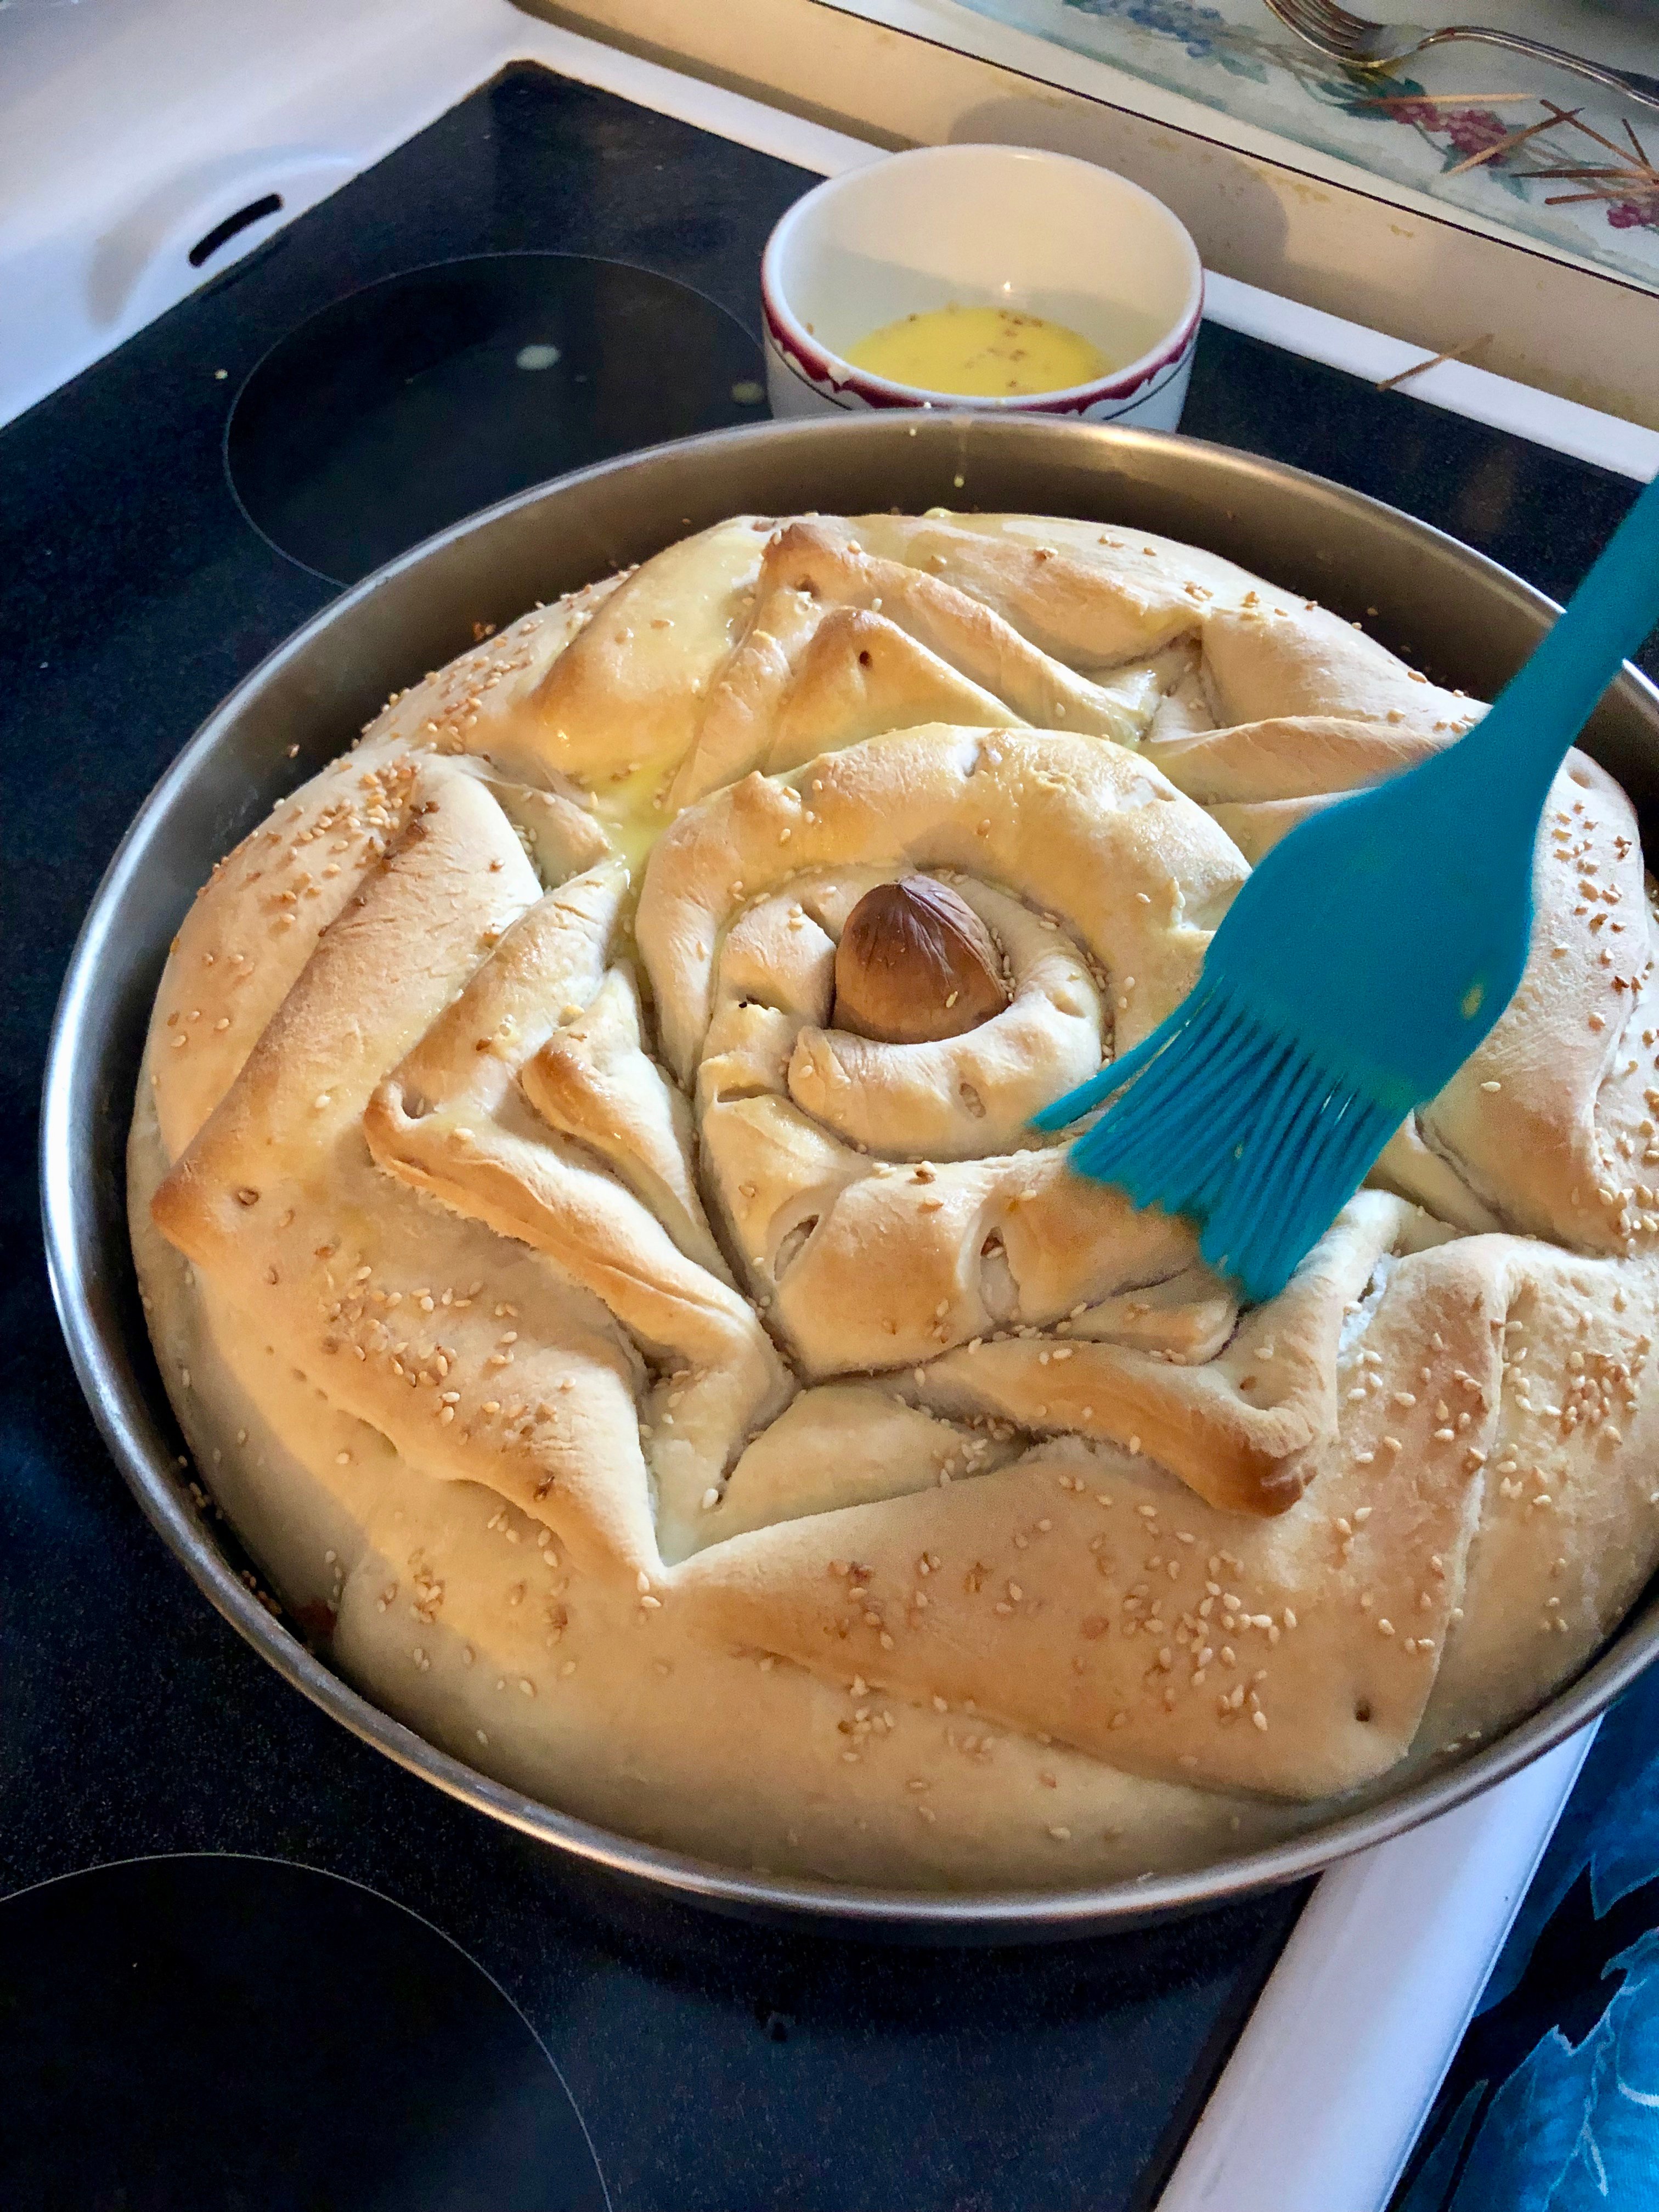
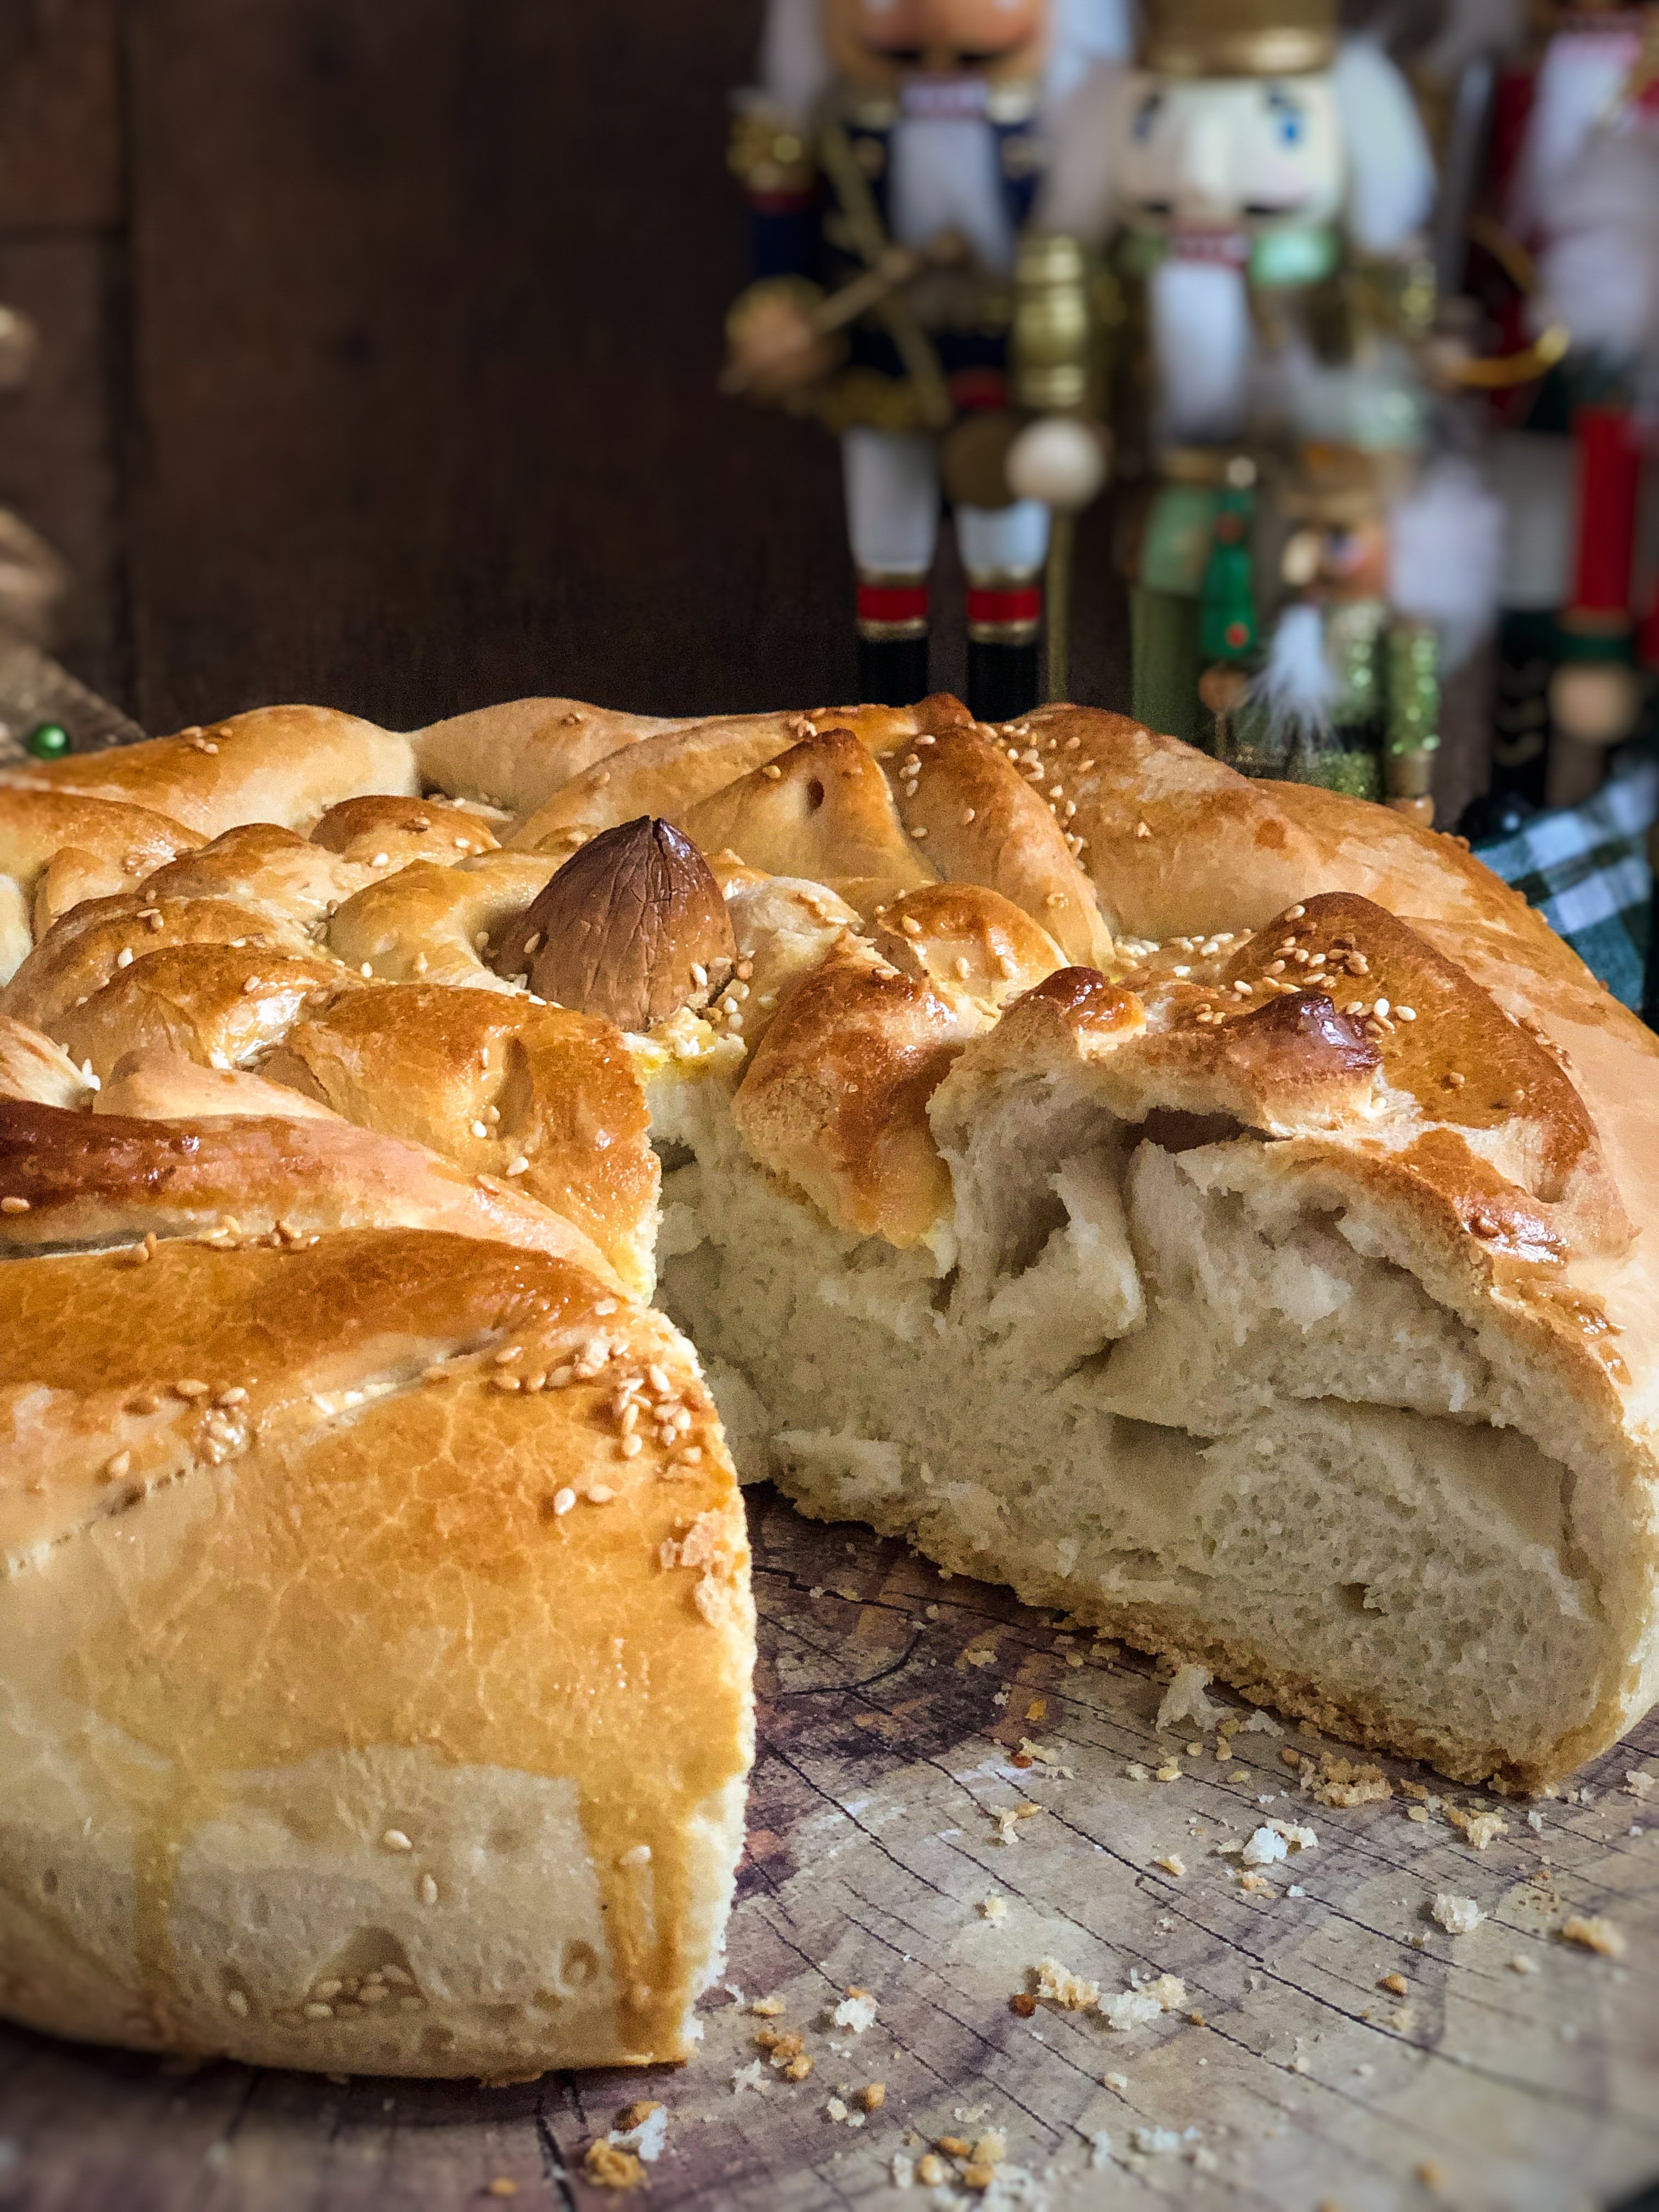
Bake your christopsomo in the middle rack of your oven for approximately 1 hour. While your bread is baking, mix your 2 egg yolks with 1 tablespoon of water and set aside. After the first 30 minutes, carefully remove from oven, and gently remove the toothpicks, brush the egg yolk on top of the bread and add more sesame seeds. Continue baking until the bread is cooked. You will know your christopsomo is ready when it is easily detached from the pan, and when it sounds hollow when you tap it on the bottom. If either of these conditions are not met after an hour of baking, give your loaf another 5 – 10 minutes in the oven. If your christopsomo is already browned on top and you are worried about it getting too dark, simply cover it loosely with aluminum foil.
Step 14
Remove from oven, and let cool. Flip pan over, to carefully remove the bread.
Helpful hints and baking tips
Be prepared!
Before anything, read through the recipe carefully and calculate all the time that you will need to prepare the dough, allow for rising and baking the christopsomo. Much of this is not active time, but you do need to allow the dough to go through three rises.
Invest (it is a small investment) in a kitchen scale
I usually like to offer you measurements in a variety of ways, but when baking, it really is much easier if you have a kitchen scale. Particularly when baking breads, a kitchen scale helps you to carefully measure out your ingredients so that you end up with a successful dough. If you really don’t have access to a scale keep in mind that 1 cup of all-purpose flour equals about 150 grams. If you do want to purchase (or gift) a kitchen scale, this is a great affordable option. We have it, and use it all the time – it even travelled with us to Greece when we were baking for our cookbook! Click here to purchase our favourite kitchen scale!
Practice makes perfect
Even with a kitchen scale, baking is in large part an art which takes practice and patience. It is not really possible for me to give you an exact measurement for the flour that you will use. A lot depends upon the quality and type of flour, the humidity in your home, the altitude level…and a lot of other crazy stuff. This is why my ingredient list suggests that you start with 800 grams of flour, and have an additional 225 grams available. You will almost certainly need to use some of that extra flour, but how much will depend on how your dough is looking and feeling as you knead it. It is very unlikely that you will need the entire additional amount of 225 grams.
Symbolism is important!
Although there is no obvious cross or “X” adorning the top of this bread, the symbolism is still there. While preparing your loaf for baking, a cross is cut into the dough, discretely embedding the sign of the cross. I have included several photos to illustrate exactly how to make the pretty design; I hope these are helpful because describing the steps in words was a little challenging (but hopefully not confusing!)
Use the right pan
Christopsomo is always baked in a round baking pan. We used a pan which was 13 inches in diameter.
How to know that your bread is cooked
Unlike cakes where you can stick a toothpick in the center to see if they are cooked, bread relies on other tactics. The best ways that I know to check if your loaf of bread is done is to test and see if it easily detaches from the pan (it should), and, if after removing the bread from the pan, it sounds hollow when you tap it on the bottom. If either of those things don’t happen, your bread needs more time in the oven. If you are concerned because the top has already reached a nice brown colour, simply cover it loosely with aluminum foil to prevent it from getting too dark.
Recipe substitutions
You will note as you read through the recipe that you will need olive oil spread for this christospomo. We find this in our grocery store, usually where we find butter and margarine. If you can’t find olive oil spread you can use margarine or butter.
We add a bit of olive oil to the dough. You can instead add vegetable or canola oil in the same amount.
Freezing and storing
This recipe makes two loaves of christopsomo
The recipe which follows will give you 2 christopsoma. If you do not want to make two loaves of Christmas bread you can freeze half the dough after its second rising and use it to make a plain loaf of bread at a later date.
Your baked bread can also be frozen. Wrap well to keep air from getting to the bread and freeze for up to 3 months.
Store your baked bread, fully cooled, in a paper bag which you then place in a plastic bag. I find that this keeps bread fresh the longest. You can also store it in the refrigerator.
Related holiday recipes
Join our holiday traditions by baking these amazing recipes, perfect for the holidays!
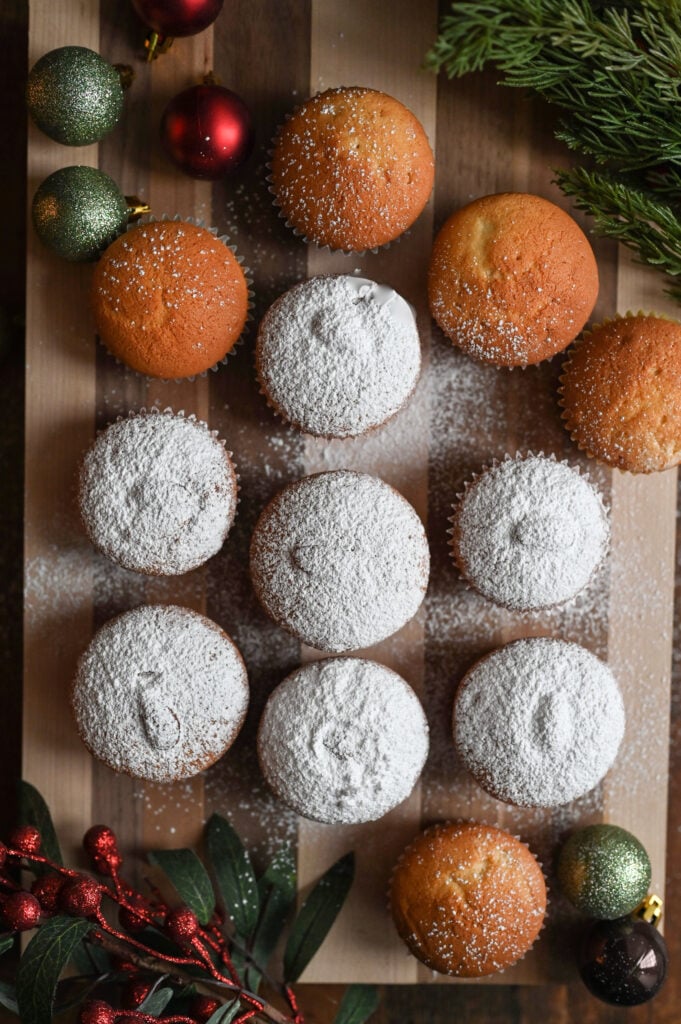
Vasilopita cupcakes
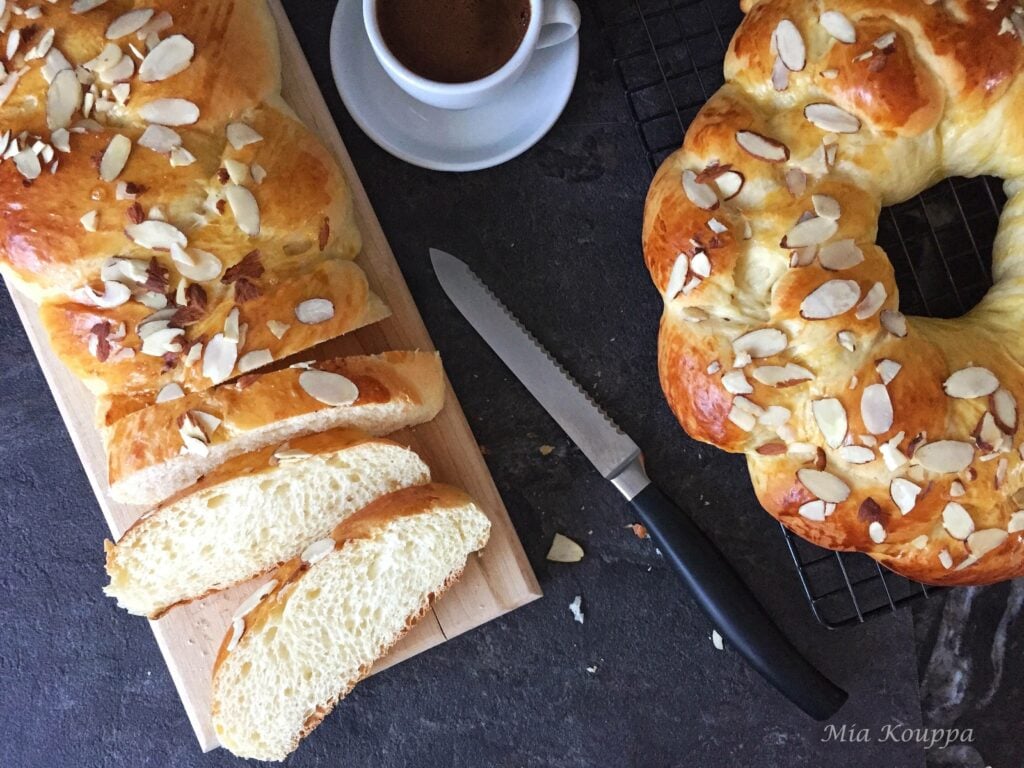
Tsoureki, Greek Easter bread (Τσουρέκι)
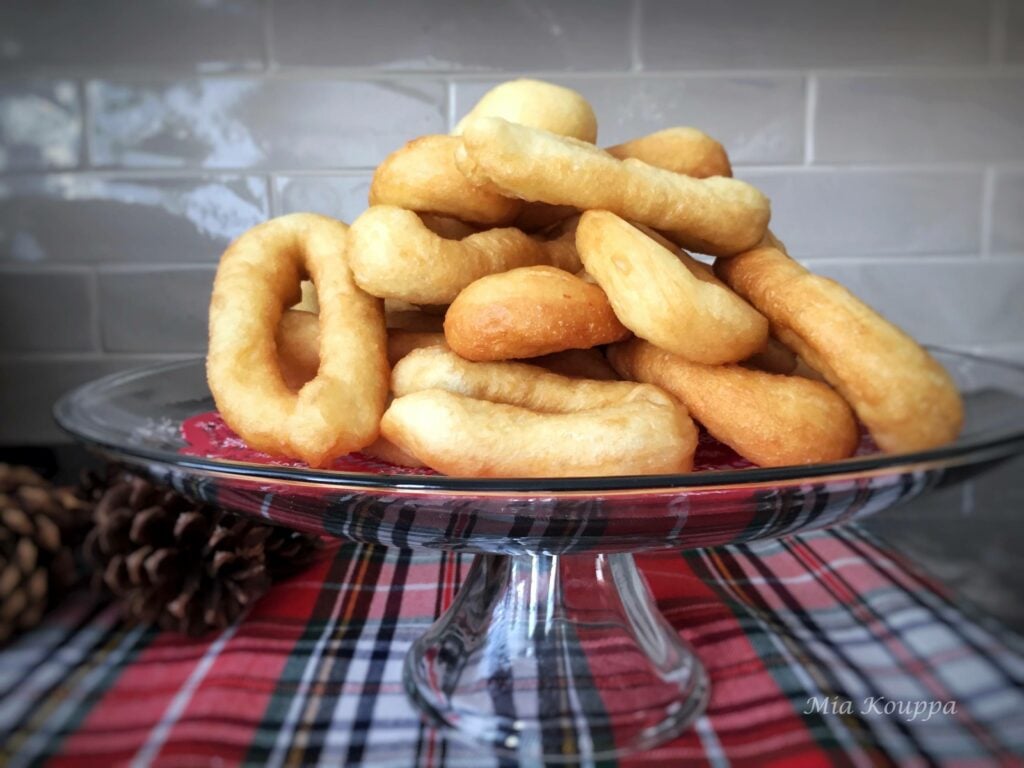
Lalagia (Λαλάγγια)
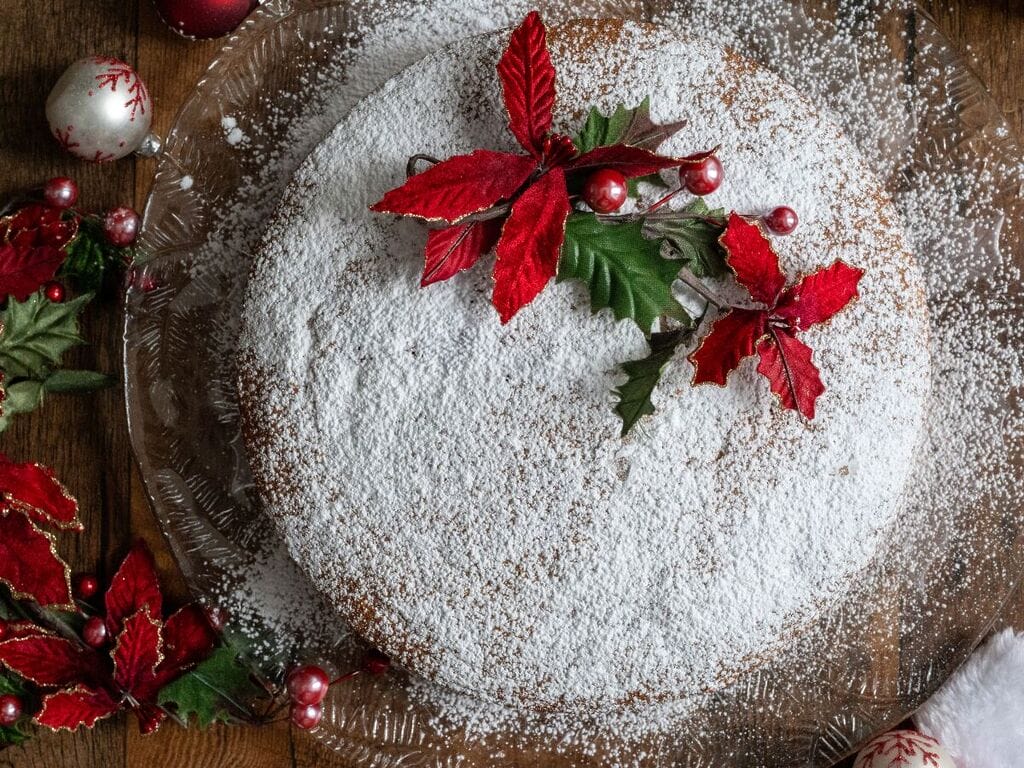
Vasilopita or Greek New Year Cake (Βασιλόπιτα)
Recipe
Christopsomo, Greek Christmas Bread
Equipment
- 2 baking pans, 13 inches You need 2 because this recipe makes 2 loaves of bread. You can bake them one after the other however.
Ingredients
- 5 ⅓ cups (800 grams) all-purpose flour, + an additional 1 ½ cups (225 grams) all-purpose flour, only if needed
- ½ tbsp salt
- 3 tablespoons (45 mL) vegetable oil divided + extra for coating bottom of pan
- 5 ¼ cups (1,310 mL) warm water divided
- 1/4 tsp sugar
- 1 tablespoon active dry yeast
- 1/4 cup (60 mL) melted olive oil spread see notes below
- 2 whole walnuts
- 2 tablespoons sesame seeds
- 2 egg yolks
- 1 tablespoon water
- toothpicks
Instructions
- Prepare your dough by sifting 5 1/3 cups (800 grams) of all purpose flour into a large mixing bowl. Mix in the salt.
- In a small bowl or mug, combine 1/2 cup of warm water, the 1/4 teaspoon sugar, and the 1 tablespoon active dry yeast. Stir well and allow to sit for approximately 3 – 5 minutes. You should see some bubbling on the surface, which indicates that your yeast is working.
- Pour this yeast mixture into the large bowl which contains your flour, and add the additional 4 3/4 cups of warm water and 2 1/2 tablespoons of vegetable oil. Mix well with your hands and begin to knead your dough. You may find that you need to add additional flour; add 1/4 cup flour at a time (sifted before you add it to your dough) until you have a dough which is soft and not sticking onto your hands (we added a total of about 1 1/4 cups or 185 grams more flour at this point). You should end up with a dough which is soft, not too stiff and not sticking to your hands. You can see video here of dough consistency.
- Form the dough into a ball in your bowl and lift one side of it so that you can add 1/2 tablespoon of vegetable oil to the bottom of the bowl. Cover your dough with a clean kitchen towel and let rise for at least 2 – 3 hours in a warm, draft free place
- After this first rising you should notice that your dough has almost doubled in size. Begin to knead the dough again for an additional 5 minutes or so. Reshape into a ball and cover once again with your clean kitchen towel. Allow the dough to rise for another 2 hours, or until doubled in size.
- Now it is time to shape your christopsomo. Note that this amount of dough will make two loaves of christopsomo. If you will be making two loaves, place some vegetable oil on the bottom of your round baking pans (we used 13 inch diameter pans) and set aside.
- Divide your dough into equal halves. Put aside one of the halves, and continue the following steps with one of the halves. (Note: if you only want to make one christopsomo, use half your dough and freeze the rest to make a plain loaf of bread at a later date.)
- Divide the dough into 4 equal parts. Take one of the pieces and roll it out to about one inch thickness and a diameter which is the size of your pan. Place the dough into your baking pan and brush the top with the melted olive oil spread. Repeat this process two more times, so that you end up having 3 layers of dough with olive oil spread brushed on top of each layer, including the top one.
- Using a sharp knife, make a large cross in the dough, cutting through all 3 layers of dough, but beginning approximately one inch from the edges (see photos above).
- Beginning at the center of the cross, begin to pull back the layers of dough, one at a time, securing the folded back pieces with toothpicks. Each layer will have 4 points pulled back, and this will be done with all 3 layers (see photos above). You will end up with an empty space at the bottom of your pan, right in the middle.
- Use your fourth piece of dough to roll it out into a long strip and roll it around itself to make a coil. Place this coil into the empty center area of your pan. Do not worry if you still have some areas of the bottom of your pan visible; as the dough rises again these empty spaces will be filled in. Using a pair of kitchen shears snip pieces of dough from the center coil to make points of dough. Place your walnut into the center of your coil. Brush the entire top of your dough with additional melted olive oil spread and sprinkle your christopsomo with sesame seeds. Cover with a clean cloth and set aside to rise for approximately 30 minutes.
- (Repeat with the rest of your dough if you will be baking 2 loaves of christopsomo).
- During this last rising, preheat your oven to 350 degrees Fahrenheit.
- Bake your christopsomo in the middle rack of your oven for approximately 1 hour. While your bread is baking, mix your 2 egg yolks with 1 tablespoon of water and set aside. After the first 30 minutes, carefully remove from oven, and gently remove the toothpicks, brush the egg yolk on top of the bread and add more sesame seeds. Continue baking until the bread is cooked. You will know your christopsomo is ready when it is easily detached from the pan, and when it sounds hollow when you tap it on the bottom. If either of these conditions are not met after an hour of baking, give your loaf another 5 – 10 minutes in the oven. If your christopsomo is already browned on top and you are worried about it getting too dark, simply cover it loosely with aluminum foil.
- Remove from oven, and let cool. Flip pan over, to carefully remove the bread.
- Enjoy, and Merry Christmas to you and your families.
This bread looks outstanding–great job!
Thank you so much Jess!! It really is a bread we are proud of…and love to eat 🙂
Can I bake this in a larger round pan but still make the bread close to 13inches? Or will the bread spread out to the size of pan it cooked in ? I don’t have a 13 inch pan.
Great question. Actually the recipe makes 2 loaves of Christopsomo. We would recommend you just make one larger bread, to keep with the size of your pan. It will spread out somewhat in the pan, but you risk having the edges turn very brown and hard if exposed (not fitting directly in the pan). Hope this helps and that you love the recipe!
Is that proportion of flour / water correct? That’s more than 100% hydration isn’t it?
Hi Delbert! Yes, it works well 🙂 Hope you give it a try! xoxo Helen & Billie
Thank you for your reply – I just saw it today.
I am getting ready to do it now – dividing the proportions in half to make just one Christopsomo.
Lots of symbolism – This is to be my entry in the “Christmas Competition” at Breadclub20 on Facebook.
https://www.facebook.com/groups/208334310627572/permalink/738842710910060
Amazing! Good luck 🙂 Let us know how it goes 🙂 xoxo Merry Christmas, Helen & Billie
Came out pretty nice. I did a few additions of my own – Your recipe doesn’t call for salt at all. I put a little in, but needed so much more flour to make it a workable dough- it’s a little bland tasting. How can I send you the pictures?
Hi there Delbert, You can email them to us at hello@miakouppa.com. Merry Christmas xoxo Helen & Billie